iC Tool Windows
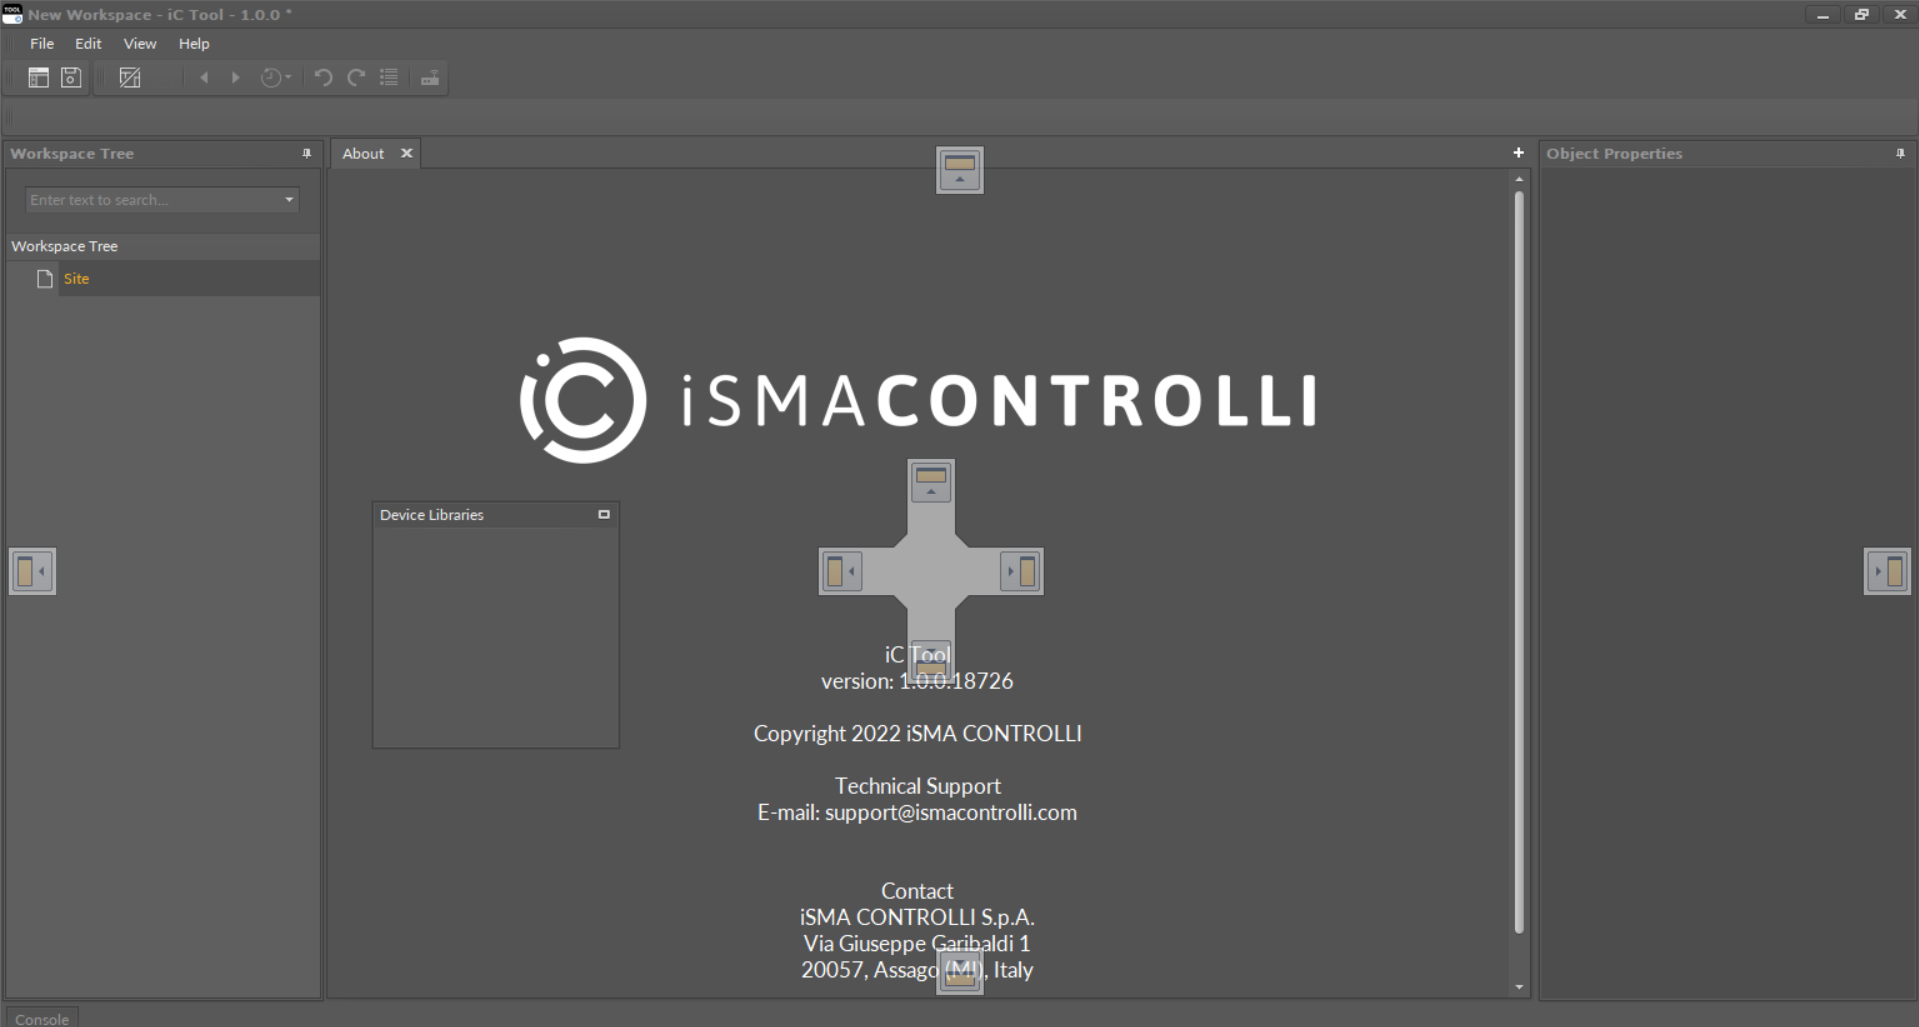
A structure of the iC Tool is based on widows with varying functionalities, which altogether allows for user-friendly programming of devices. The basic structure of windows is shown on the figure below.

The iC Tool initial window
The above look presents an initial set of iC Tool widnows. Next opening and updates of the program will remember the window settings changed by the user in accordance with his preferences.
In the default settings of the iC Tool, the upper left side of the screen is occupied by a Workspace Tree window. Below is a Device Libraries/Kits window showing current libraries/kits of a connected device. Central part of the screen is occupied by a Main screen, a space where the application’s views are shown on tabs, which is discussed further. After the iC Tool is opened, the Main screen shows program information shown on the figure above. On the right side of the Main screen there is an Object Properties window. A Console window is by default minimized. It is accessible as an expandable tab in the bottom left corner of the iC Tool .
Additionally, besides the mentioned windows, the iC Tool screen shows a menu and a toolbar, a window with component path, and a capacity identifier.
The window with an component path is by default set below the main menu and toolbar. It can be moved to the bottom, or to the left or right margin by changing the path text to the vertical one.
The suggested window position in the iC Tool can be modified freely by dragging, resizing, and fixing views relative to each other.
Start Screen for nano EDGE ENGINE Devices
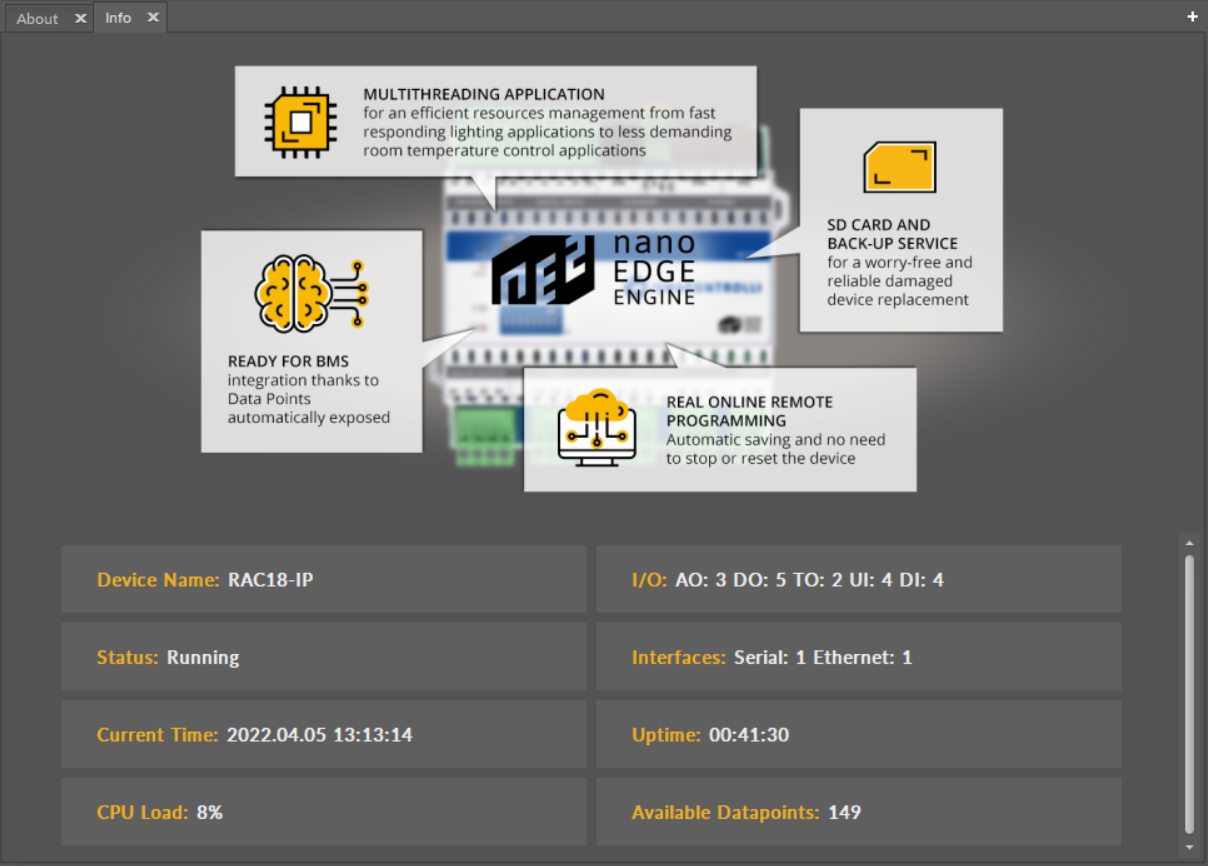
The iC Tool start screen
Once the iC Tool connects with a nano EDGE ENGINE device, a start screen is displayed. It provides basic information about:
-
device name;
-
I/O;
-
status;
-
interfaces;
-
current time;
-
uptime;
-
CPU load;
-
available Data Points.
No specific start screen is displayed when connecting to a Sedona based device.
Windows Adjustment
The iC Tool allows a completely free setting of the views and windows. Free distribution allows specific windows to be visible non-stop or hide automatically. These settings apply to the windows such as the Workspace Tree, Device Libraries/Kits, or Object Properties. It is possible to move the window outside of the iC Tool software to the other connected screen–the only exception here is the Main screen window, which cannot be moved to the other connected screen.
To move any window into another part of the screen, it needs to be grabbed by the header and dragged into a new location. The figure below shows moving of the Device Libraries window. While moving the window, special controls appear to facilitate proper placing of the window in relation to the remaining windows in the view.
Windows adjustment controls
As a result of changing the windows position, it is possible to adjust them according to individual needs. On the figure below, the Workspace Tree window has been moved above the Main screen, and the Device Libraries window has changed its position from the left side to the right.
Rearranged windows
The iC Tool offers a quick extension of the Main screen to the whole area thanks to automatic minimizing of the remaining windows. To temporarily enlarge the Main screen, press the Hide panels icon (third one from the right) on the toolbar under the main menu, as it is depicted on the figures below showing the iC Tool before and after the enlargement of Main screen. In order to restore the full view of all windows, either press the icon again or press the next Restore previous panels set icon.

Hide panels button

Temporarily enlarged main screen
Restore previous panels set button