This article outlines how to properly configure a client for the purpose of a BACnet/SC integration in Niagara.
NOTE: This BACnet/SC function is available from Niagara 4.11, therefore, it is required to make sure that the 4.11 or higher version has been installed.
NOTE: To set up a BACnet/SC client on the network, there must be at least one host with a configured hub to which the client will connect. For a description of how to set up a BACnet/SC hub, see the article Niagara - BACnet/SC - Hub configuration. A PEM file is also required, containing only the public certificate key of the server (the device on which the Hub sits), which must be imported into the driver in Platform->CertificateManagement.
NOTE: Before proceeding with the following instructions, make sure that a client certificate has been configured (digitally signed) in Platform->CertificateManagement, as described in the article Niagara - Certificates - Creating and signing certificates of devices. This should be a unique client certificate (different from the one for the hub), signed with the same CA as indicated in the hub as Issuer CertificateX.
NOTE: It is required to click the "Save" button in specified places, as the order of configuration affects whether the integration can be carried out correctly.
-
In the first step, it is required to carry out a basic BACnet configuration, which is described in the article: Niagara - BACnet - Basic configuration steps.
-
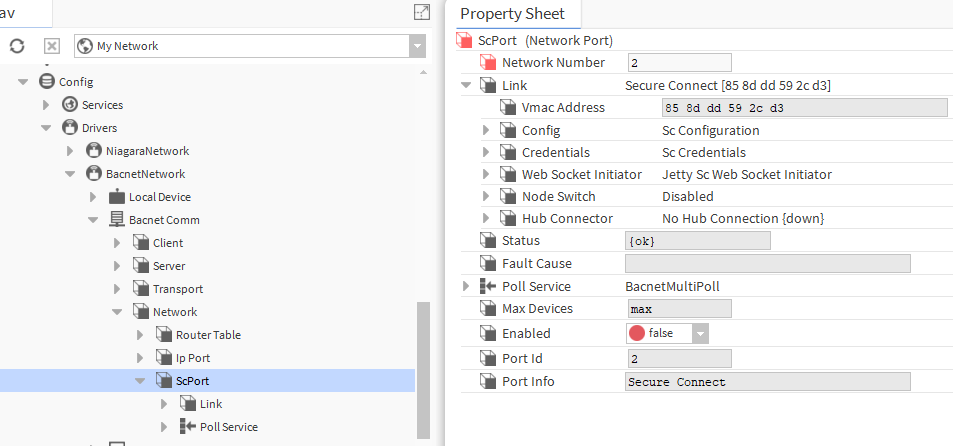
Then, in Config->Drivers->BacnetNetwork->BacnetComm->Network add the ScPort port from the bacnet palette and set its NetworkNumber slot.
-
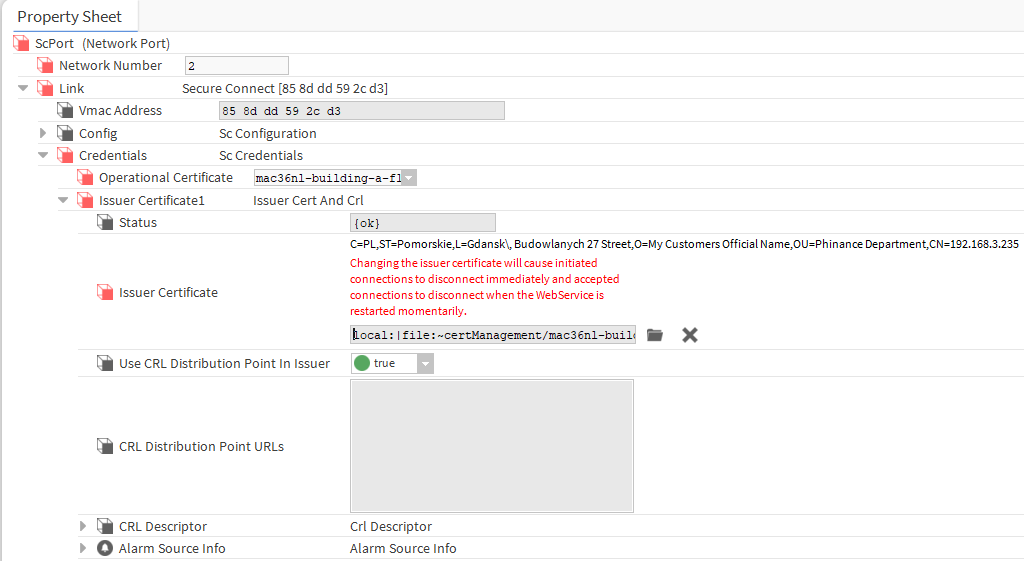
Next, expand the Link->Credentials components and in the Operational Certificate slot select the digitally signed unique client certificate from the list, while in the Issuer Certificate slot indicate the link to the PEM file containing only the public key of the custom CA's certificate with which the said client certificate was signed, and save the changes.
-
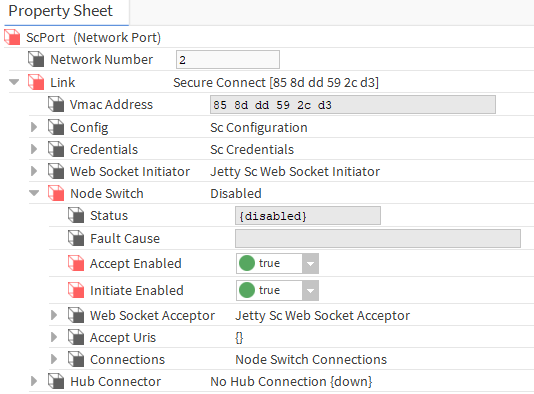
In the next step, configure the Node Switch to determine the node's behavior for direct in and out connections; to do this, set the Accept Enabled and Initiate Enabled slots to true and save the changes. An error will pop up here, which should be ignored, as it will be fixed at a later stage.
-
Right-click on the Node Switch, expand actions and invoke the Add Sc User action. This will add a new user for BACnet/SC communication.
-
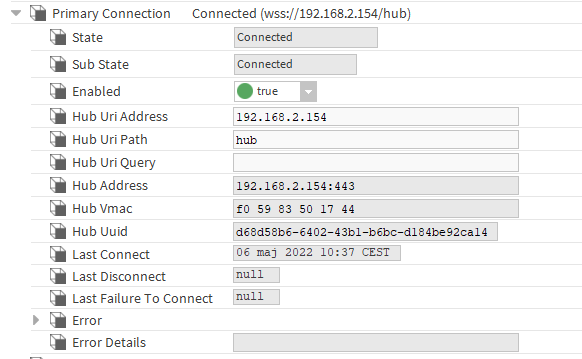
Next, go to the ScPort->Link->HubConnector->PrimaryConnection folder and in the Hub Uri Address slot enter the address of the BACnet/SC hub, and in the Hub Uri Path slot enter the proper name of the hub (if not changed, in the Servlet Name slot of the hub configuration, the default is "hub").
-
At the end, set the Enabled slot of the ScPort component to true and save the changes, at which point communication with the hub will be established.
-
Now, go to the BacnetNetwork component, to the AX Bacnet Device Manager view and execute click on the Discover button at the bottom of the view, then select the network number assigned for ScPort and the search result should show the hub, as well as other clients connected to it.

Fig. 5. Results of the Discover function after establishing communication with the hub