The article outlines how to properly go through the BACnet protocol basic configuration on the Niagara driven device. This document does not mention adding BACnet devices to the station (after the correct configuration of the network), which is the subject of the Niagara - BACnet - Adding devices article.
1. ‘Jar’ Module Installation
WARNING: This step is applicable only for controllers (e.g., iSMA-B-MAC36NL or JACE-8000); for Supervisor, it shall be skipped.
Firstly, log in to the device’s platform and select the following ‘jar’ modules:
-
bacnet-rt;
-
bacnet-ux;
-
bacnet-wb;
-
platBacnet-rt;
-
platMstp-rt.
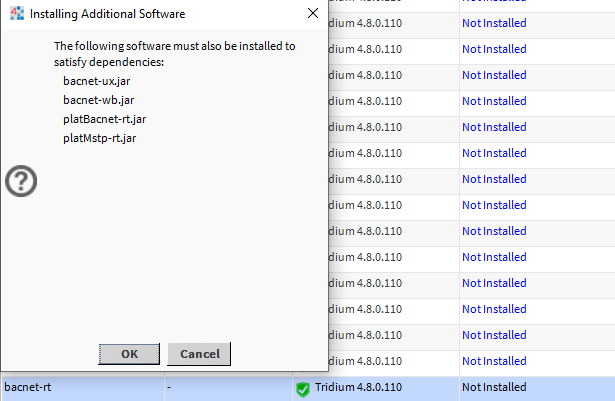
Figure 1. Installation of basic modules necessary to start the BACnet protocol - if one of them is selected, the WorkPlace automatically suggests installing the rest.
Next, select Install and then Commit. The controller downloads and installs the selected modules. At the end of the installation, the controller asks to restart, which has to be confirmed.
2. Adding the BACnet Network to the Station
In order to add the BACnet protocol to the station, go to the /Config/Drivers, and use one of the following methods:
2.1. ‘bacnet’ Palette
In the Palette window, open the ‘bacnet’ palette and drag&drop the BacnetNetwork component to the /Config/Drivers location.
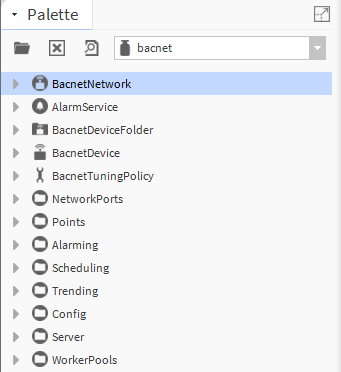
Figure 2. Selecting the BacnetNetwork component in the bacnet palette.
2.2. ‘New’ Button
At the bottom of the Driver Manager view of the Drivers component, select the ‘New’ option. The pop-up window appears showing a drop-down list; select the BacnetNetwork option. Adding of the component has to be confirmed with the OK button.
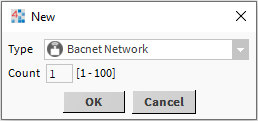
Figure 3. Adding the BACnet protocol in the Driver Manager with the ‘New’ button.
3. The BacnetNetwork Component Configuration
In order to configure the BACnet network, open the BacnetNetwork component in the AX Property Sheet view.
The configuration is started with giving the device its unique BACnet ID (by default, this value is -1, which is forbidden in the network). The BACnet ID is set in the Object Id slot in /Config/Drivers/BacnetNetwork/Local Device.
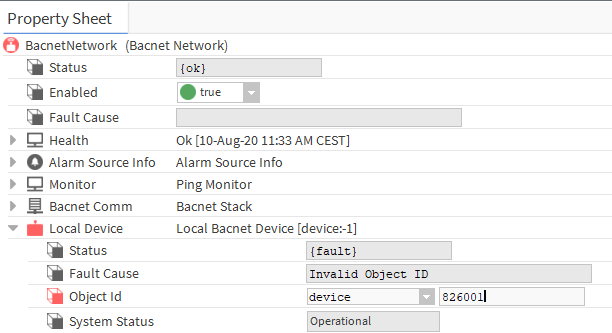
Figure 4. Setting the BACnet ID for the Niagara device - the Object Id slot.
The next step is to enable the interface (one or more), which will be used by the station to communicate. Selecting the interface at the same time means selecting the proper protocol, BACnet IP or BACnet MS/TP.
3.1. IP Port - BACnet IP Protocol
The IP port, servicing the BACnet IP protocol, is added to the BacnetNetwork component by default, however, it requires configuration and enabling.
In order to do so, go to /Config/Drivers/BacnetNetwork/Bacnet Comm/Network/Ip Port. Select a unique (for the edited device) network number in the Network Number slot. In the Link component, select the proper interface in the Adapter slot and enter the Udp Port (by default, it is 0xBAC0), which is used to read and write data packets. Finally, in order to start the communication, set the Enabled slot to true.
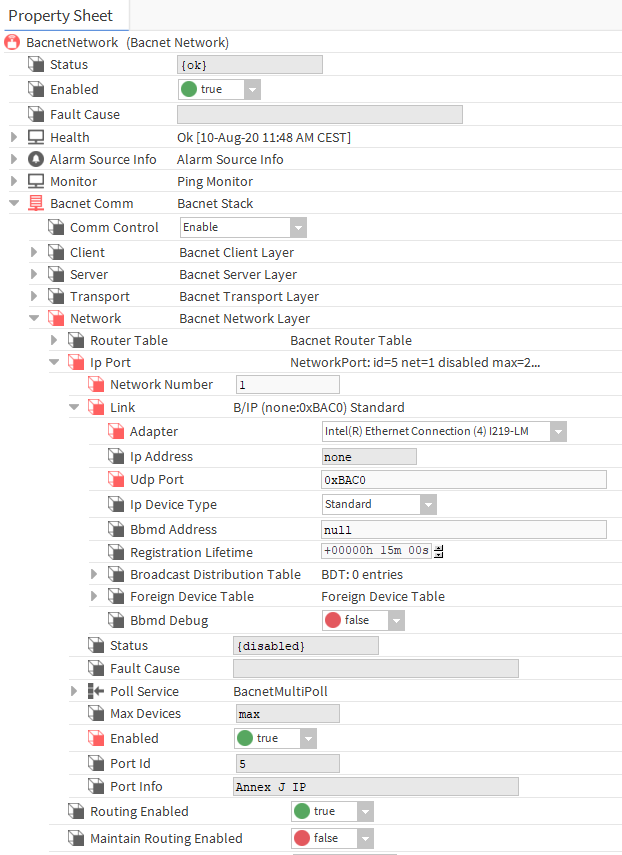
Figure 5. IP Port configuration for BACnet IP protocol - Supervisor example.
WARNING: For the iSMA-B-MAC36NL controller to communicate in the BACnet IP protocol on both interfaces, add another IpPort component from the NetworkPorts folder in /Config/Drivers/BacnetNetwork/Bacnet Comm/Network, and set it to the second adapter.
3.2. RS485 - The BACnet MS/TP Protocol
The BACnet MS/TP serial port service is not automatically added to the BacnetNetwork component. Go to the bacnet palette, NetworkPorts folder, and drag&drop the MstpPort component to /Config/Drivers/BacnetNetwork/Bacnet Comm/Network. Next, set a unique (for the editted device) network number in the NetowrkNumber slot. In the Link component, set a serial port in the Port Name slot, communication speed in the Baud Rate slot, and set the Mstp Address. Finally, in order to start the communication, set the Enabled slot to true.
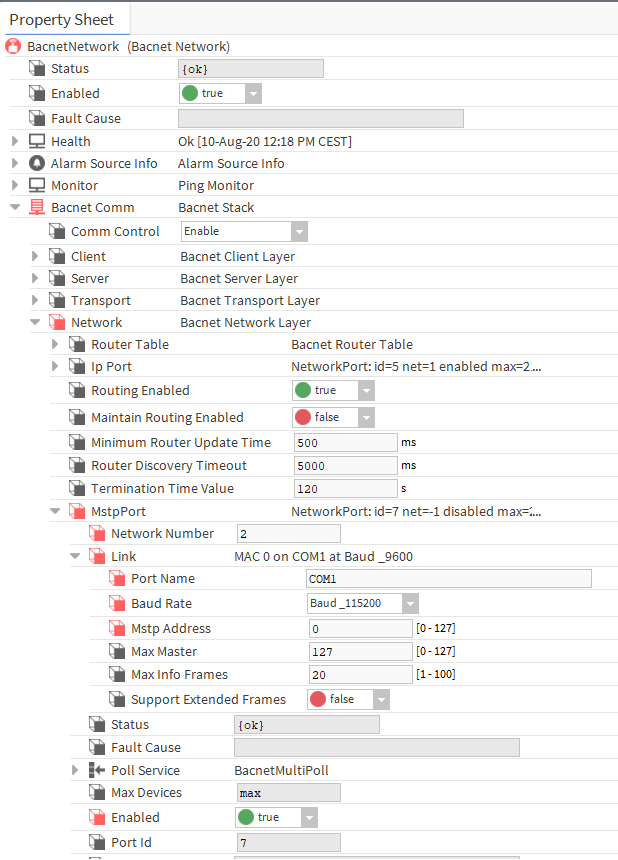
Figure 6. Configuration of the serial port for the BACnet MS/TP communication.
WARNING: The N4 Niagara Supervisor does not support a serial port configuration (e.g., USB/RS485 converter) for the BACnet MS/TP protocol.
