This document describes how to add the iSMA-B-AAC20 driver in the iSMA Tool program, to do this:
-
Create a project, right-click in the "Workspace Tree" and select "New Project".
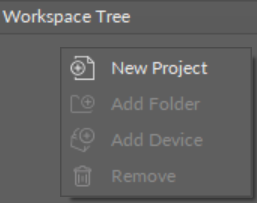
Picture 1. "Workspace Tree" edit options view.
2. Right-click on the project and select "Add Device". A pop-up window will appear in the middle of the screen. In "Type" you can select the type of device, in this case, set to "Sedona". "Host" contains the default IP of the iSMA-B-AAC20 driver, and in "Port" there is the basic port of the "SOX" protocol. After entering the appropriate values, click the "OK" button.
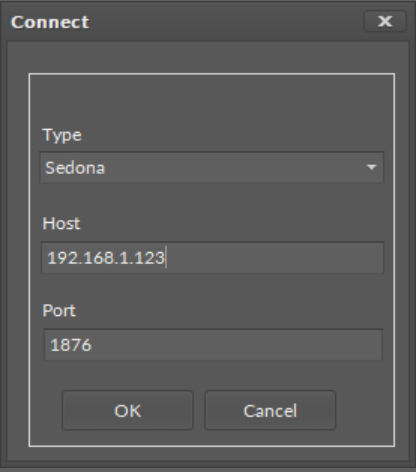
Picture 2. Connection window with default values.
3. Another pop-up window will appear in which you need to enter your login details. By default, it is "admin",
and the password field is blank. Data should get confirmed with the "OK" button.
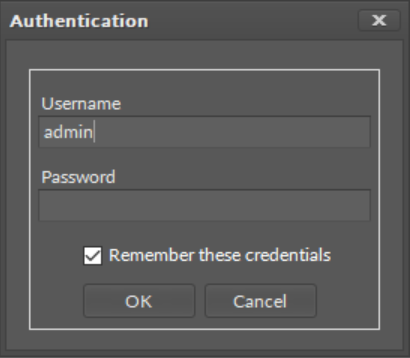
Picture 3. Login window with default values.
4. After confirming the login data, iSMA Tool will try to connect with the controller. If the color of the device changes from grey to white in "Workspace Tree", it means that the device is successfully connected.
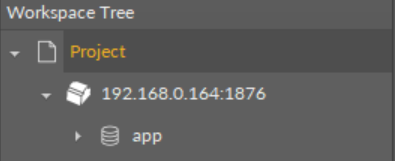
Picture 4. The appearance of the "Workspace Tree" after connecting to the controller.
NOTE: Remember to save the newly created Workspace configuration, using the ‘"Save Workplace’ button. Unsaved Workspace is lost, and the next time you start iSMA Tool, the last saved Workspace will be displayed.