The article describes how to write a custom component in the Niagara system with logic prepared in JAVA, without having to develop a new JAR module.
Sections of this article are based on an example of creating a Light_switch component, which is used to switch the state of lights (the Out slot) depending on the occurrence of a pulse from a monostable (bell) button.
Description
The solution is based on the Program component from the program palette. To use it, there is no need to install any module on the driver, as it is included in the basic package of each distribution.
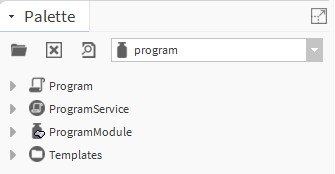
Fig. 1 Contents of the program module
In order to use the Program component, add it to the station (e.g., by dragging it to the WireSheet view using a drag&drop method). Next, open it in the Program Editor view, where there are four tabs:
-
Edit - a text editor for writing logic using JAVA,
-
Slots - the equivalent of the Slot Sheet view, where input and output slots of the component are added,
-
Imports - a list of modules referenced by the component (they must be installed on the device if, in its station, this specific program will be used),
-
Source - a read-only view showing the JAVA source code that will be generated based on the configuration in the other three tabs.
As presented in the Source tab, the Program component in its entirety is a single class named ProgramImpl, while the user logic is the interior of this class.
Adding slots
First, go to the Slots tab to add the component's inputs and outputs, and configure their flags accordingly.
To prepare the example component Light_switch, add an input slot (of type baja:StatusBoolean) named MonoSwitch that reads pulses from the bell button, and an output slot (also baja:StatusBoolean) Out that will be connected to the digital output.
In order to create a complete configuration, both slots must have flags set accordingly. For the Out slot, it is recommended to set a Readonly flag (to prevent it from being used/linked as an input) and Summary (to make the slot visible on the Wire Sheet). Then, for the MonoSwitch slot, it is worth setting the flags Execute On Change (so that the program executes when the value is changed) and Summary.
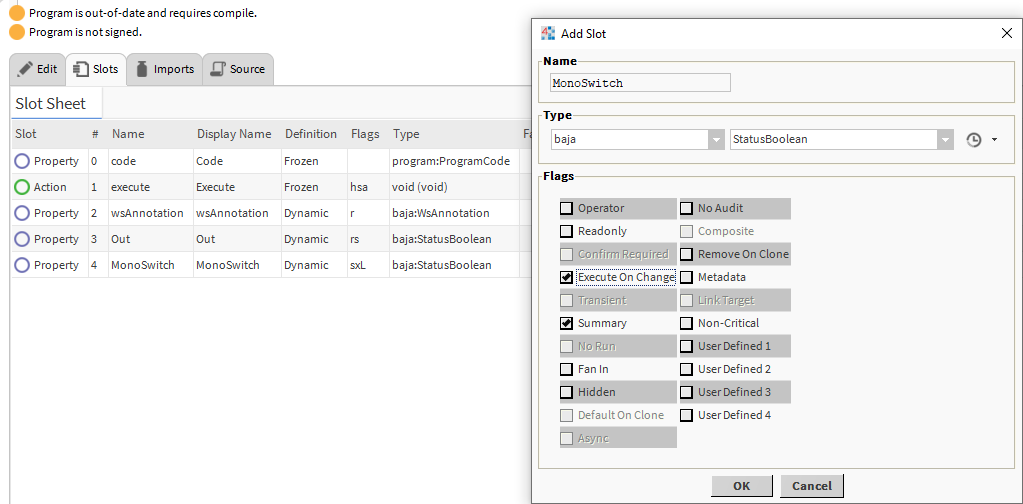
Fig. 2 Adding slots and configuring their flags in the Program component
After creating these slots in the Source tab, the GET and SET methods will be automatically added, which will allow later in the logic to read and write slot values.
////////////////////////////////////////////////////////////////
// Getters
////////////////////////////////////////////////////////////////

  public BStatusBoolean getOut() { return (BStatusBoolean)get(Out); }
  public BStatusBoolean getMonoSwitch() { return (BStatusBoolean)get(MonoSwitch); }

////////////////////////////////////////////////////////////////
// Setters
////////////////////////////////////////////////////////////////

  public void setOut(javax.baja.status.BStatusBoolean v) { set(Out, v); }
  public void setMonoSwitch(javax.baja.status.BStatusBoolean v) { set(MonoSwitch, v); }
Code 1 Automatically created methods “GET” i “SET”, in the Source tab, for added slots Out and MonoSwitch of type baja:StatusBoolean in the Program component
Editting logic
Once the slots are properly configured, proceed to create logic using JAVA in the Edit tab. After adding the Program component, its default logic will look as follows:
public void onStart() throws Exception
{
  // start up code here
}

public void onExecute() throws Exception
{
  // execute code (set executeOnChange flag on inputs)
}

public void onStop() throws Exception
{
  // shutdown code here
}
Code 2 Default logic in the Edit tab in the Program component
These are available methods that are called on the corresponding events in the station:
-
onStart - executes once after the station starts up,
-
onExecute - executes when the Execute action is called on the program component or when the value of the slot(s) that has the Execute On Change flag set changes,
-
onStop - executes once when turning off the station.
The user, according to the rules of programming in JAVA, can add its methods and variables both public and private. It is also possible to use other classes such as alarm, history, kitControl, for example, and declare objects in accordance with their classes. Below is one example of logic execution, in the Edit tab for the Light_switch component:
//Light control with Monostabile switch

//Author: Paweł Kąkol
//Company: iSMA Controlli
//LastUpdate: 2020-08-24

public boolean previousSwitch;
private boolean actSwitch, actOut;

public void onStart() throws Exception
{
  // start up code here
  previousSwitch = false;
  getOut().setValue(false);
}

public void onExecute() throws Exception
{
  // execute code (set executeOnChange flag on inputs)
  actSwitch = getMonoSwitch().getValue();
  if (actSwitch && actSwitch != previousSwitch)
  {
    actOut = getOut().getValue();
    getOut().setValue(!actOut);

  }
  previousSwitch = actSwitch;
}

public void onStop() throws Exception
{
  // shutdown code here
}
Code 3 Example implementation of the Light_switch logic, in the Edit tab, using the Program component.
Saving and compiling
While creating a custom logic, save it using the floppy disk icon in the top menu, otherwise the changes made may not be remembered. In the figure 3, the icon is marked with 1.
After finishing writing (or before testing) the logic, it should be compiled it using the hammer icon in the top menu. In the figure 3, the icon is marked with the number 2.
Alternatively, use the button to simultaneously write and compile the logic using the hammer icon on the floppy disk in the top menu. In the figure 3, the icon is marked with the number 3.
Fig. 3 Marking in the top menu icons for save, compile and simultaneous save and compile actions in the Program component