The article describes how to properly install the module to support Google Maps and configure the map on Px graphics.
In order to use Google Maps on the Px view, it is required to:
-
install gmaps-ux.jar just like any standard jar module;
-
then, create a new Px view and place GoogleMapsGlobalDashboard on it.
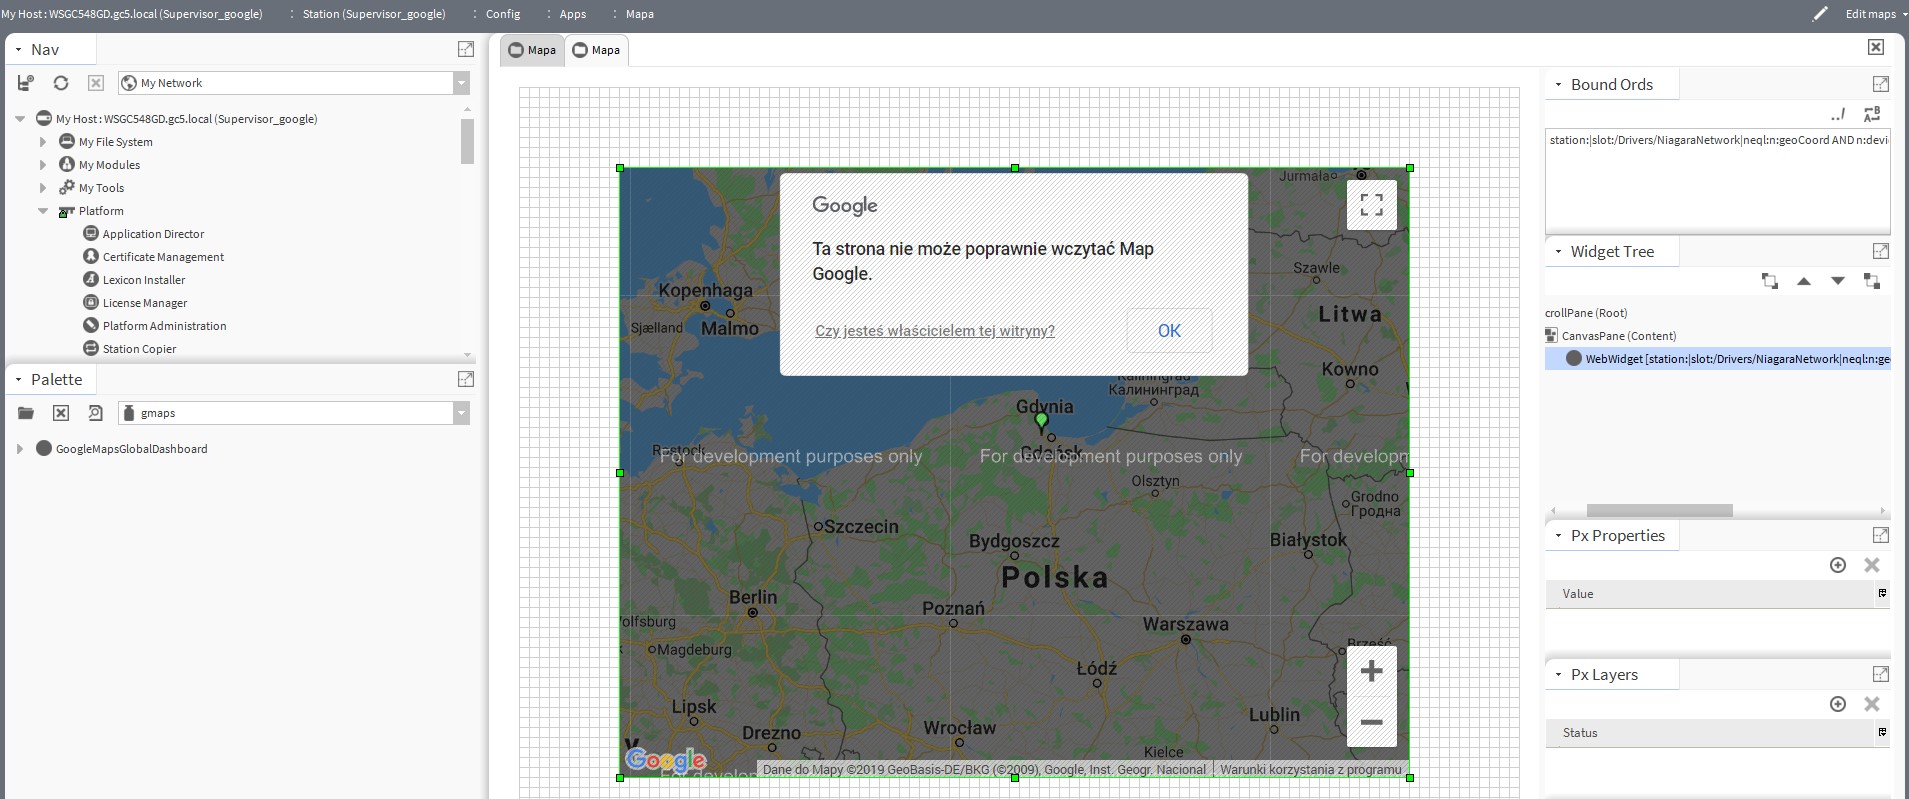
Fig. 1 The Px view with Google Maps
The next two steps are not required, the map will work fine, but there will be a watermark on it.
-
Register google api key at https://developers.google.com/maps/documentation/javascript/get-api-key. Google account payment method is required.
-
Open the properties window of the Google widget and, in the key slot, enter the previously registered API key.
-
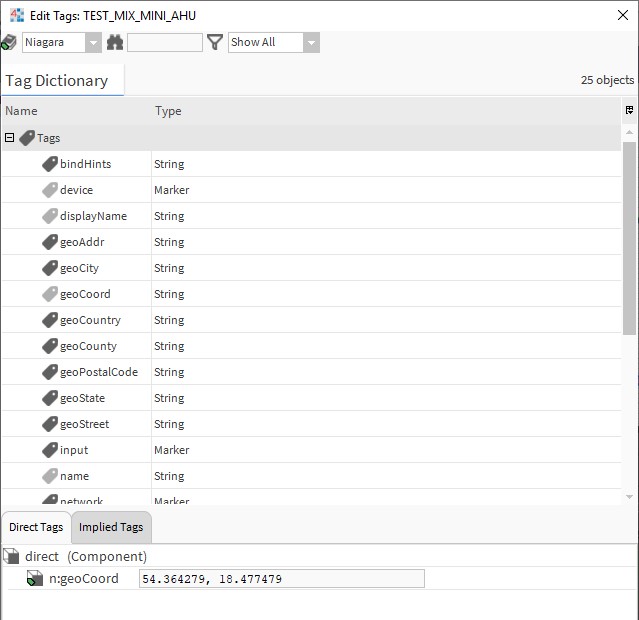
Import any Niagara station via FOX(s) protocol, right click on the station, and open the Edit Tags window. Add the tag n:geoCoord and enter the geographic coordinates of the station's location separated by a comma into it.
-
Import the selected points to the Niagara station.
-
After refreshing the view, a pin should appear on the map; when you hover over it, a window will appear with the name of the station and the imported points.
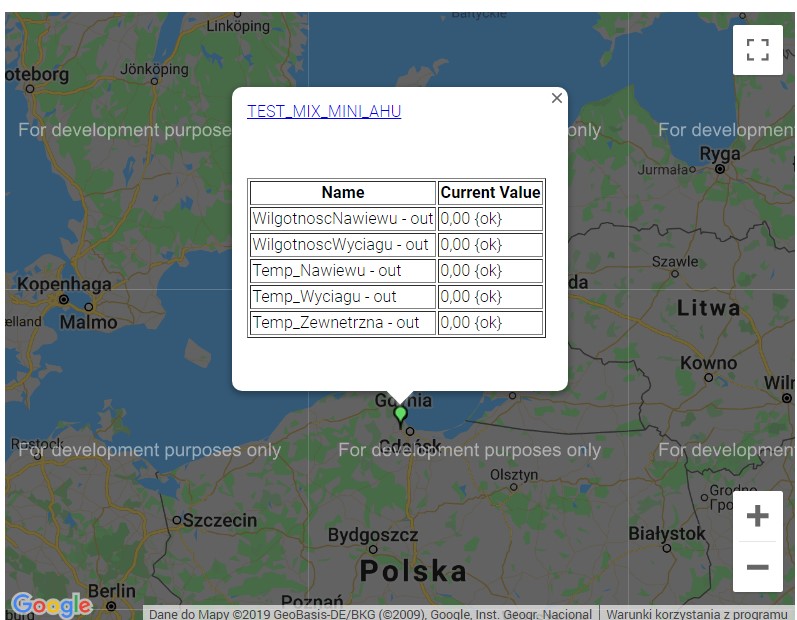
Fig. 3 The Niagara station on the Px view map
-
In the properties window of the Google widget, in the position slot, enter the starting position and, in the zoom slot, enter the starting zoom.

Fig. 4 Configuration of the start and zoom position