The article outlines how to configure a platform and station with the Niagara system to use a lexicons function. In case it is necessary to have a multilingual BMS system or (at least) to translate system terms (originally in English) to users' language, the Niagara lexicon function has been created to easily substitute series of characters for different languages instead of duplicating views.
The article focuses on a particular example of the "control" module lexicon, which illustrates many aspects of using lexicons. In practice, lexicons usually are best used with the "alarm" and "history" modules, where the end user typically deals with components and system messages displayed either in English or as programming reference to a class built-in in the Niagara.
Creating and installing a lexicon
1. The first step refers only to controllers (e.g., iSMA-B-MAC36NL) - it can be skipped for the "Supervisor". In the Software Manager, install the "Runtime"-type module (with the "-rt" ending) of a lexicon for a selected language (e.g., niagaraLexiconPl-rt).
2. Then, in the top menu of the "WorkPlace", select "Tools->Lexicon Tool", open the "Lexicon Report" view, and check the lexicon's language in the list at the left side (in the described example, it is "pl"). After selecting the language, the list of modules is displayed; double-click the one, which in further steps the lexicon is going to be built for (in the described example, it is "control").
3. Open the "Lexicon Editor" (for the selected module) and add text values (possible, "Ord" references or numerical/color values and other parameters) for slots, which are going to be used in further steps.
4. Also, this view allows for adding new keys (selecting the "Add New Key" option), which can be used for other descriptions (non-systemic). Each time (for each key) changes have to be confirmed with the "Update Value" option.
5. Having introduced all changes to the lexicon, save with with a disk button on the top bar of the "WorkPlace".
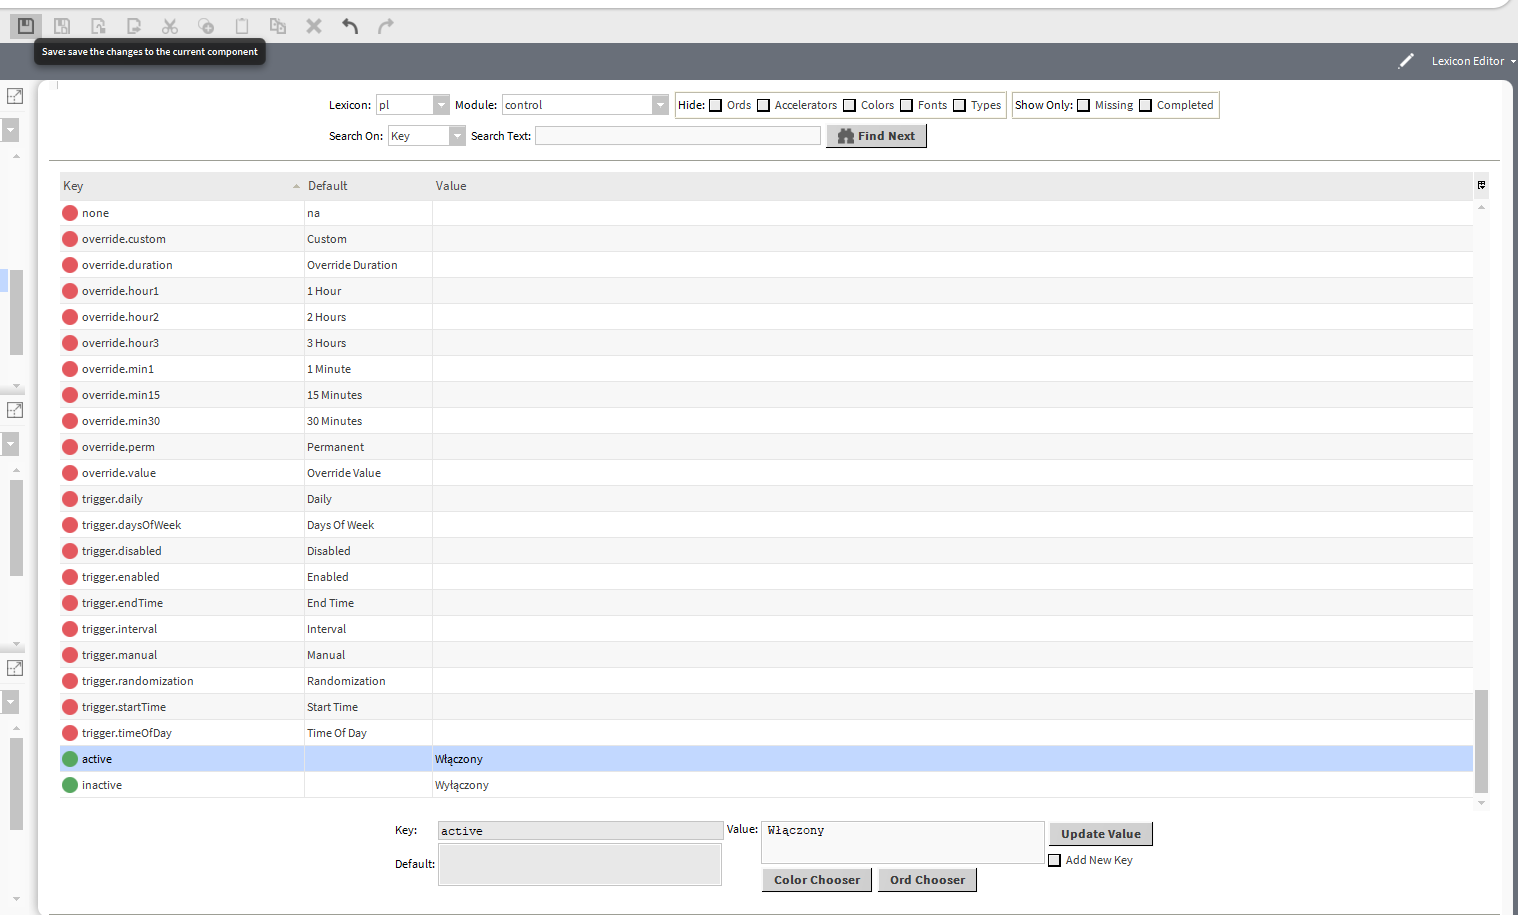
Figure 1. Editing a Polish lexicon for the "control" module
6. After setting lexicons for all modules, go to the "Lexicon Module Buildier", select all editable lexicons from the list, name them, set their symbol, manufacturer, and version, and confirm with the "Build Module" button. After compiling, restart the "WorkPlace" (new files are loaded during its initialization) - compiling process adds a new "jar" file to the list of modules, named according to the name given before the compilation.
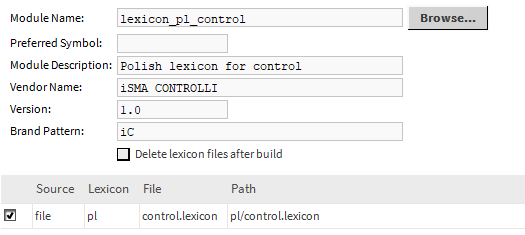
Figure 2. Lexicons compilation window as one "jar" file - the "Lexicon Module Buildier" view
7. Then (for the iSMA-B-MAC36NL controller), in the Software Manager, install the new compiled module with lexicons in the platform.
8. Go to the "Lexicon Installer" and click "Install". In the pop-up window, select the "SysHome/lexicon/your_lexicon" (in the described example, it is "SysHome/lexicon/pl"), and confirm with OK. This way, the lexicon is added to the controller. 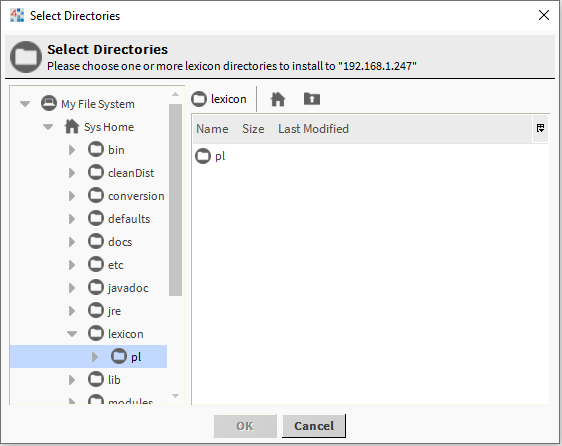
Figure 3. Installing the lexicon in the platform with the "Lexicon Installer" - selecting the location of files
9. Next, after logging into the station, check if installed text equivalents of keywords (in the described example, Polish translations for the "active" and "inactive" keywords have been added) work properly.

Figure 4. Substituting "active" and "inactive" keywords with "Włączony" and "Wyłączony"
Using lexicons for components' names
To use lexicons for names of components, follow the below steps:
1. Change the "displayName" value of the component (e.g., "BooleanWritable10") to the reference to one of the lexicon's keys using the "BFormat" standard (in the described example, it is "%lexicon(control:active)%").
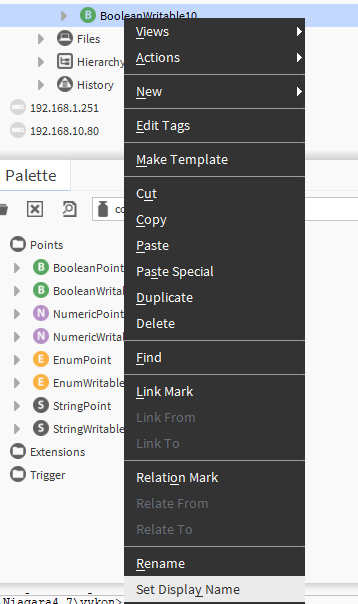
Figure 5. The "Set Display_Name" option in the context menu

Figure 6. Configuring the lexicon's key as the "displayName" value of the component
2. After setting the "displayName" value, the component takes the lexicon's key as its displayed name.

Figure 7. Representation of the displayed name ("displayName") after referencing to the lexicon
Using lexicons for components' labels on the PX views
1. First, add a PX view in any location and go to the editing mode.
2. Then, add a graphic widget in the working area (in the described example, it is "Label").
3. The "Value Binding" object has been added to the "Label" widget. Then, the "BooleanWritable10" component is indicated in the "Ord" slot (with the "displayName" defined as lexicon).
4. Animate each text slot one by one (in the "Label" widget) to the created "Value Binding" using the "Object To String" object and set the format to "%displayName%".
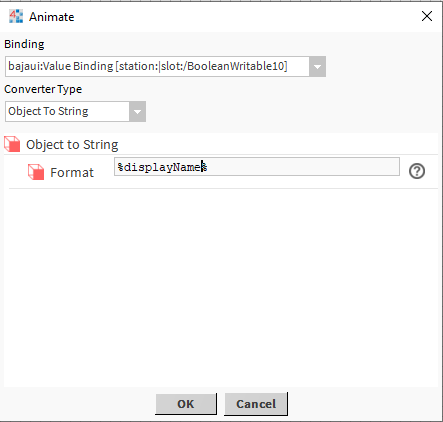
Figure 8. Animating the "Label" widget text using the "displayName" component with the value from the lexicon
5. The label configured this way automatically changes contents when the lexicon is updated or connected.
Using lexicons for constant texts on the PX views
Another method of technically creating the "binding" is meant for displaying keys included in the lexicon but not set as the "displayName" of any component.
1. For this purpose, add any component to the station, which is not going to be included in the logic (e.g., the "BooleanPoint" from the "control" module).
2. Then, in the PX view, add the "Value Binding" object to the "Label" widget (or "BoundLabel"). In the "Ord" slot, select the component added to the station in the previous step.
3. Animate each text slot one by one to the created "binding" using the "Object To String" object and set the format to "%lexicon(kitControl:key_name)%".
4. Further, such descriptions may be repeated, each time changing the "Key_name" value in the animation. ![]()
Figure 9. Animating the "Label" widget using a direct reference to the lexicon's key
5. This way, it is possible to display keys directly from the lexicon on the PX view, and, similarly to previous cases, they will be automatically updated with every lexicon's change; The only condition is that the user key names are added to the lexicon and referred with a proper text representation.
