This document describes the process of adding and configuring Modbus TCP/IP in iSMA-B-AAC20 device. To do this:
-
Go to "Kit Manager" and upload the "iSMA_ModbusTcpNetwork" kit to the device.
-
After reconnecting with the controller, open "App/Drivers". From the "iSMA_ModbusTcpNetwork" in the "Device Kits" window add "ModbusTcpNetwork" to "Drivers".
-
In the "Object Properties" window of the newly added component, set the "Enable" slot to "true". Then “ModbusTcpNetwork” will be enabled with default values*.
-
To add a new device from the "Device Kits" window in "ModbusTcpNetwork" you should put "ModbusDevice".

Picture 1. "Workspace Tree" view after adding all items.
NOTE: The “DIP Switches” on the connected device must be set according to the Modbus RTU configuration so that it will support Modbus TCP/IP.
5. Switch the "Enable" slot into "true" and set the value in the "Device Address" slot in accordance with the "Rotary Switch" of the iSMA module. If the device has been correctly configured and the driver communicates with it, then the value in the "Status" slot will be "OK".
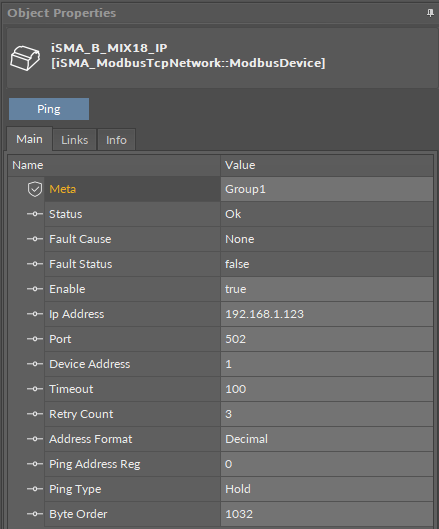
Picture 2. Correctly configured device.
*a detailed description of the parameters related to “ModbusTcpNetwork” can be found in the iSMA-B-AAC20 manual in chapter 5.