This article shows possible ways to check the IP address and change it in iSMA-B-AAC20. Methods effective for both iSMA-B-AAC20 versions with and without an LCD are presented.
Checking the IP address:
Universal solutions:
-
The first option is to use Sedona Updater (available in all Software Bundles). Connect the controller with the PC via the USB cable. Both USB-A - USB-A and USB-A - USB-C cables (must be connected to PC) will work. Then open the program and select the 'Console' button, which is available only when the USB connection is correct. Then click the 'Full log' button. The data from the device, including the device's IP address, will appear in the console window.
-
The second option is to use the iSMA Configurator program. The controller must be connected to the computer with an ethernet cable.
NOTE: In this case, you need to know in what address space the IP address of the controller and the Modbus port that was used can be located.
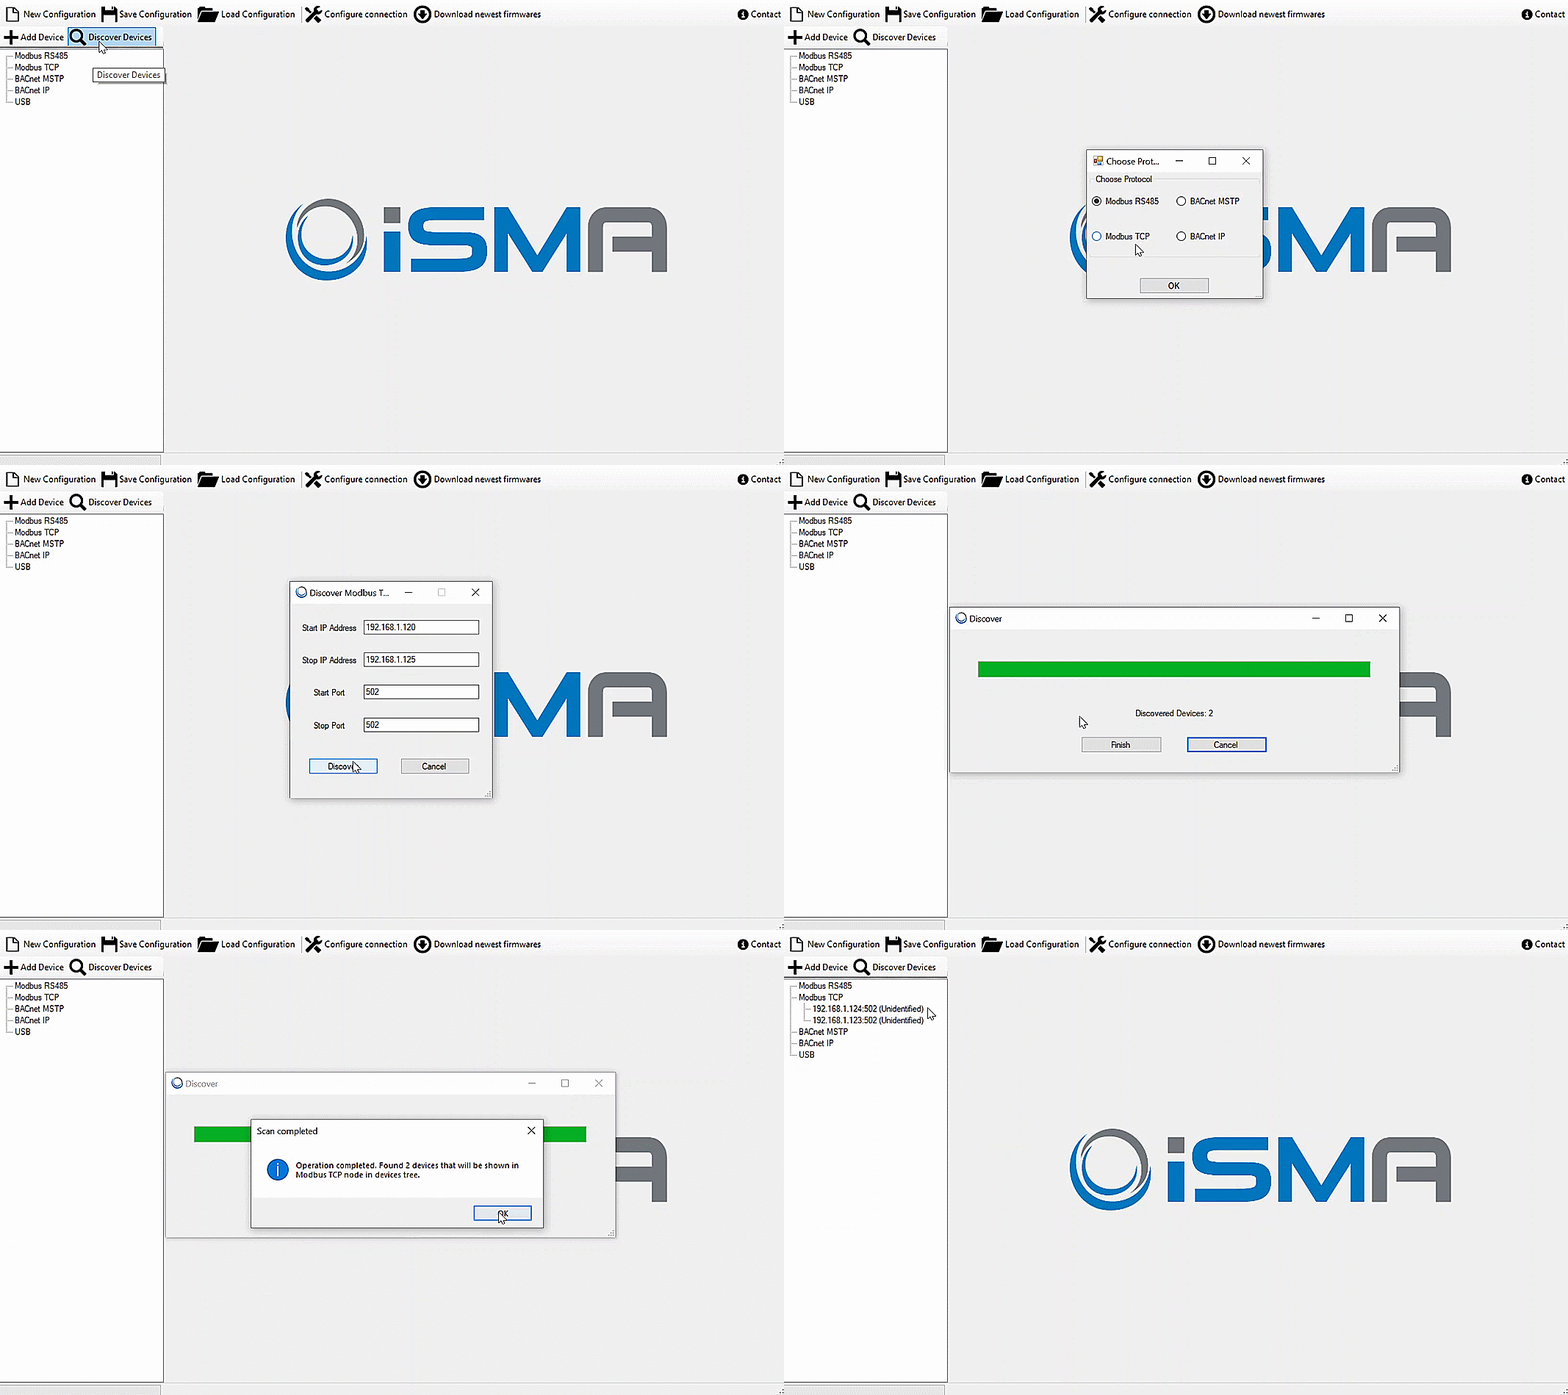
Select the 'Discover Devices' option. A pop-up window will appear, in which you need to click 'OK'. In the next pop-up window, it is necessary to select 'Modbus TCP', confirm it with the 'OK' button. Enter the start and end addresses of the space where the controller will be searched for. All iSMA-B-AAC20 devices found will be listed as 'Unidentified'.

Animation 1. Searching for iSMA-B-AAC20 controllers with iSMA Configurator.
Solutions dedicated to iSMA-B-AAC20-LCD:
Press the 'F1' button on the device for a longer time. A login window will appear, it is necessary to enter the password for the driver, the default is '1000'. The entered phrase must be confirmed with the 'Enter' button, also holding it down. The user will be taken to the main menu where you must select 'Network Config'. Inside it is possible to read the IP address. Additionally, it can be changed. After editing is complete, you need to do 'Reboot' the controller.
Changing the IP address of the controller:
Universal solutions:
-
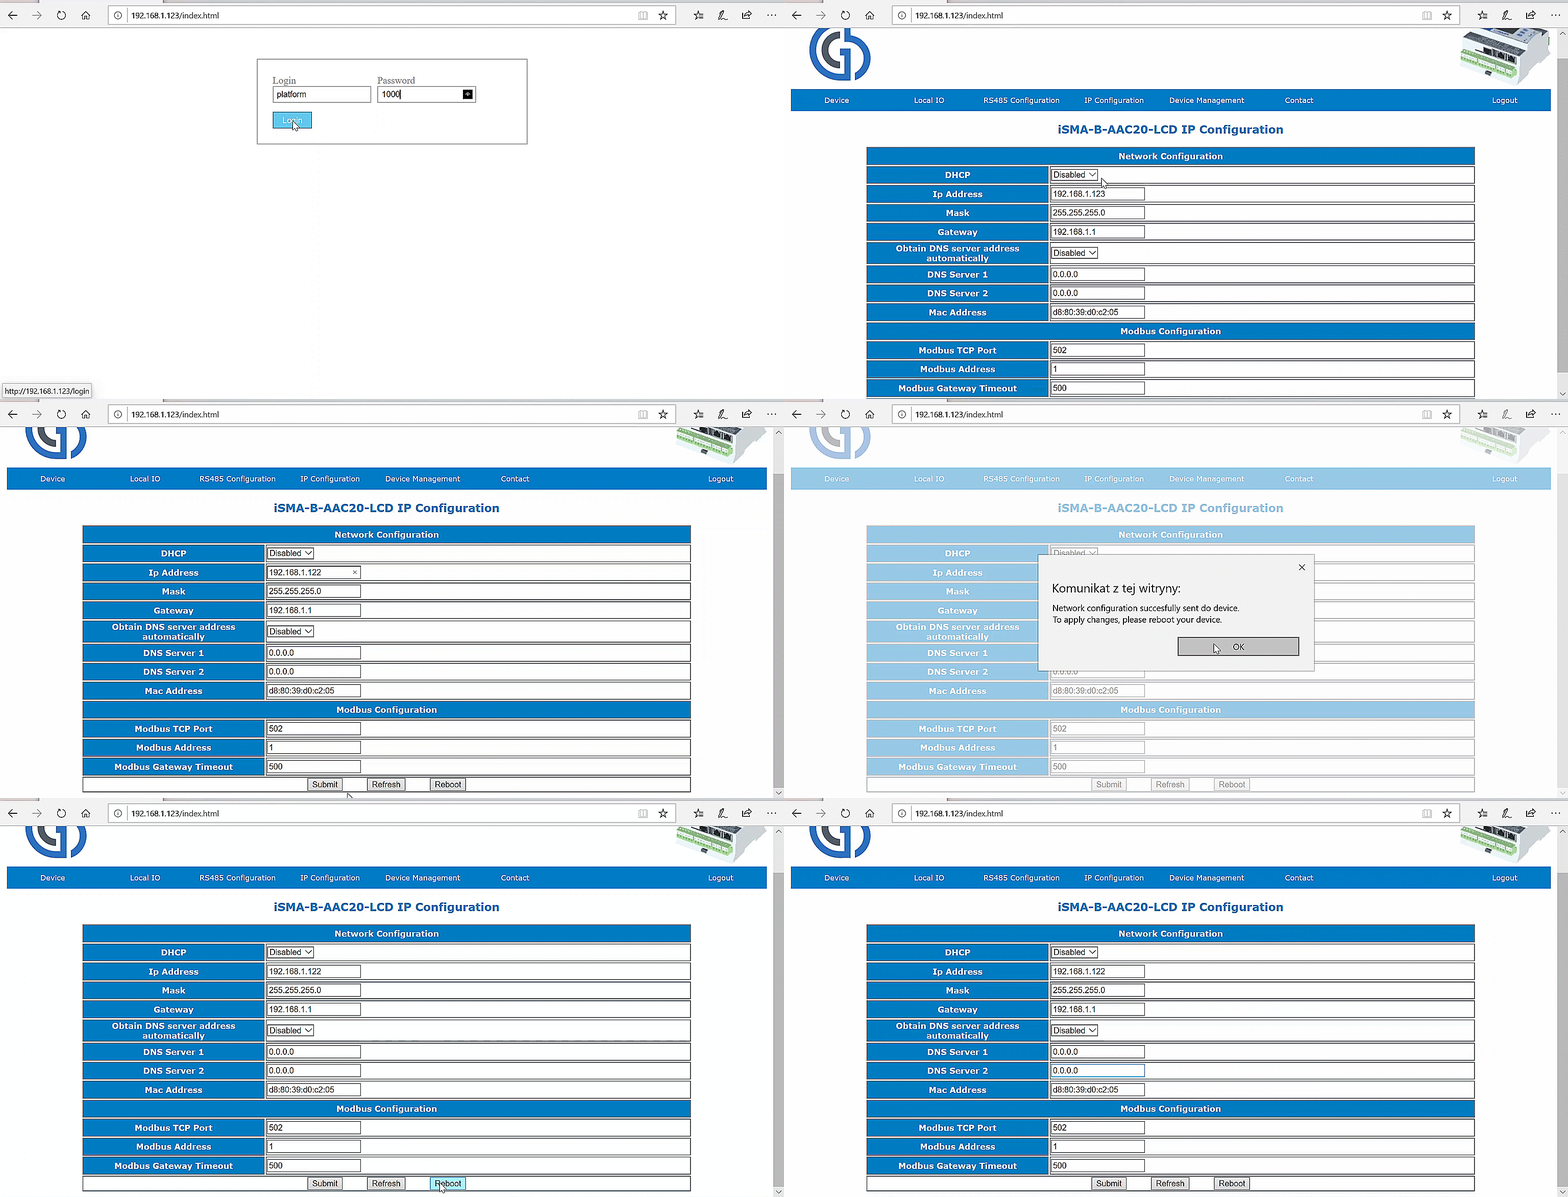
Using the driver page. Enter the IP address of the controller in the browser window (default 192.168.1.123). A screen will appear in which you must enter the login and password of the controller (by default, platform/1000). After logging into the controller, go to the 'IP Configuration' tab. You can enter a new IP address in the available slots. After making changes, confirm them by clicking the 'Submit' button. Additionally, a 'Reboot' of the controller is necessary.

Animation 2. Changing the IP address using the website.
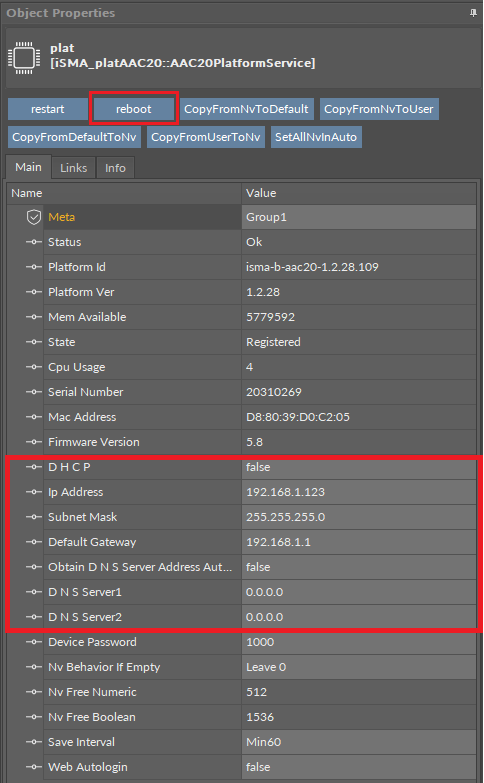
2. Using iSMA Tool. Log in to the device (the default user is admin with no password). Go to 'service/plat'. To edit the IP address of the controller, change the values in the appropriate slots in the 'Object Properties'. After completing the work, it is necessary to reboot the controller.

Picture 1. Editing the IP address using iSMA Tool.
