NOTE: The article uses .gif files, the process of loading them may take a while.
Pop-up screens can be used in many ways. In the case of visualization, they are usually used to confirm the change of important data or an additional window for parameter configuration.
This article outlines the process of creating and adding a pop-up window to the main screen. It is based on the example of approving a change.
Creating a pop-up window
-
In the Files space, create a new PX file. This file will be the base for the pop-up screen.
NOTE: The .px file that will be used as the pop-up window can be saved in a different location than Files, but when referring to it on the home screen, the reference must be to the path from the Files folder. Otherwise, the Niagara Workbench window will show an error code.
-
Open the newly created file and in the upper right corner of the screen switch it to edit mode by selecting Px Editor. In the example, a label and a button were created to approve the change of the variable value.
-
To add the button, open the kitPx palette. The variable to be approved should be placed on the screen using drag&drop. A configuration pop-up window will appear to select the item of reference. In the case of creating an approval window, it will be the ActionButton from the kitPx palette.

Animation 1 Adding the Action button to the pop-up window
-
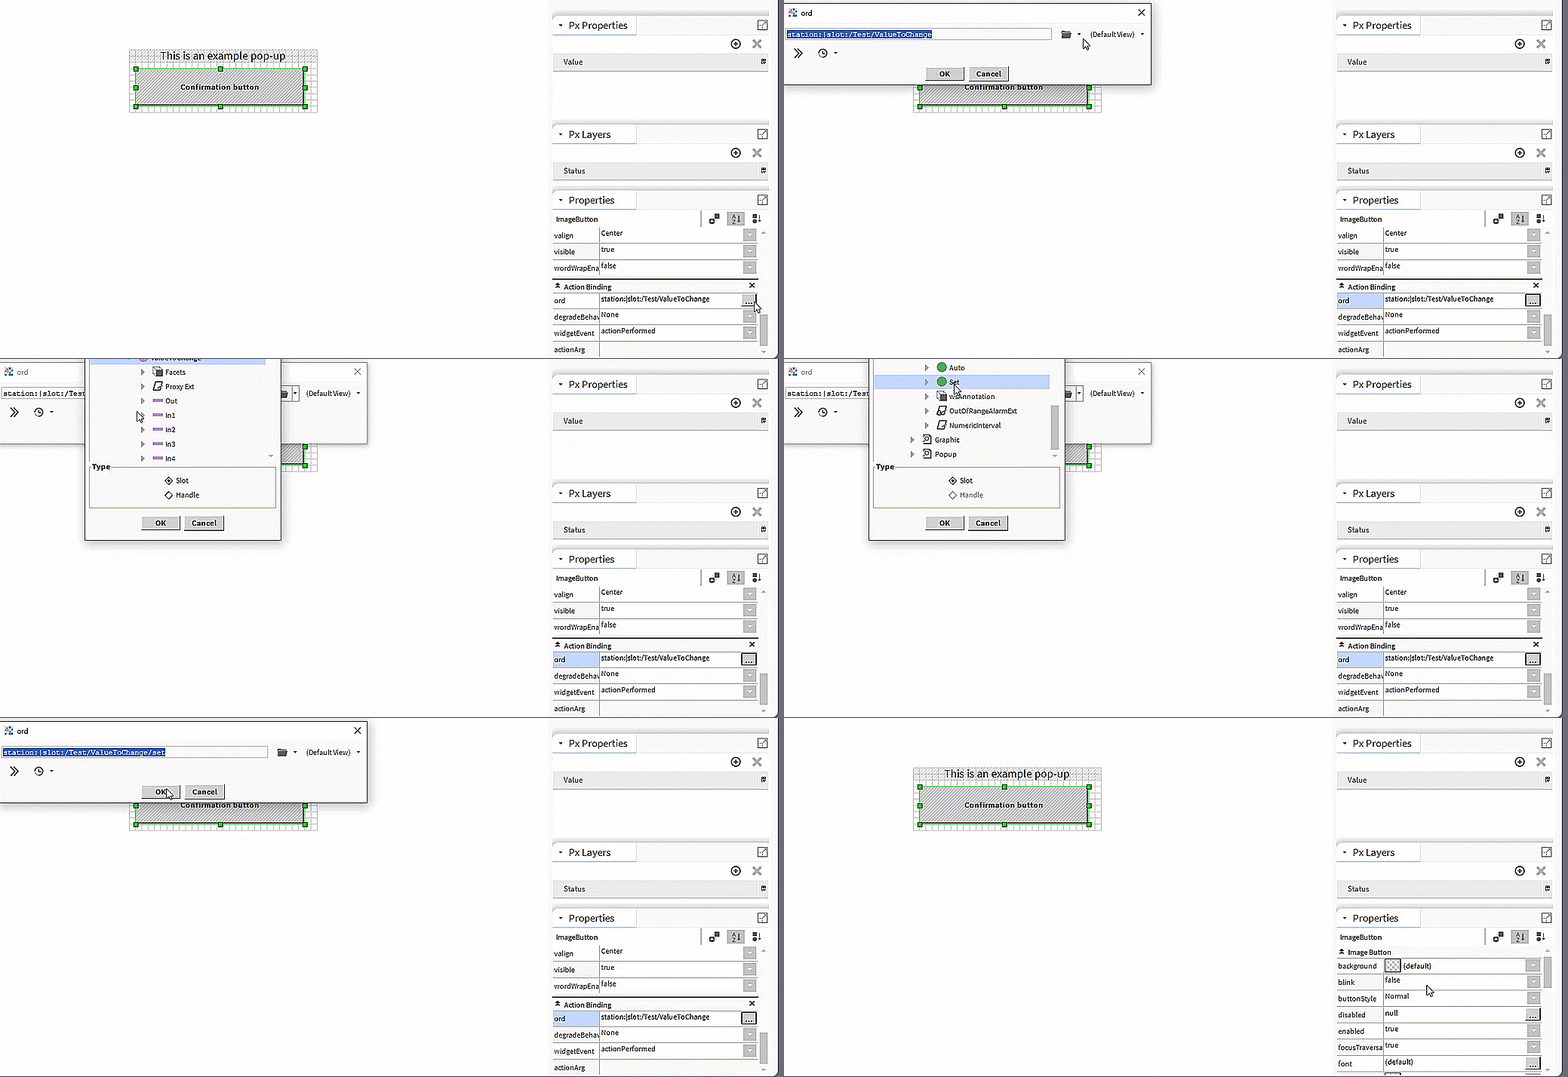
In the settings of the newly added button, configure ActionBinding, which sets the value of a variable. For example, a variable of type NumericWritable that edits the temperature setpoint value.

Animation 2 An example of a solution to approve a change.
An example pop-up screen approving a change of a variable value has been created.
Opening a pop-up window
-
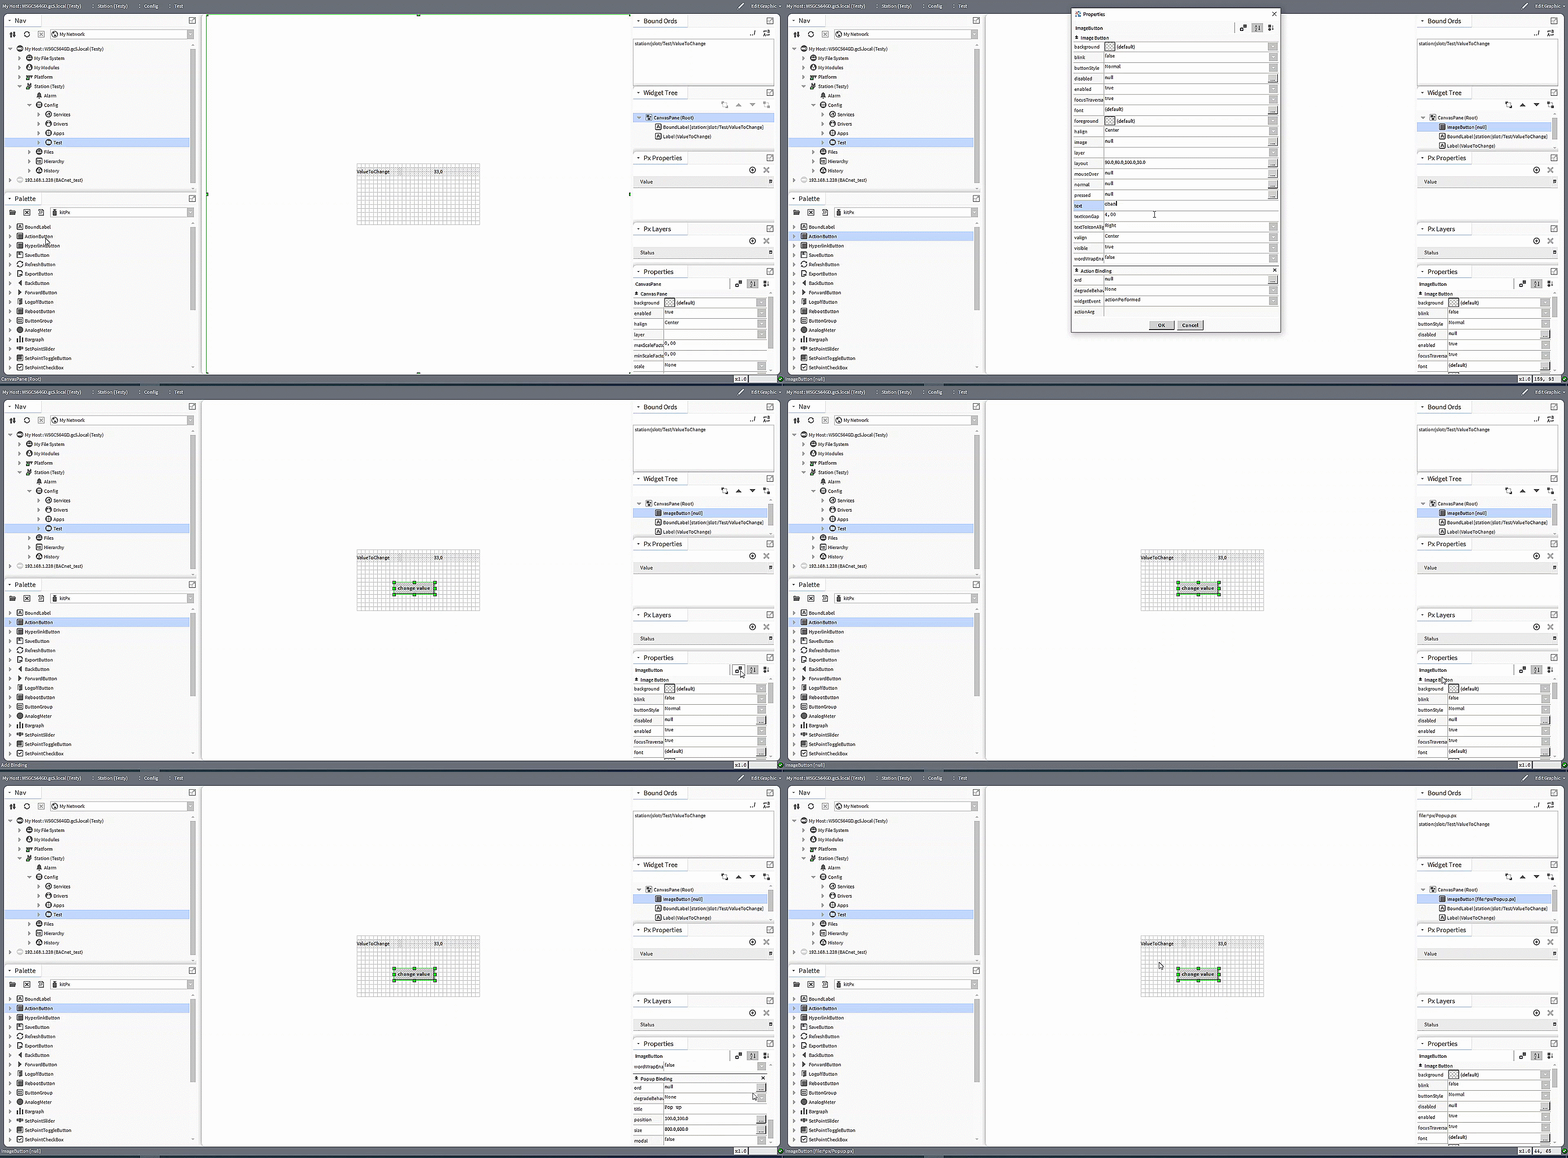
The last step to use the pop-up window is to create an element on the main screen that calls it. In the example, the ActionButton is used, with ActionBinding removed and replaced with PopupBinding. In the newly added element, specify the path to the created pop-up window.

Animation 3 Adding the Popup Binding
-
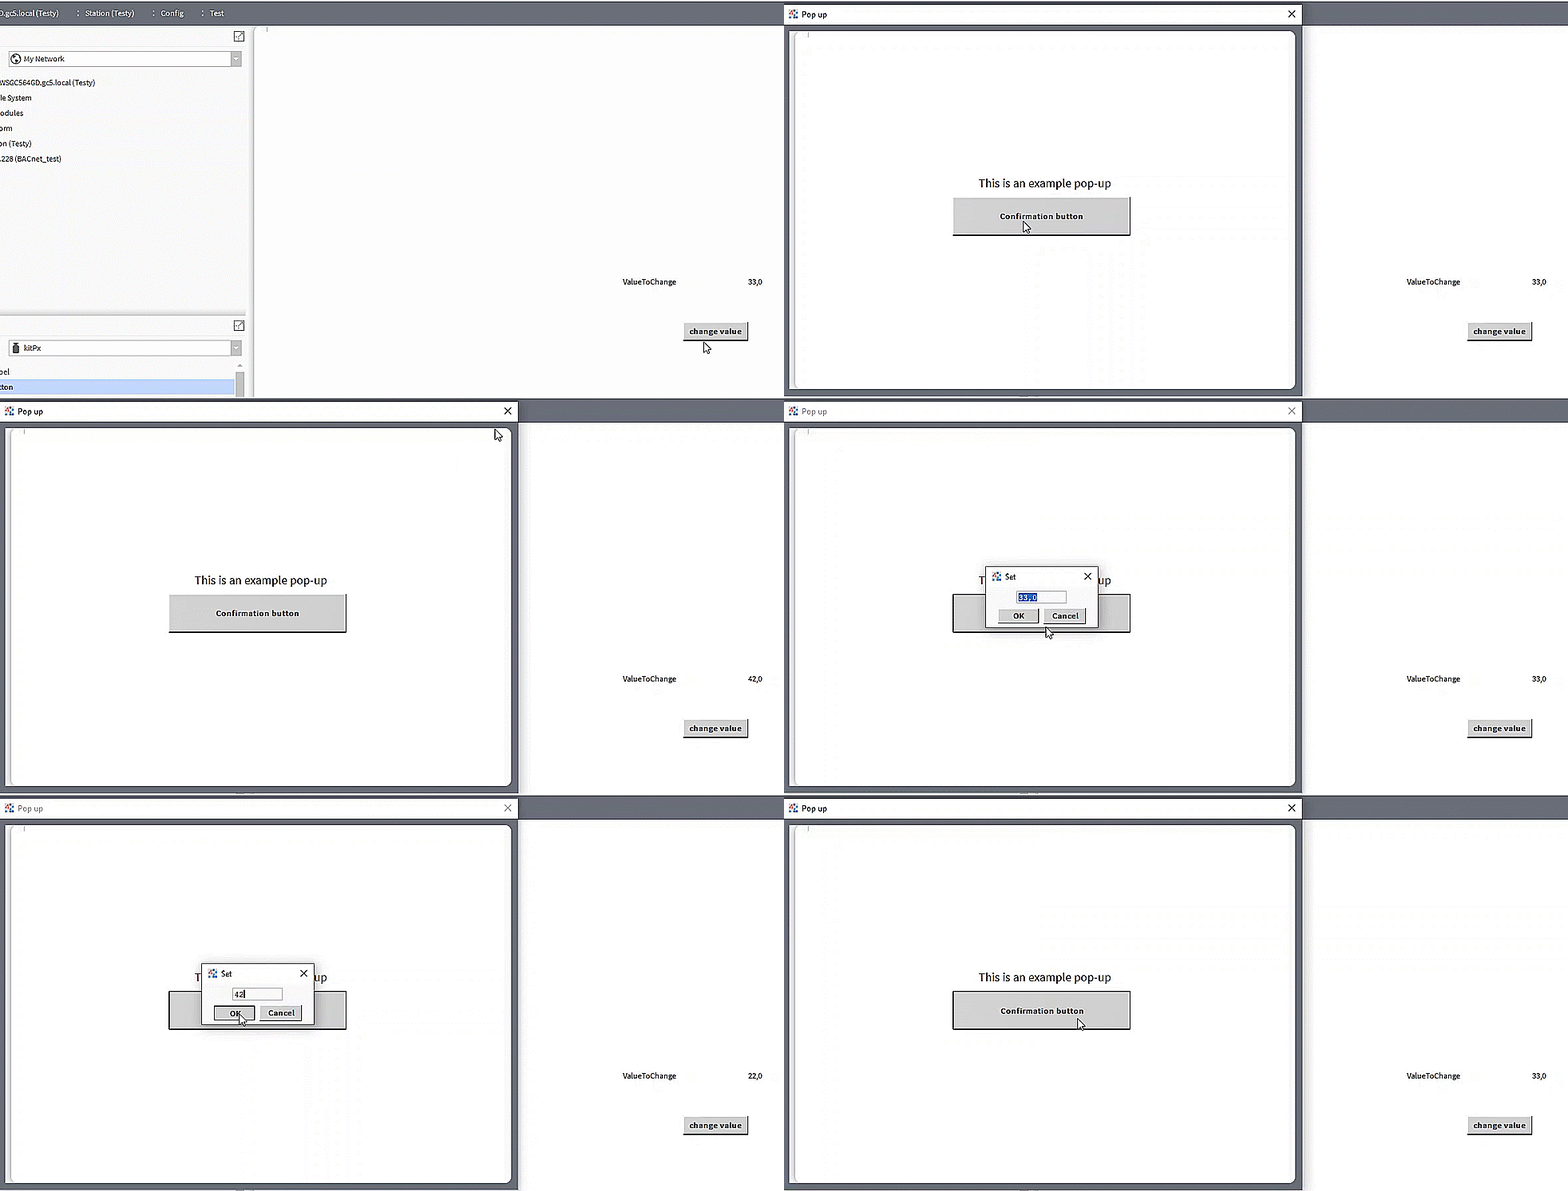
Everything has now been configured. Below are the results of the previously described process.

Animation 4 Sample pop-up window
