The following article describes how to properly compile a module with a css type file and how to add slots to create a custom login page:
-
In the first step, create a new module using the New Module tool. From the top navigation bar, select the Tools->New Module tab.
-
When the window for creating a new module opens, uncheck the Create Lexicon and Create Palette options (if needed, add a lexicon or palette to the module, but it is not required).
-
It is necessary to enter, in the Prefered Symbol window, the symbol of the module in the form of a letter, otherwise the Next button will not activate; further, click Next, then Next, and Finish.
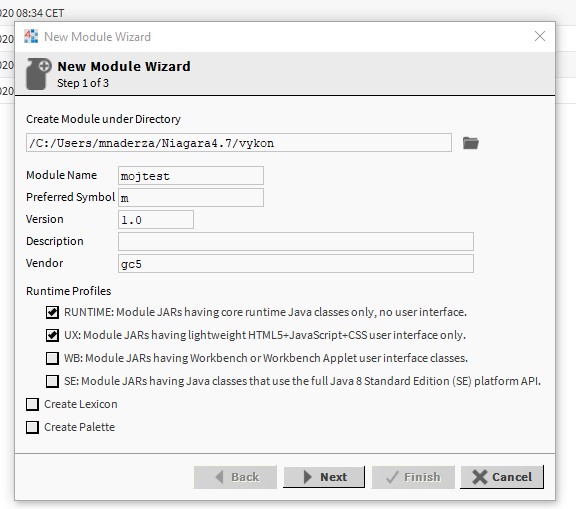
Fig. 1 Step one of creating a new module
-
Then, a window with the created module will open (if not, open it in Workbench C:/Users/…/Niagara4.7/vykon/name_modul).
-
In the next step, go to the location local:|file:~mytest/mytest-ux/src and, under the com folder, place the css file, e.g., src/com/gc5/mycss1.css (the module created for the purpose of this article was named mytest, so in the rest of the publication it will be used to refer to this module).
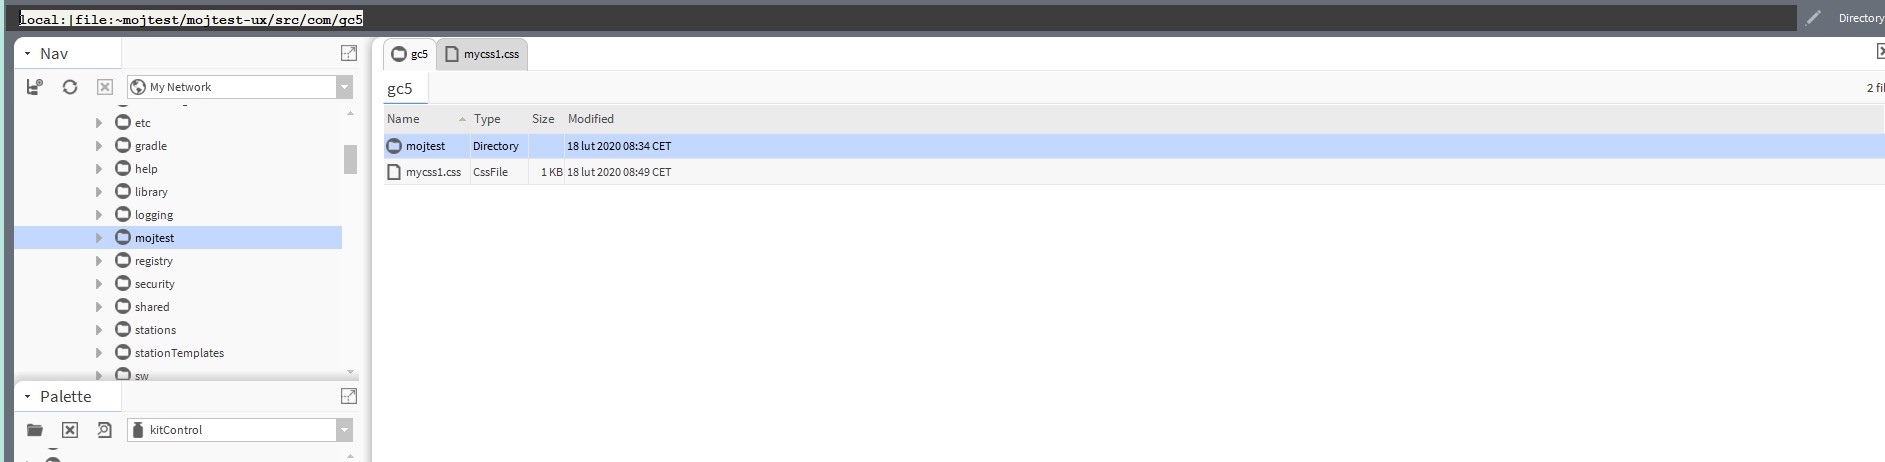
Fig 2. Locating the .css file in src/com/gc5
-
In the local:|file:~mytest/mytest-ux location, open the mojtest-ux.gradle file in the AX Text File Editor view, and then put the following under the dependencies tag:
jar
 {
from(src)
{
include com/gc5/mycss1.css
}
Code 1. Sample contents of the .gradle file
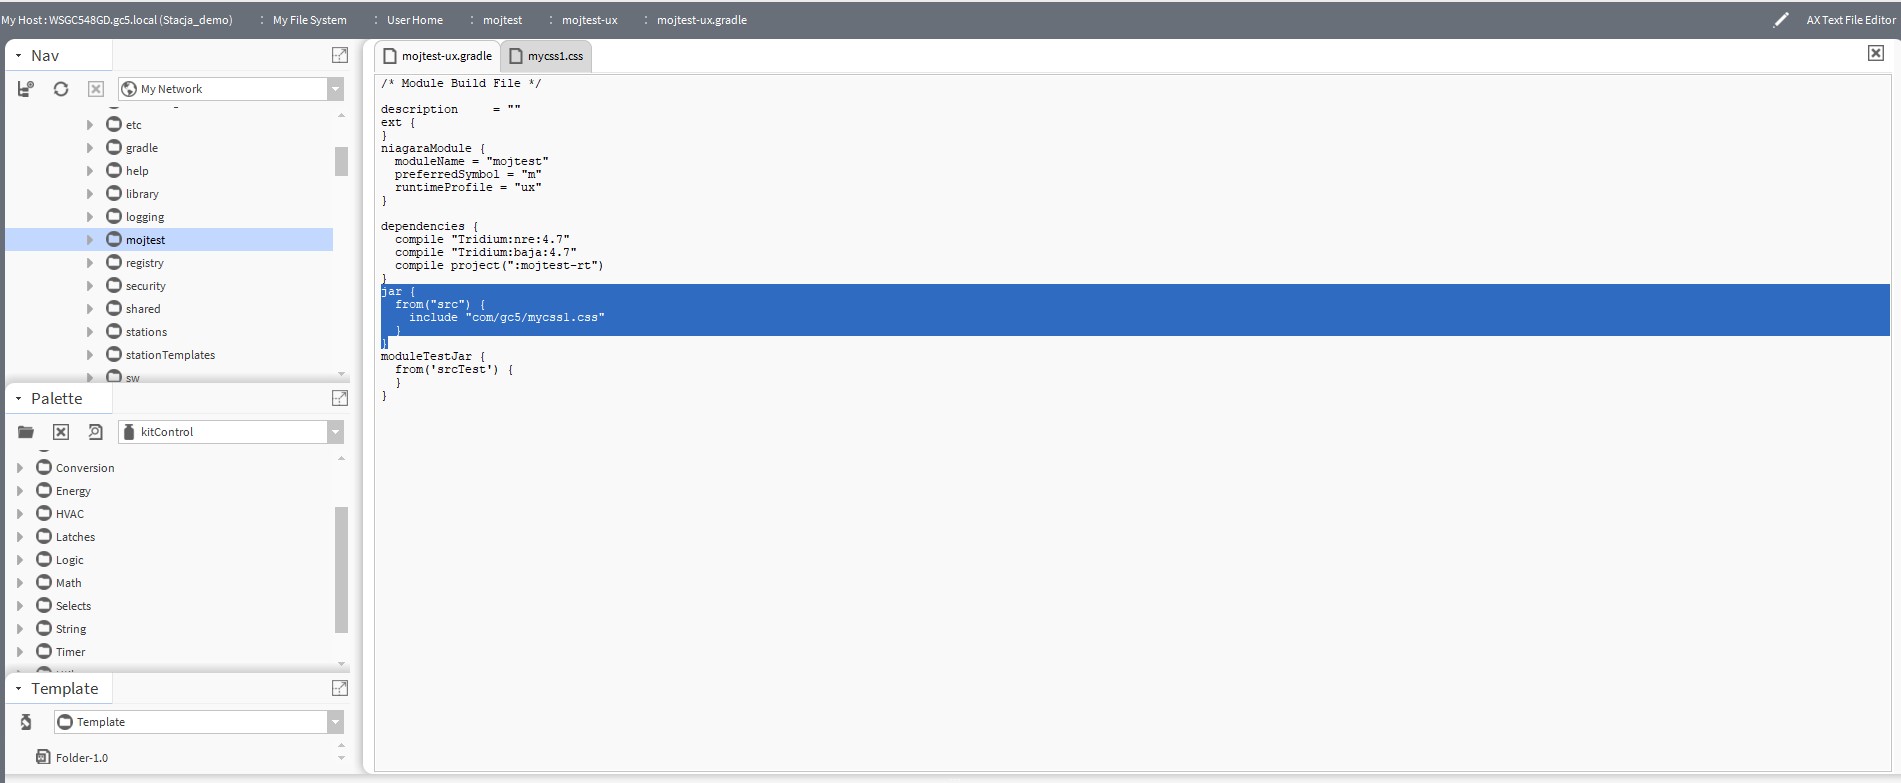
Fig 3. A marking referring to .css in the mojtest-ux.gradle file
-
In the Workbench console, invoke the gradlew jar command (the vykon folder must be open in the console).
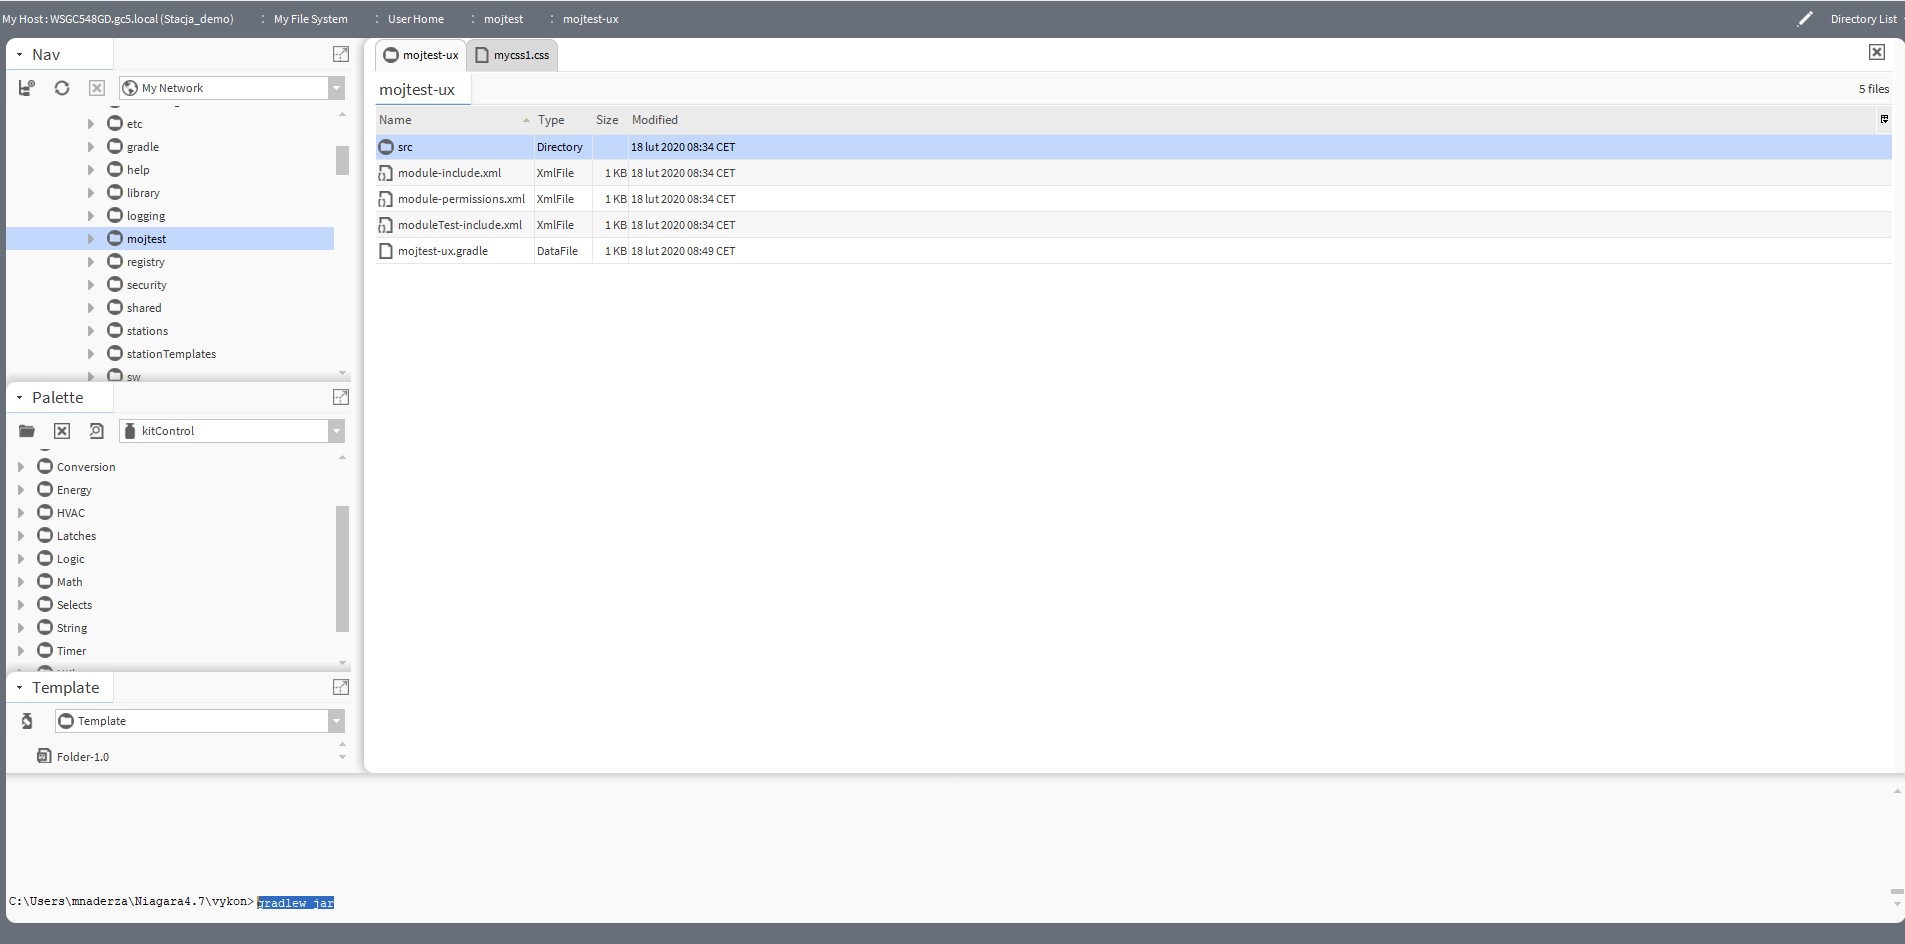
Fig. 4 Invoking the gradlew jar command in the Niagara station
-
The command will compile the module and automatically place it in the modules folder. It will be available to the Supervisor station, while for use in the Niagara controller, it must be installed using Software Manager.
-
In the Config->Services->WebService location, open the AX Slot Sheet view. Then add two slots of type baja:ord with names logo and loginCss (they must be exactly the same).
-
Open the AX Property Sheet view of the WebService component. In the ord slots of the logo and loginCss components, provide a link to the image that will serve as the logo and the path to the css file, e.g., module://mytest/com/gc5/mycss1.css.
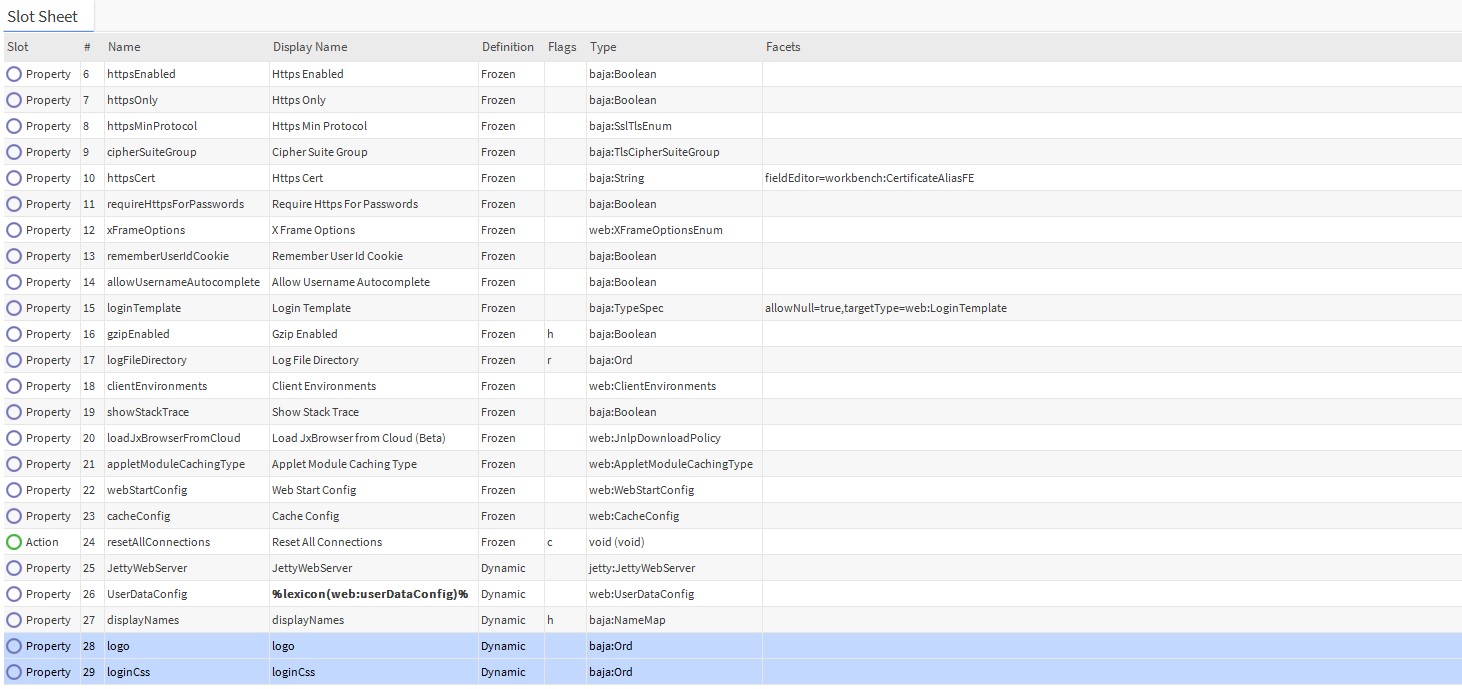
Fig 5. Correctly added logo and loginCss slots
NOTE: After compiling and automatically adding the jar file in the appropriate location, restart Workbench.
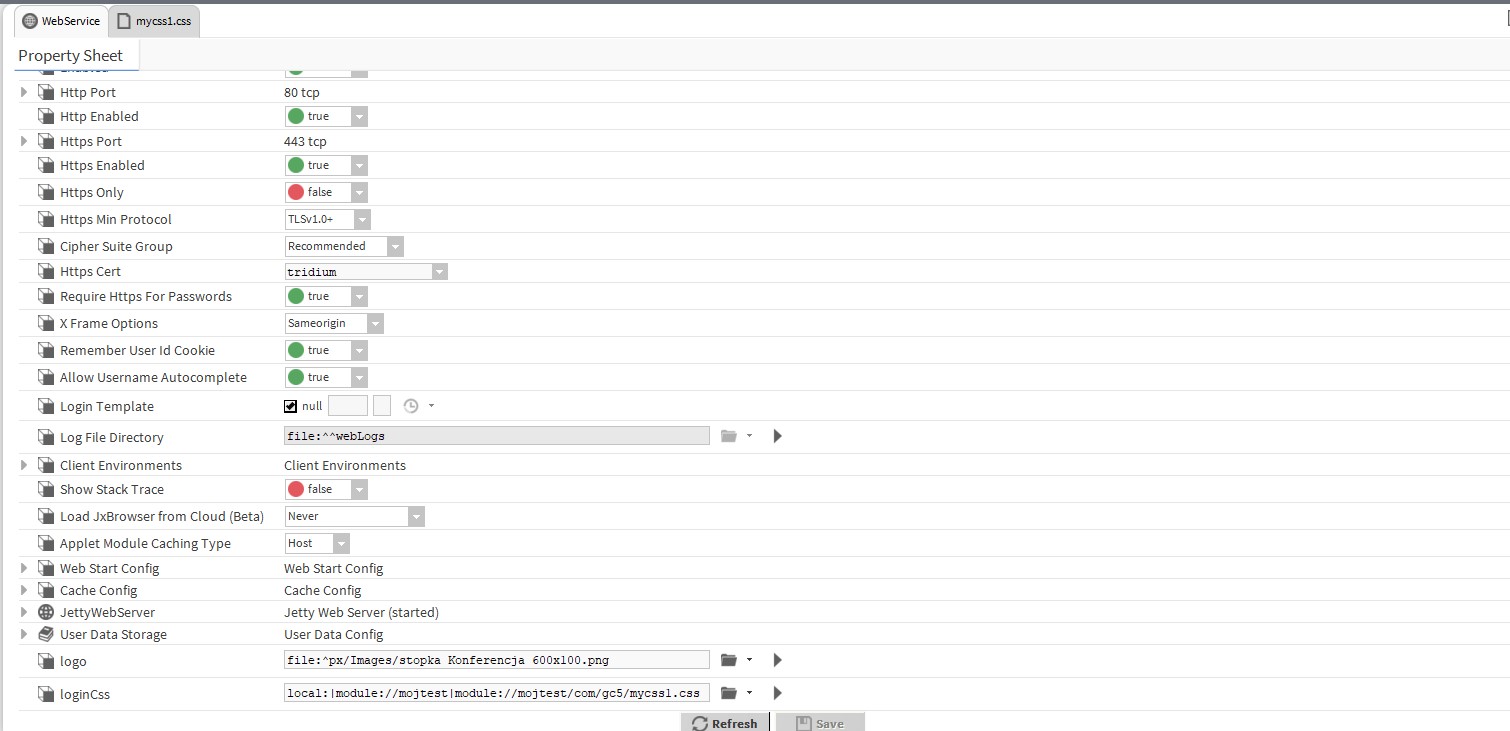
Fig. 6 Slots logo and loginCss with added paths to the corresponding files
-
In addition, it is possible to add to the Config component in the AX Slot Sheet view a slot of type Baja:string named Display Name, and enter there the name to be displayed at login.
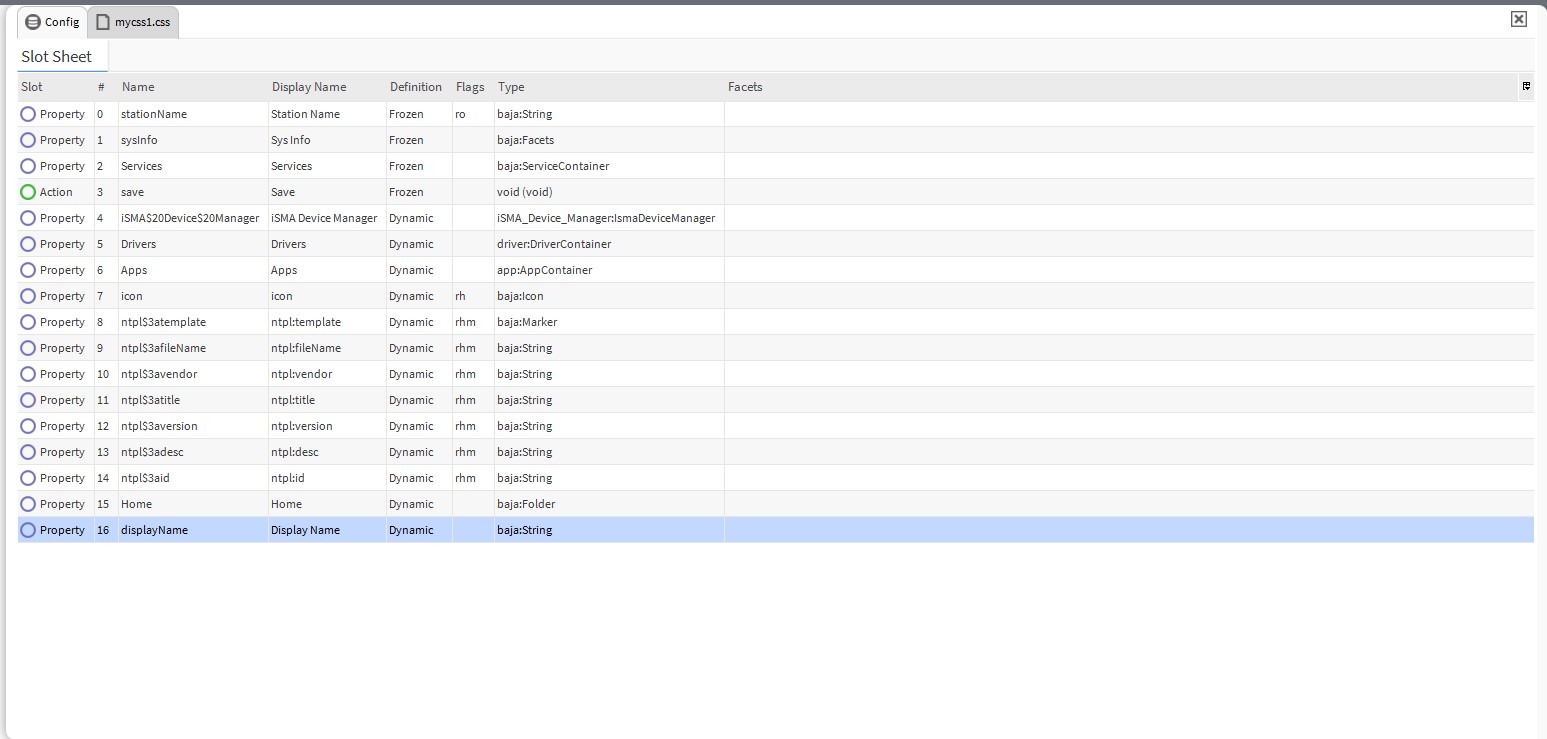
Fig. 7. Added the displayName slot

Fig. 8 The Display Name slot with entered text
-
The end result should be as below:
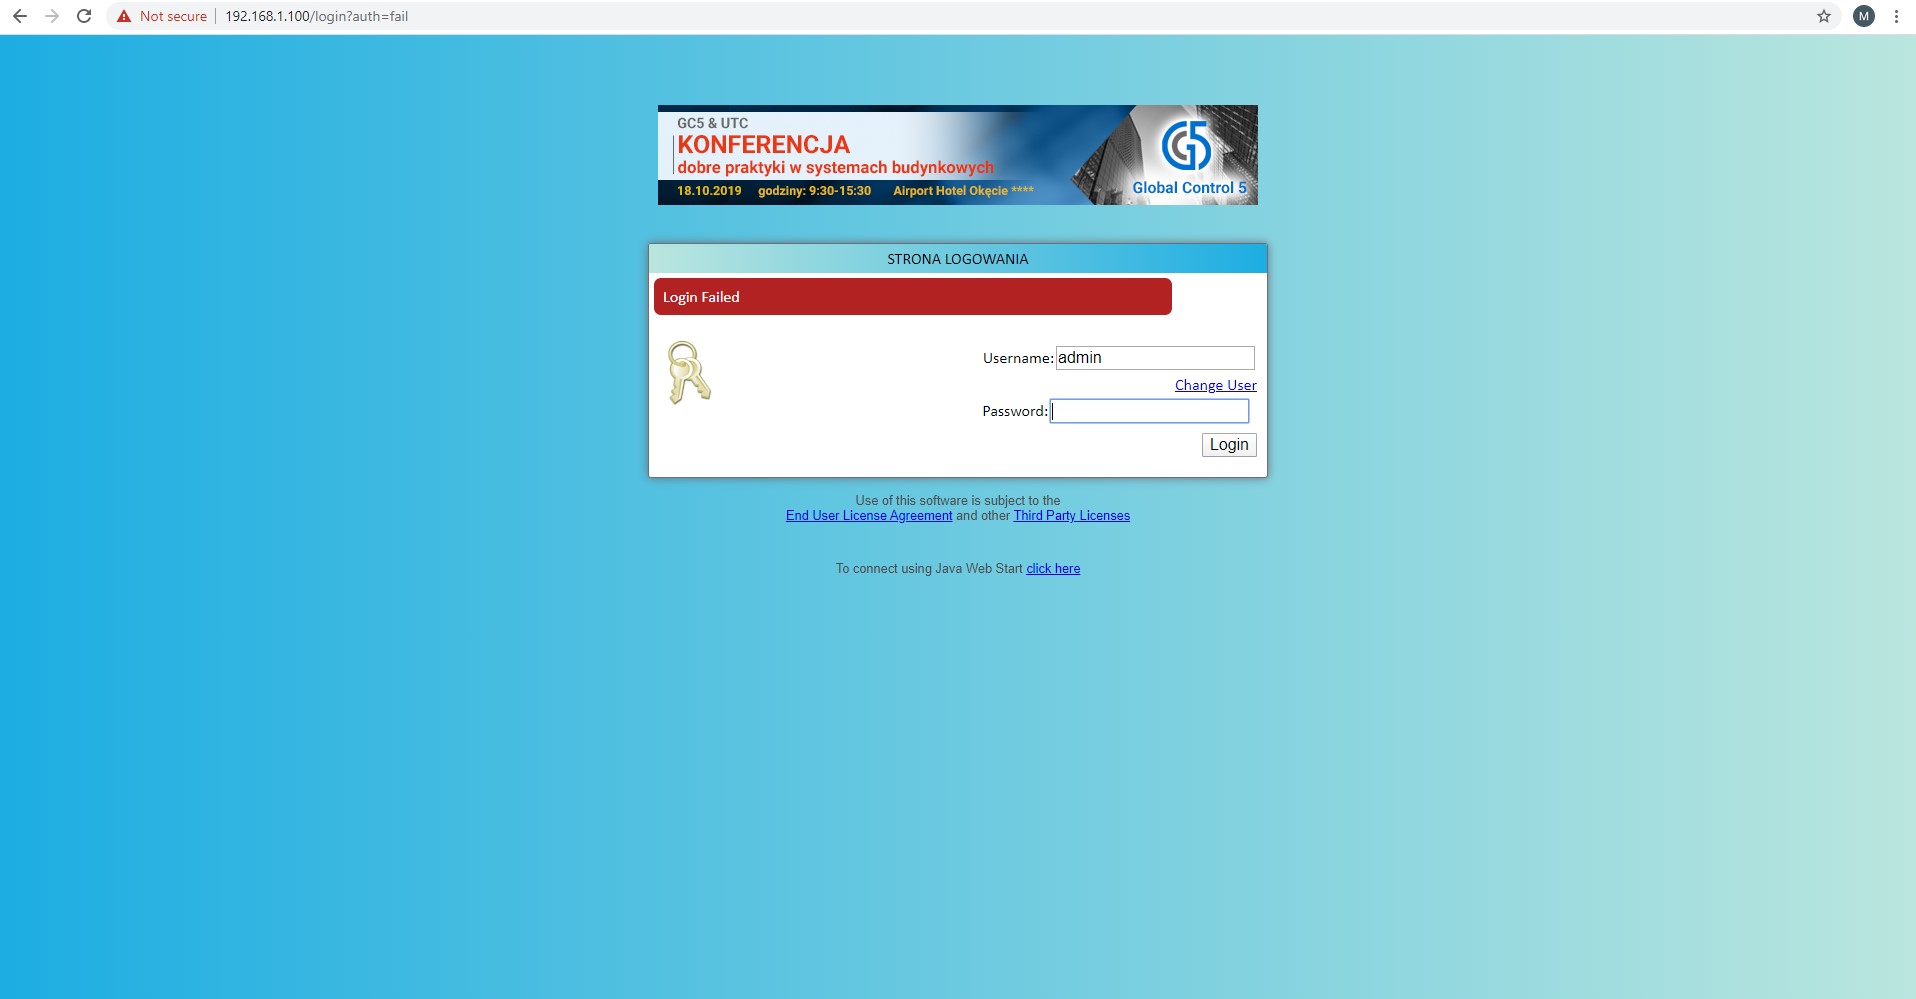
Fig. 9 Custom login page