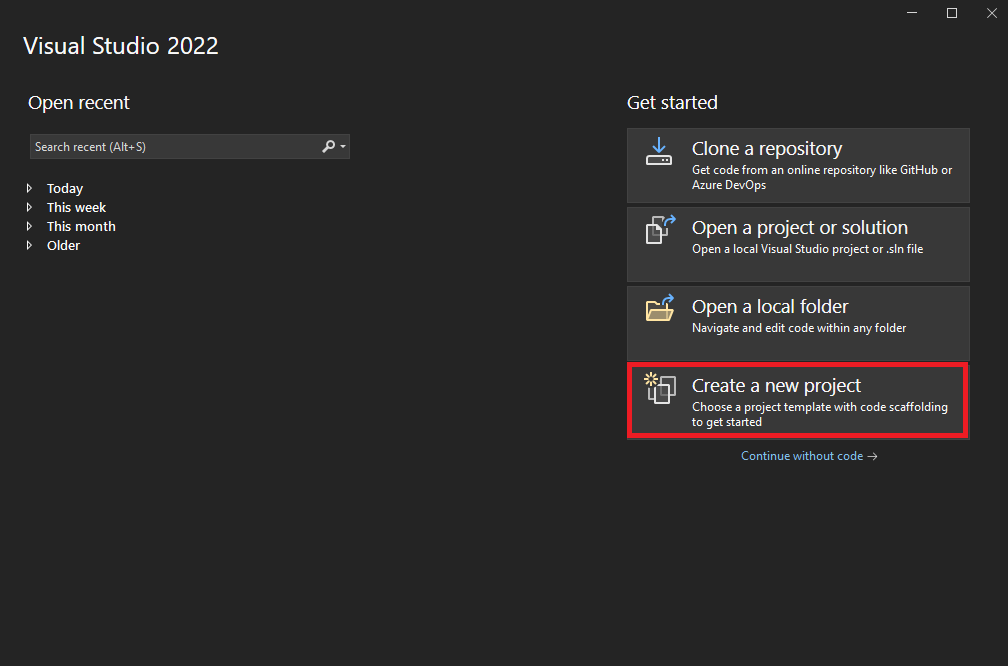
The next step is to create a new project in the Visual Studio:
-
Firstly, log in to https://sdk.isma.lan and change the password to GitLab (otherwise, there might occur a problem with cloning the SDK repository from GitLab).
-
Download the SDK source code: https://sdk.isma.lan/framework.sdk/framework.sdk.git (git clone https://sdk.isma.lan/framework.sdk/framework.sdk.git for Git Bash client).
-
Run the Visual Studio.
-
Choose a “Create a new project” option.
-
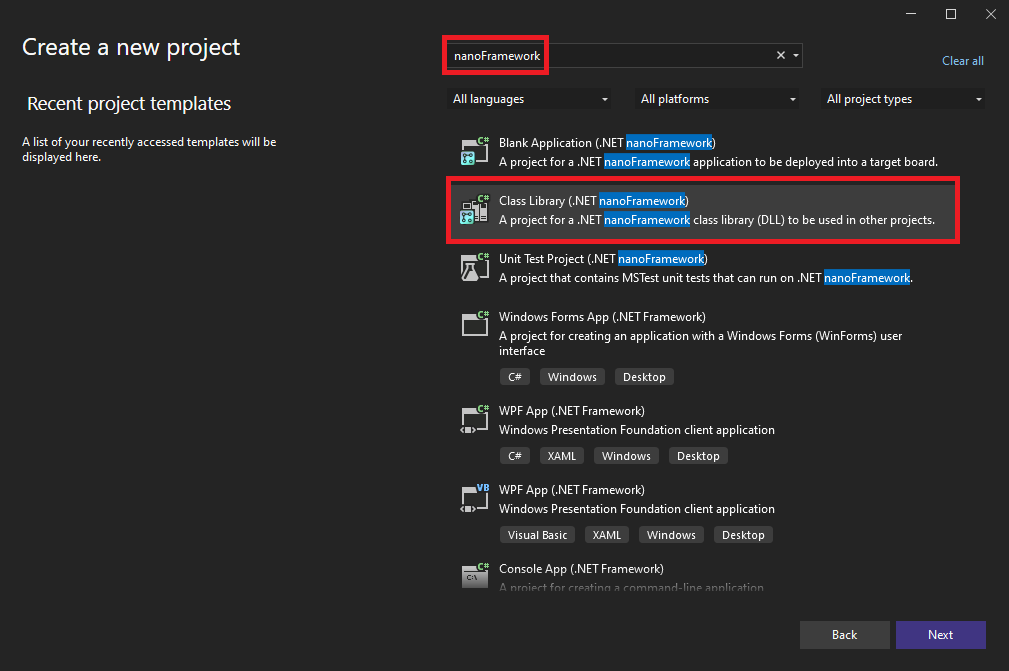
Type nanoFramework in a search box and choose “Class library (.NET nanoFramework). Click “Next”.
-
Configure a new project’s basic properties:
-
In the Project Name bar, type a name of the project. Make sure to set the project name according to a pattern: ‘nameOfCompany_Math”, for example, in case of iSMA CONTROLLI: 'iSMA_Math’.
-
In the Location bar, select a desired location.
-
Leave the “Place solution and project in the same directory” unchekced. Click “Create”.
-

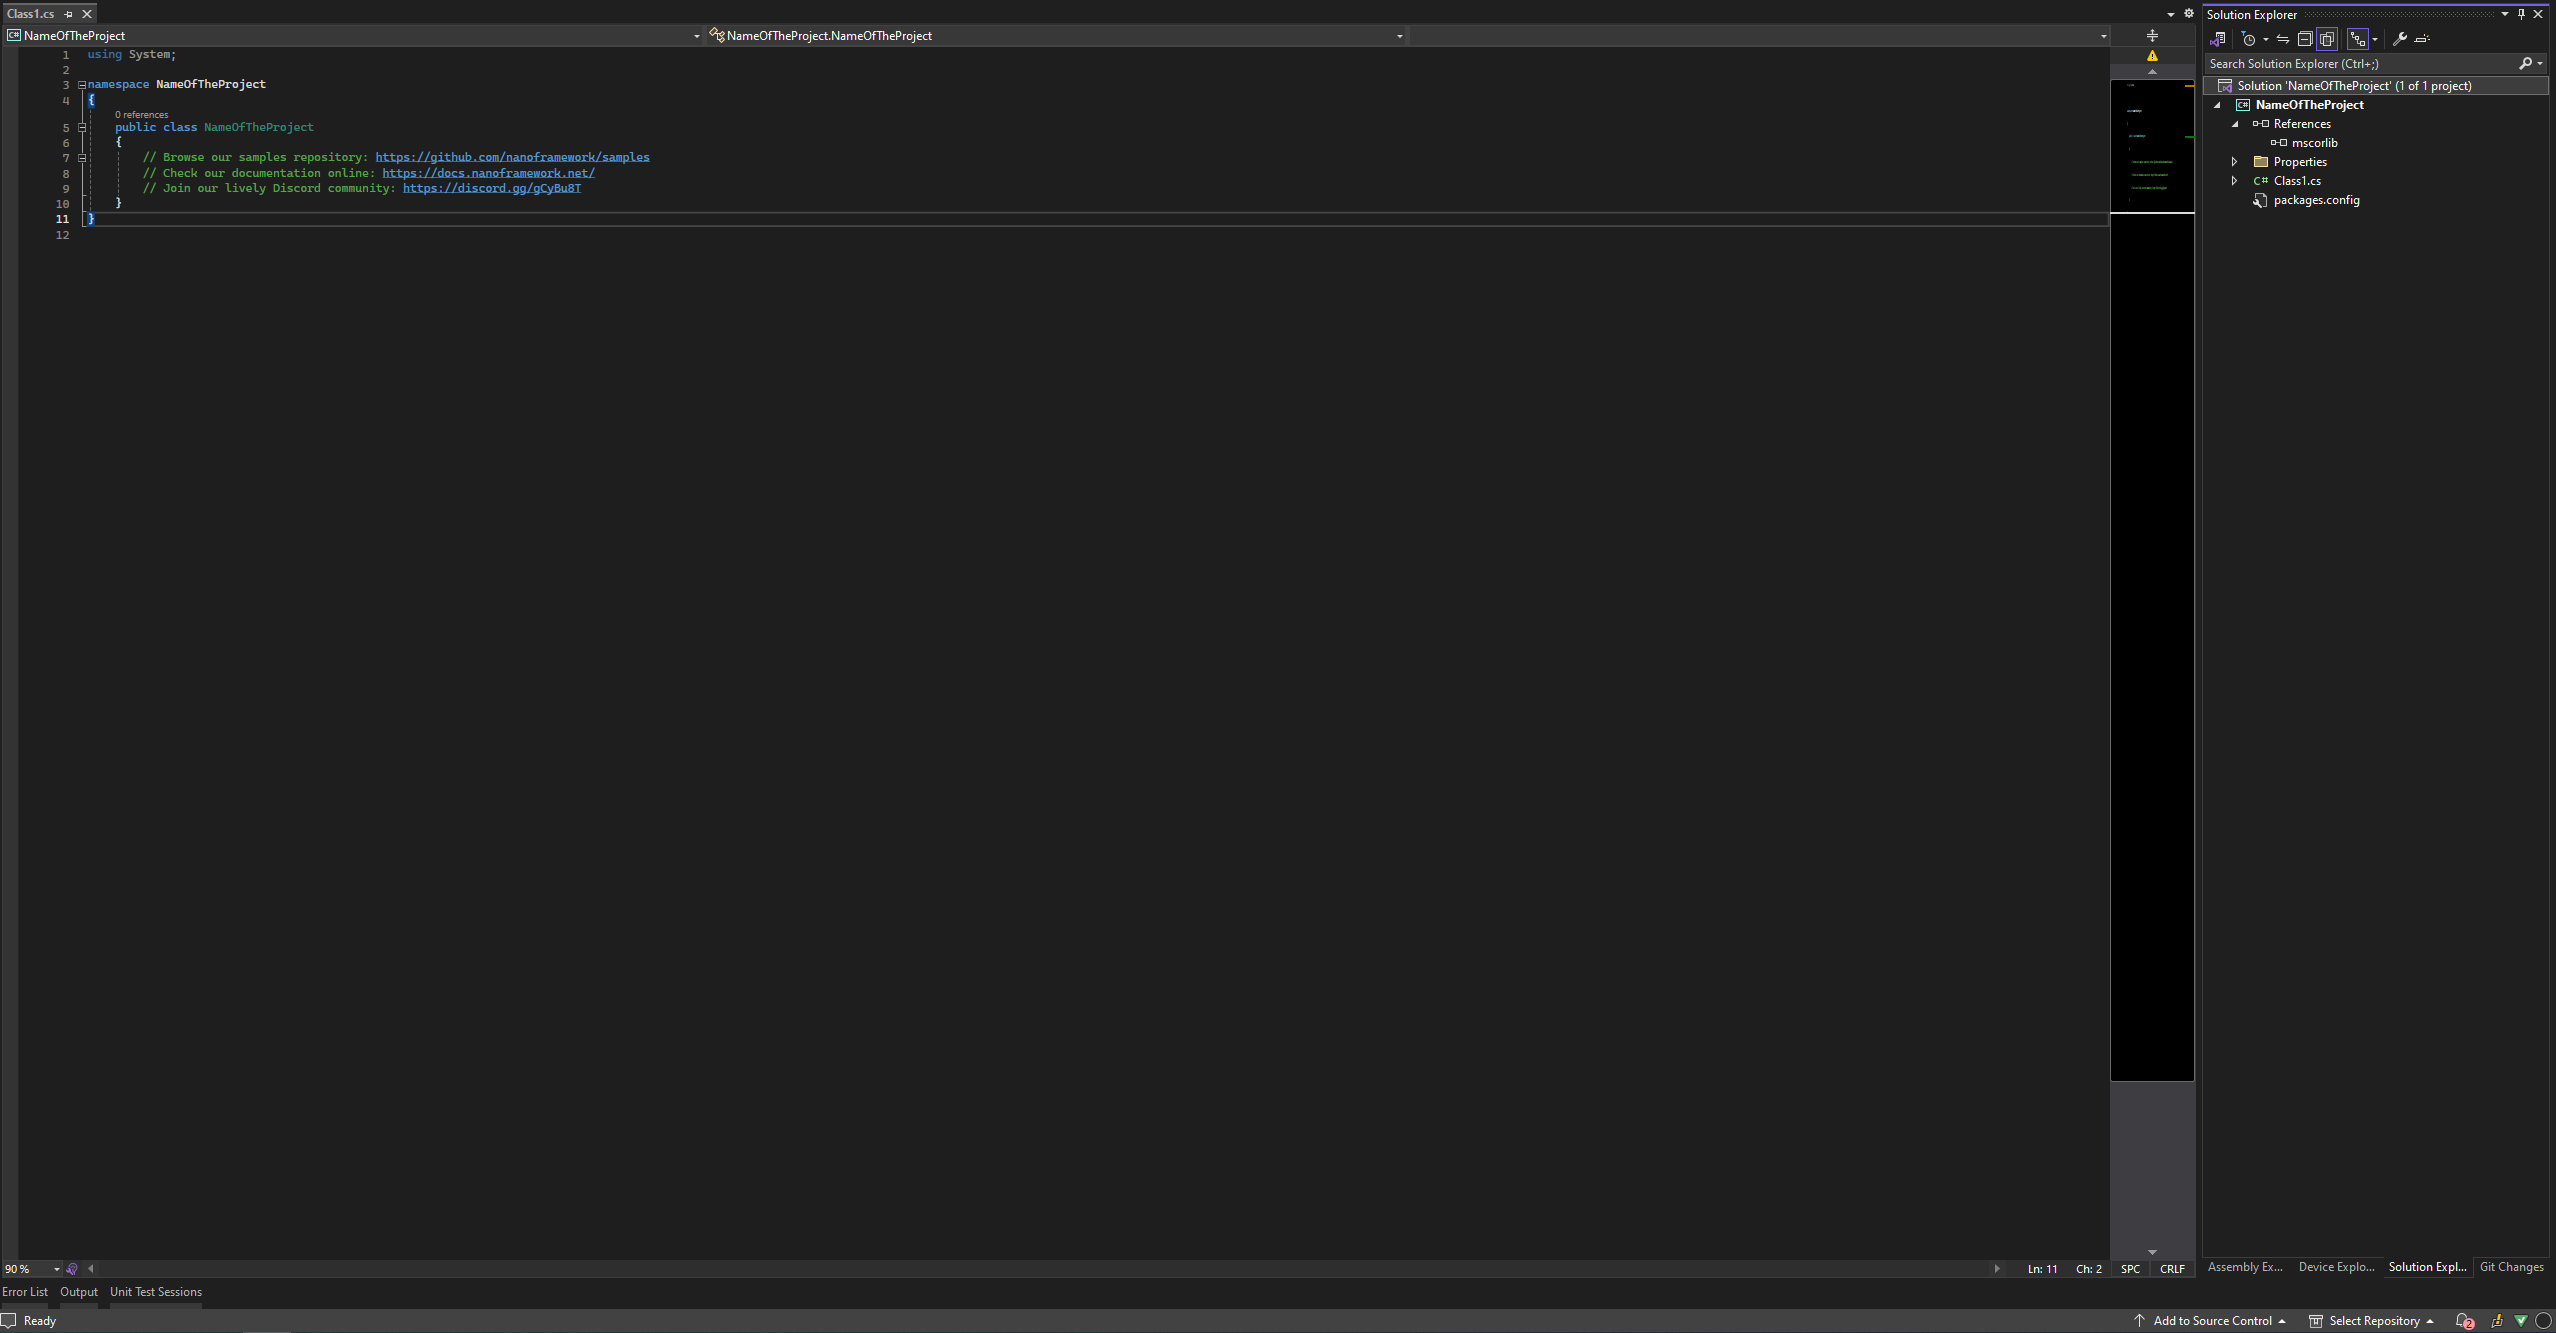
The new project will be started and it will consist of a solution with single project attached. The project will only have one class called “Class1.cs”
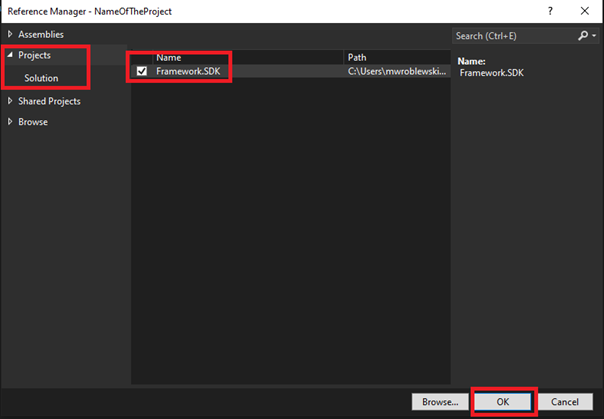
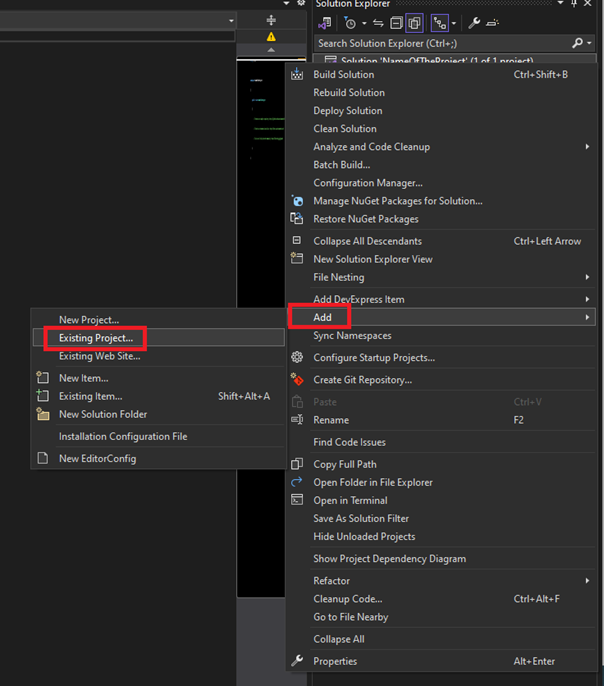
Now, it is required to reference the SDK source code:
-
Right click on Solution, choose Add and Existing Project.
-
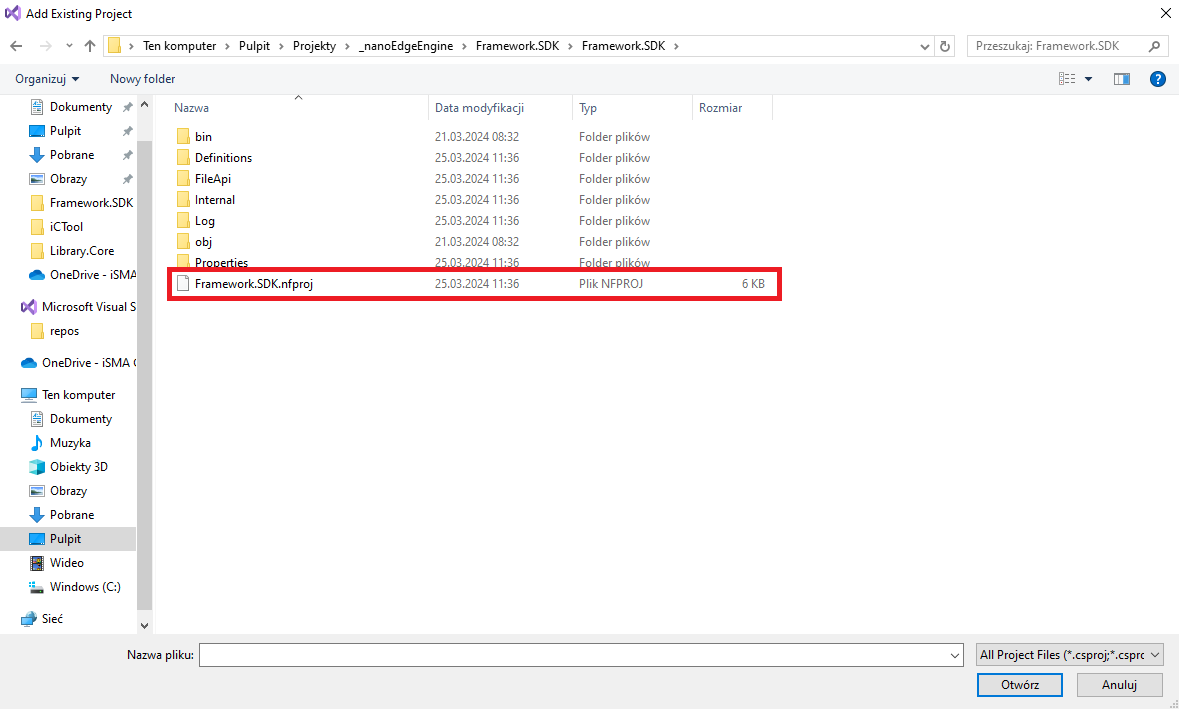
Navigate to the folder containing the source code of SDK and choose Framework.SDK.nfproj file. Click Open.
-
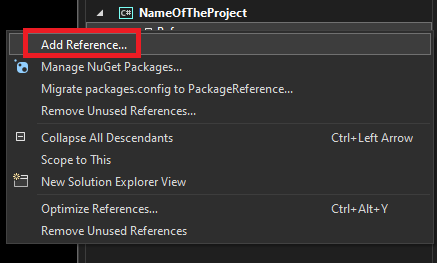
Right click on References under the created project and choose Add Reference.
-
In the Reference Manager, choose Projects and select Framework.SDK. Click OK.