This document describes in a few steps how to start displaying 'PX' views from the iSMA-B-MAC36NL controller station in the HMI panel with HDMI interface with the auto-login setting.
-
First, connect the USB and HDMI cables to the iSMA-B-MAC36NL controller, derived from the HMI panel with the HDMI interface.
-
Then power the panel and then the controller.
-
After iSMA-B-MAC36NL starts, log in to the platform, go to the 'Software Manager' and install the 'iSMA_HDMI-rt' module.
-
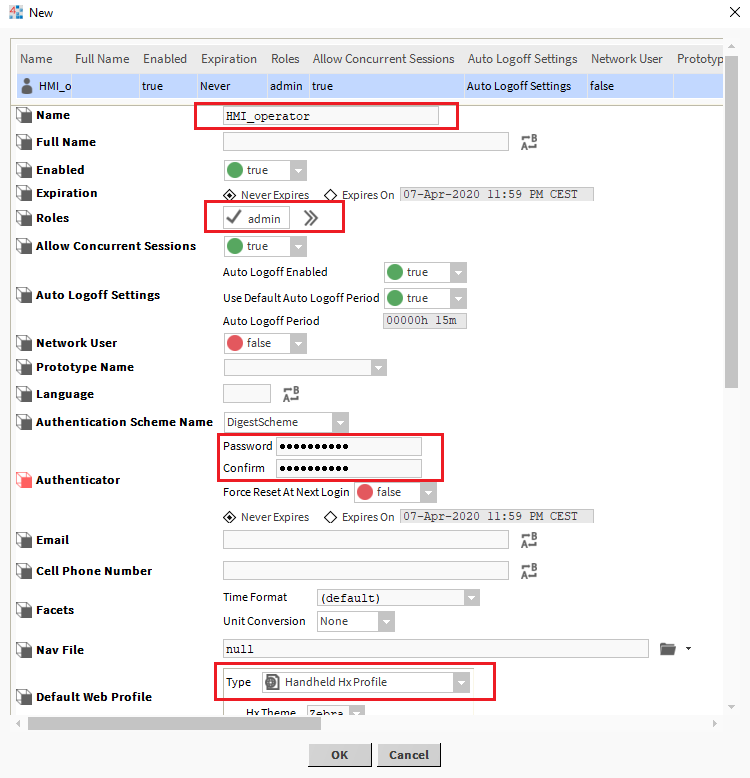
After the correct installation, log in to the station, go to the 'Config/Services/UserService' location, and add the user to use the HMI panel. First of all, set its name, assign the appropriate role, give it a password and change the 'Default Web Profile' to the value 'Handheld Hx Profile'.

Picture 1. Configuration of the user being the operator of the HMI panel.
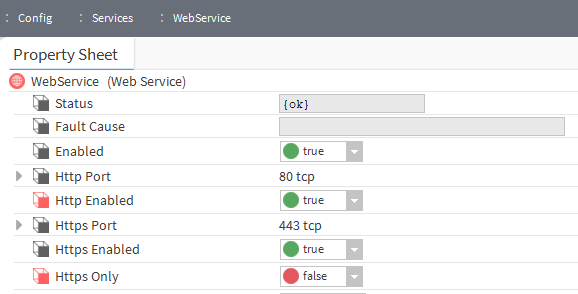
5. The next step is to launch port 80 (HTTP). To do this, go to the 'Config/Services/WebService' location and change the 'Http Enabled' slot values to 'true' and 'Https Only' to 'false' and save the settings with the 'Save' button.

Picture 2. Configuration of the 'WebService' service.
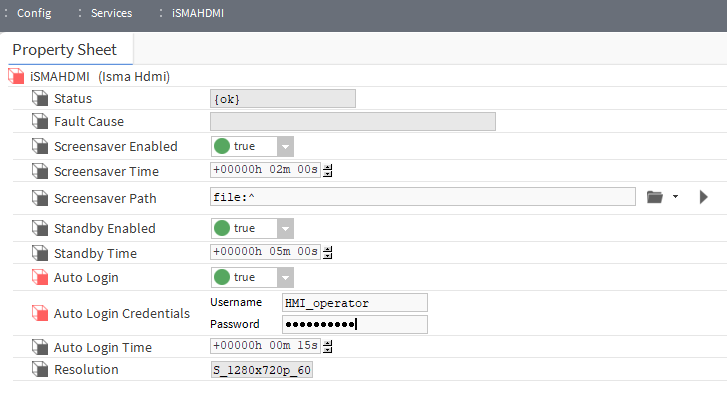
6. In the next step, in the 'Config/Services' location, add (by 'Drag&Drop') the 'iSMAHDMI' component from the 'iSMA_HDMI' palette, and then run it in the 'AX Property Sheet' view.
7. In this view, change the value of the 'Auto Login' slot to 'true' and in the 'Auto Login Credentials' slot, enter the login data of the user intended to operate the HMI panel.

Picture 3. Configuration of automatic login in the 'iSMAHDMI' service.
8. After saving the settings, the HMI panel with HDMI interface will automatically log in to the entered user data and open the default (for the user) view.
More detailed information on the use of iSMA-B-MAC36NL with HMI panel with HDMI interface can be found in the MAC36NL - HDMI Panels - Best practices document.
.
