Warning!
This section applies to the Touch Point 2.0, Touch Point ONE 2.0, Touch Point VAV 2.0, and Touch Point L&B 2.0 series. The Touch Point Network Sensor 2.0 series is not equipped with a display or any control buttons.
Basic Functionalities
Temperature Setpoint Control
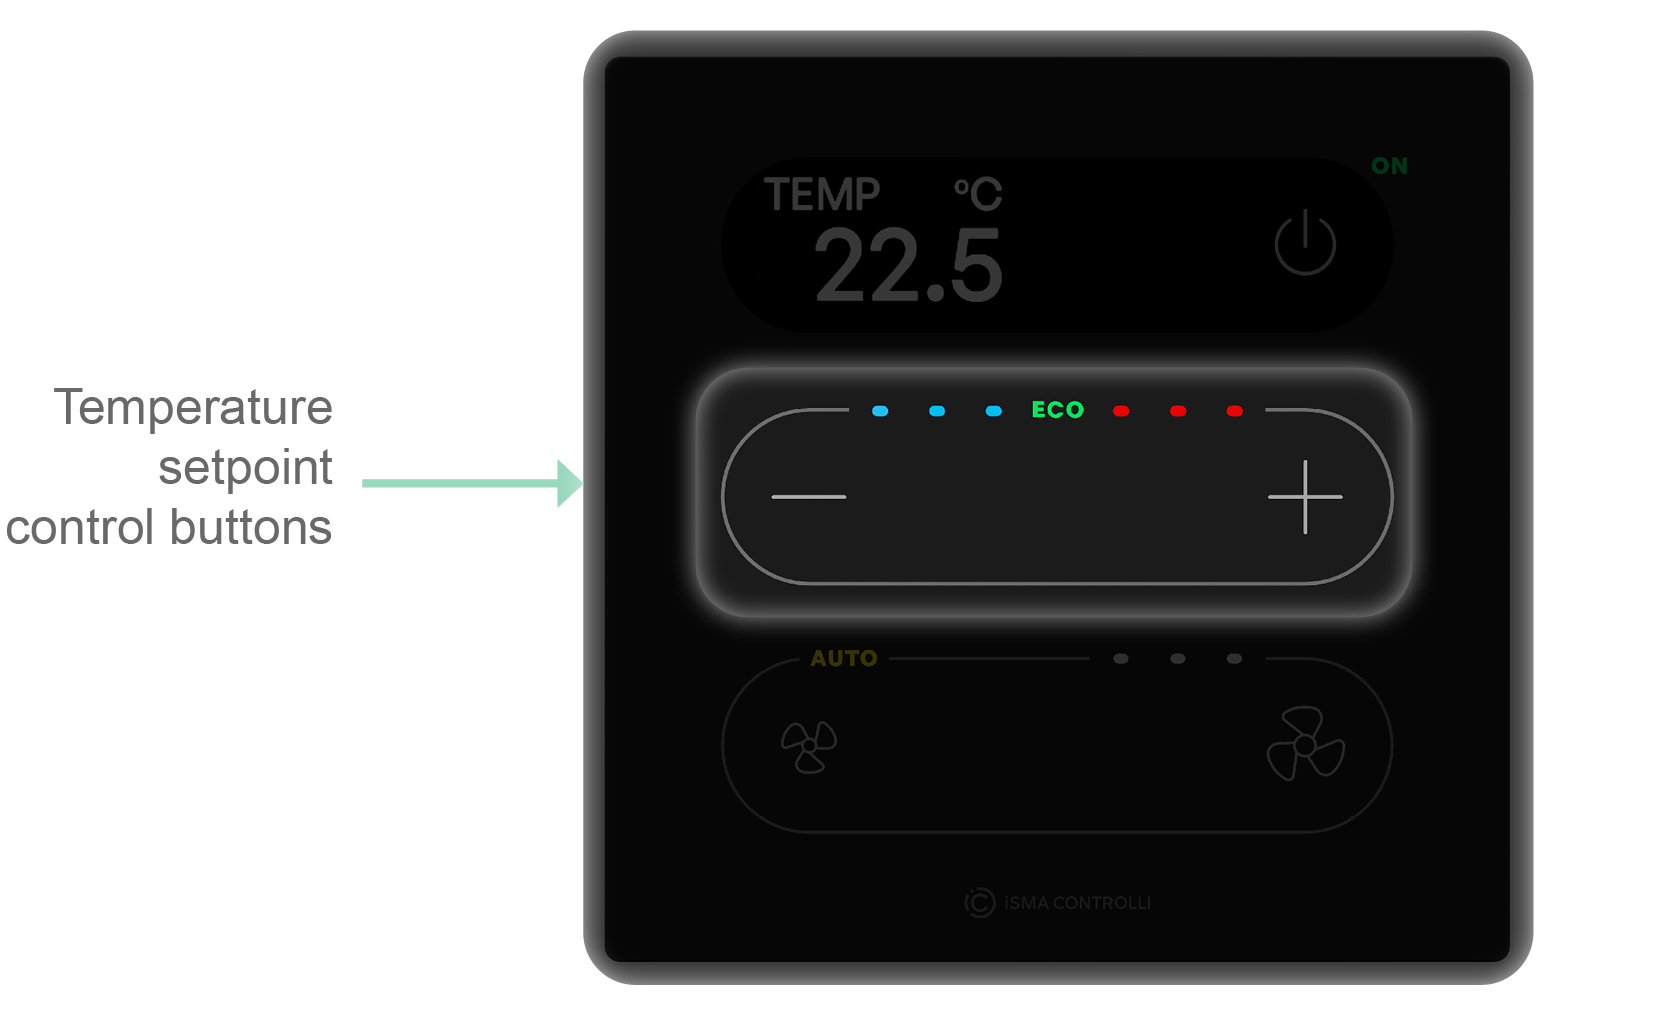
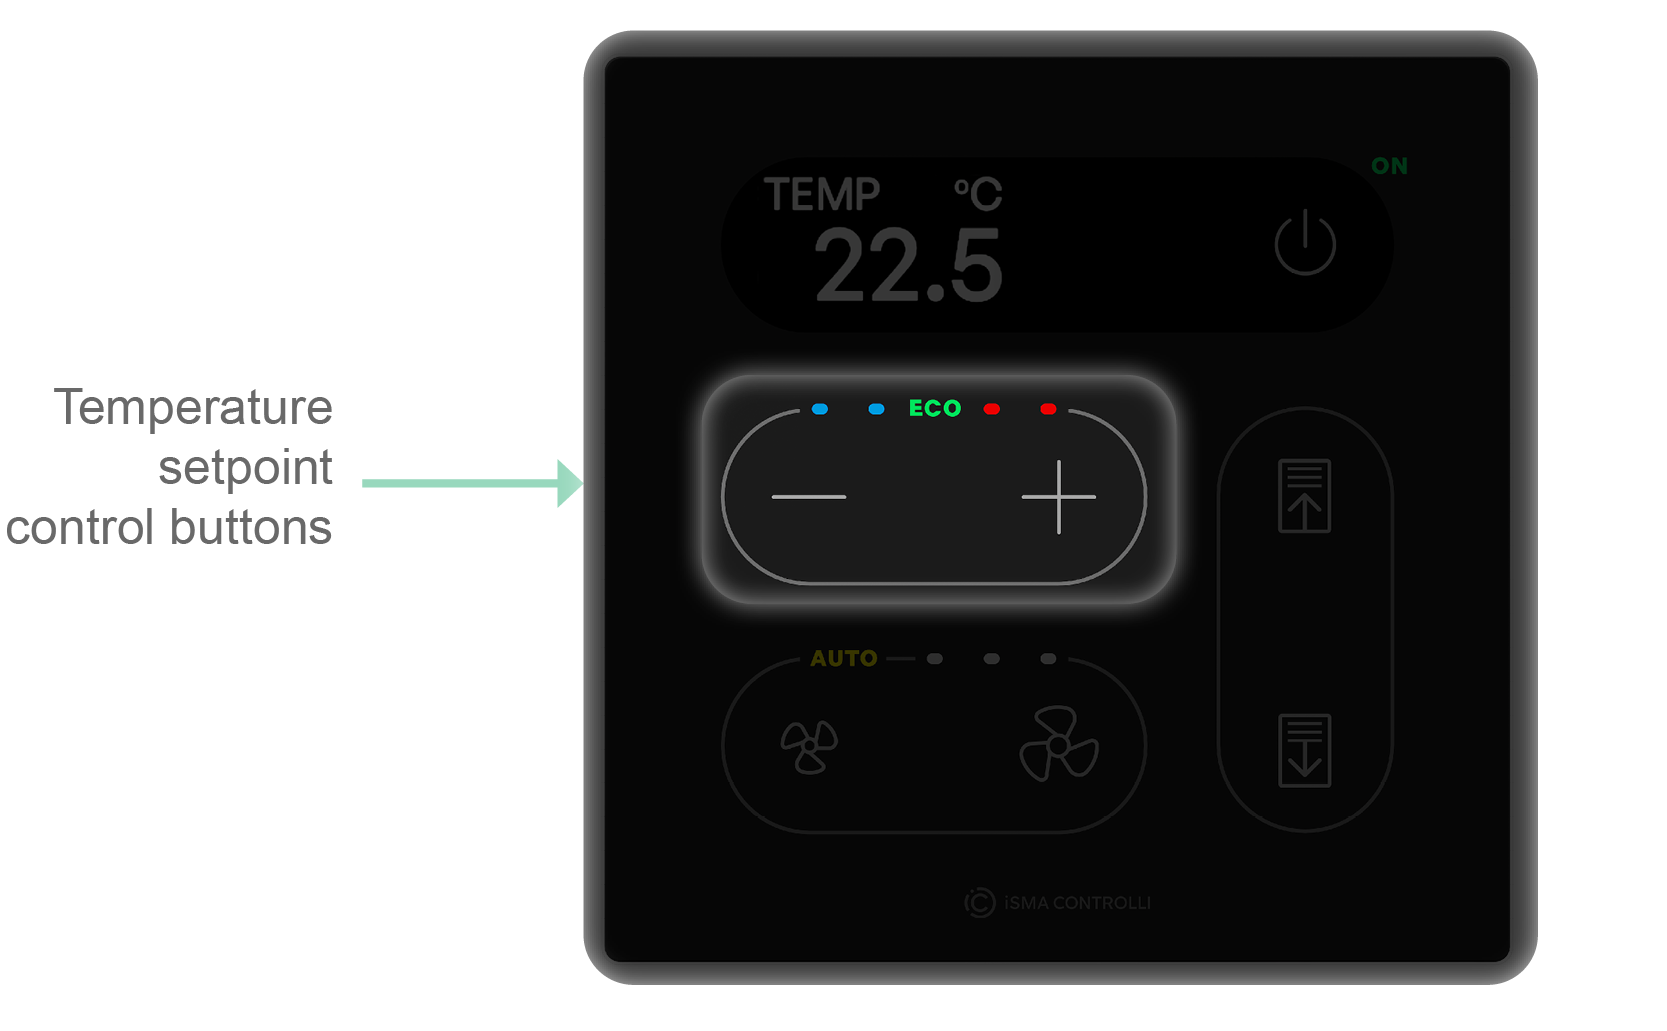
Touch Point 2.0, Touch Point ONE 2L/1B 2.0, Touch Point VAV 2.0
In order to change a temperature setpoint on a touch panel, use the plus (+) and minus (–) buttons:
-
1 press of a plus button enters the temperature setpoint editing mode;
-
press a plus button (single press or long press) to increment the temperature setpoint by a step value set in the SETPOINT_STEP register/object (decimal address: 1507);
-
press a minus button (single press or long press) to decrement the temperature setpoint by a step value set in the SETPOINT_STEP register/object (decimal address: 1507);
-
stop pressing buttons when the required value is reached; the display will end the editing mode after a time set in the EXIT_EDIT_TIME register/object (decimal address: 223).
An unavailable action is signalized by a double beep.
Fan Control
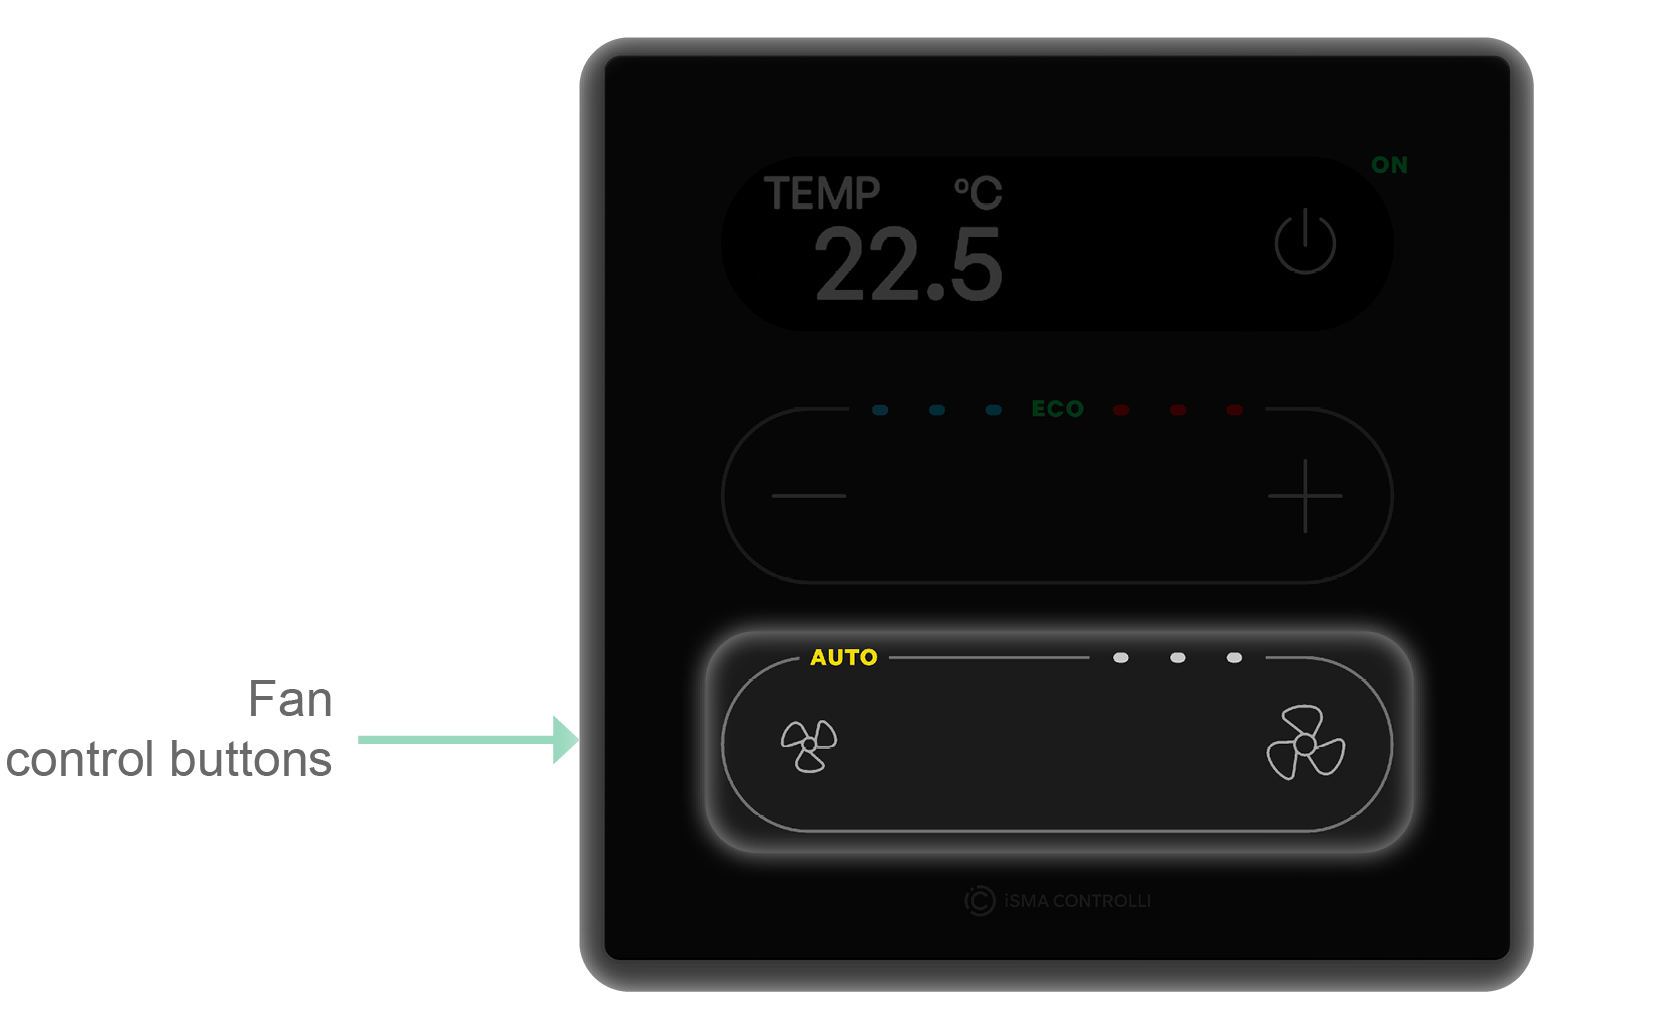
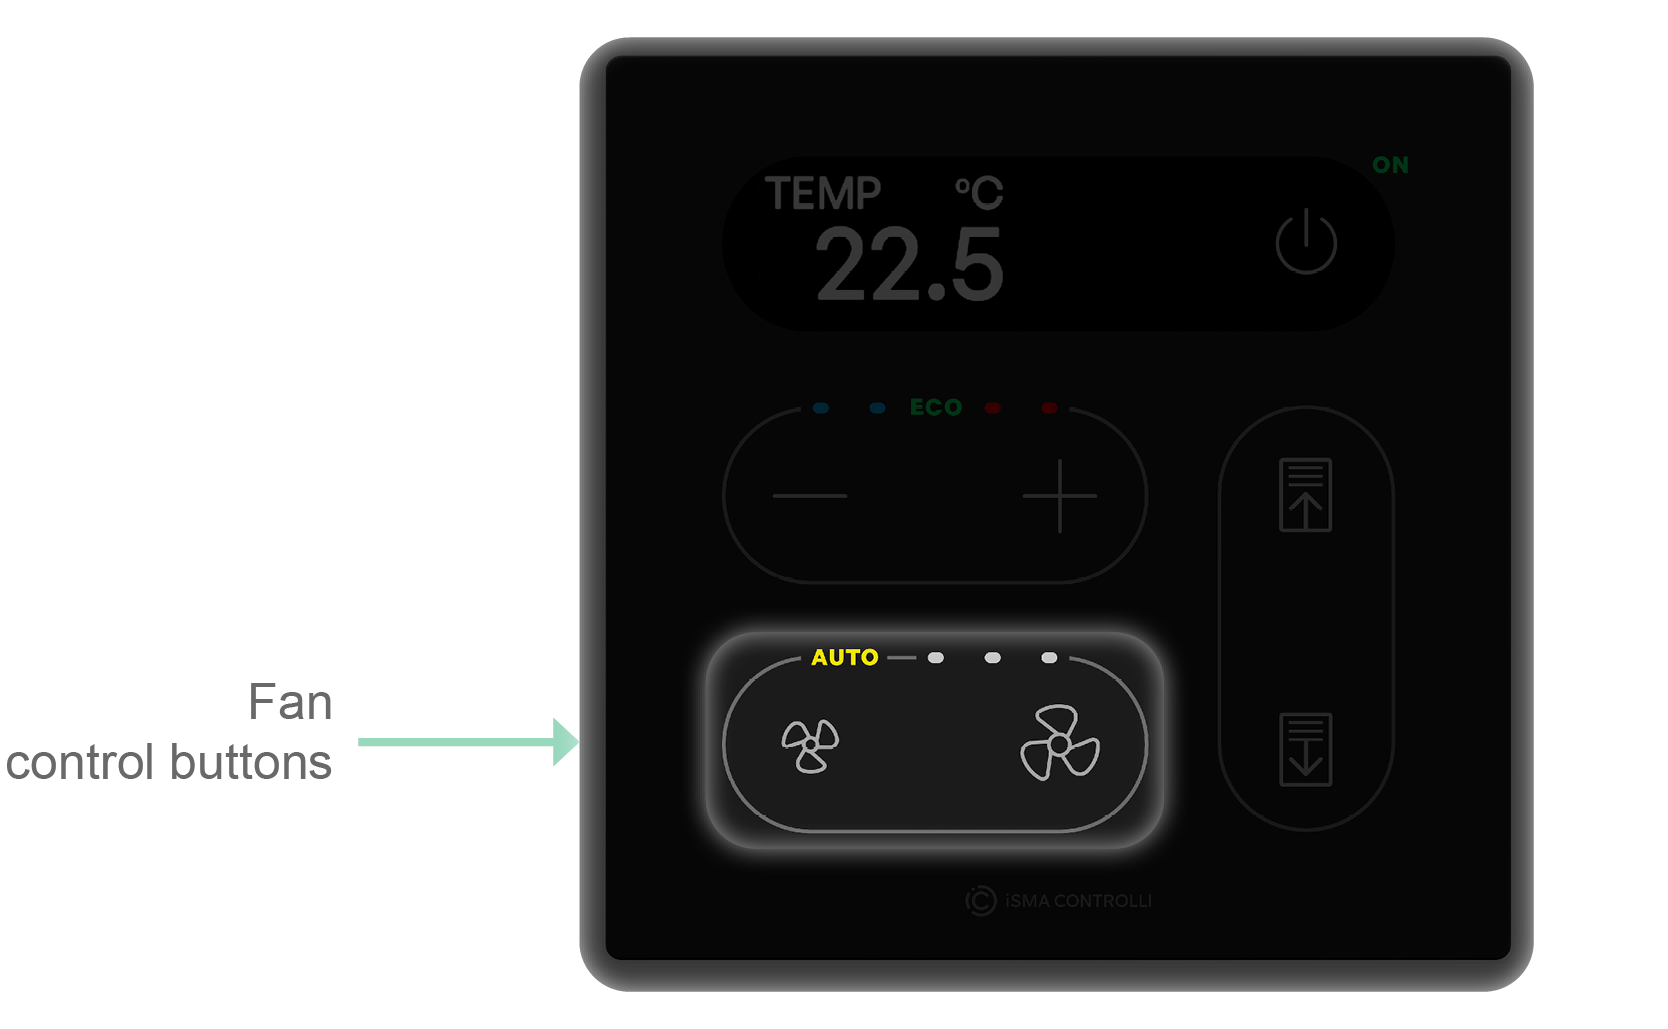
Touch Point 2.0, Touch Point ONE 2L/1B 2.0
In order to change a fan mode on a touch panel, use the small fan and big fan buttons. Pressing either of the buttons changes the fan mode to one of the available:
-
off (no icon on a fan control panel is lit);
-
1-speed manual mode (first left circle icon on a fan control panel is lit);
-
2-speed manual mode (two circle icons on a fan control panel are lit);
-
3-speed manual mode (three circle icons on a fan control panel are lit);
-
auto (AUTO icon on a fan control panel is lit).
An unavailable action is signalized by a double beep.
Occupancy
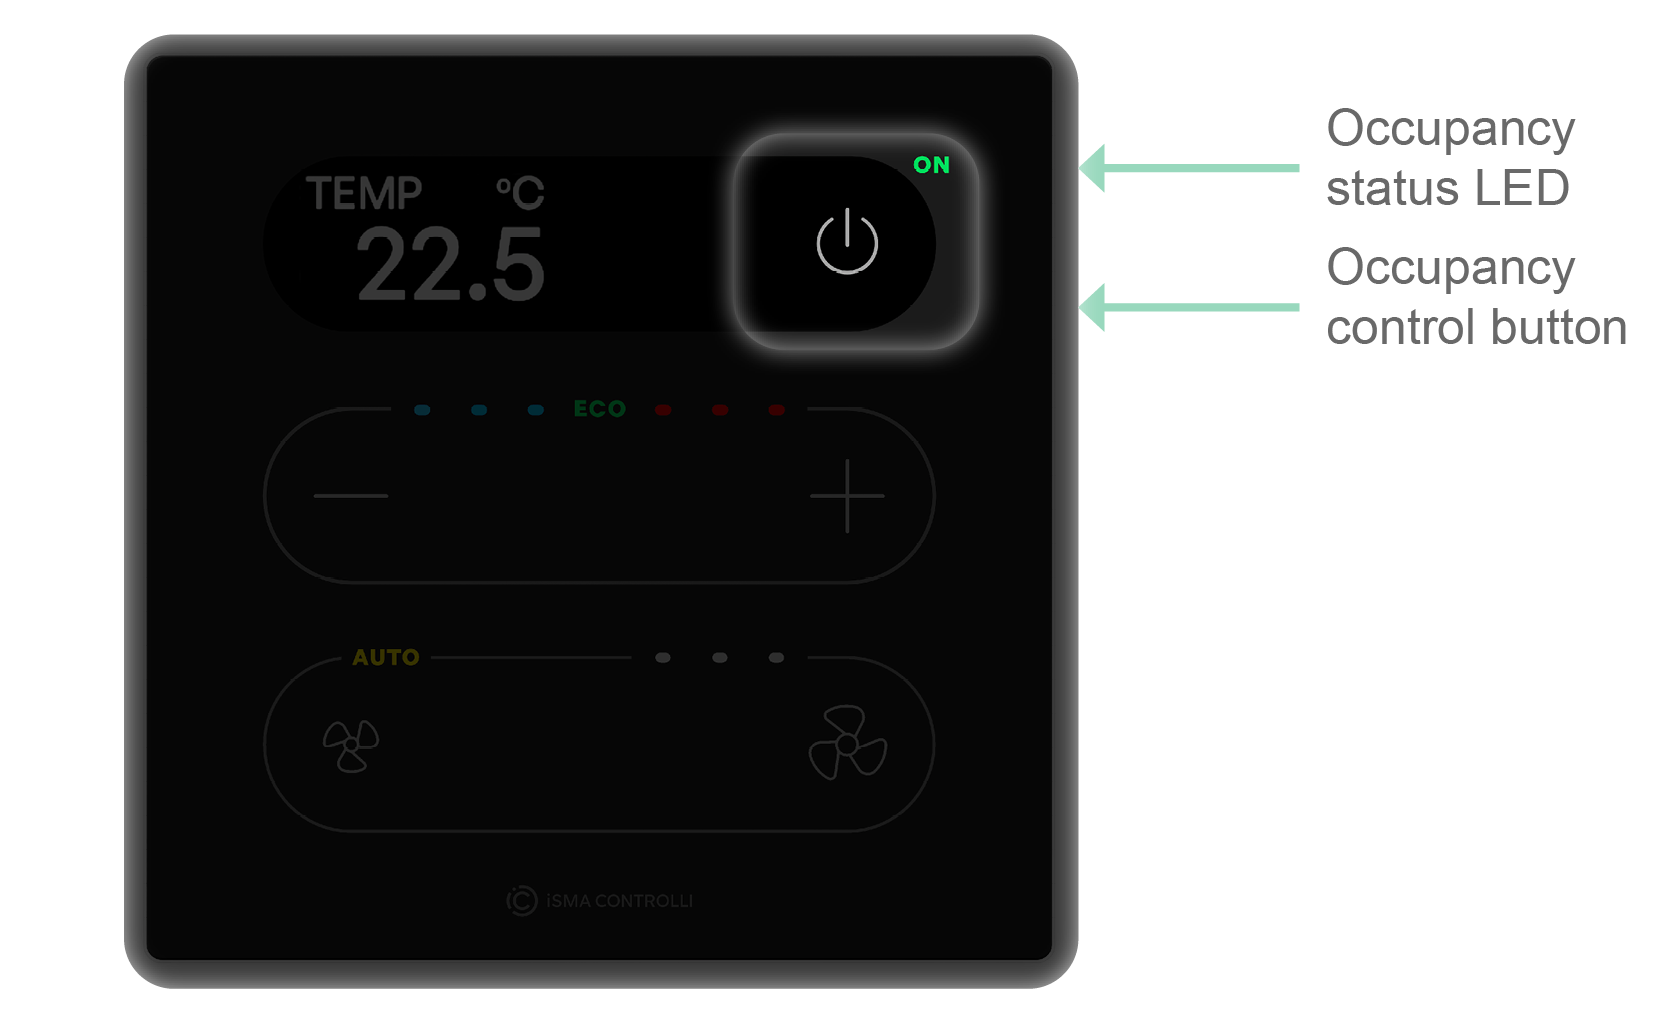
To change an occupancy status, use a power button in the top right corner of the panel. The green ON LED signalizes if the panel is in the occupied mode.
Note
In the Touch Point L&B 2.0 panels, the power button is a generic button, which functionality can be changed by programming. For more details, please see the Generic Buttons Functionalities section below.
CO2 Alarm
If a CO2 alarm occurs, it can be switched off by pressing any button on the touch panel (see CO2 Alarm).
Generic Buttons Functionalities
The Touch Point ONE 2.0 and Touch Point Light&Blind 2.0 panels control differs from the rest of panels due to the functionality of generic buttons.
Generic buttons do not have any default logic assigned to their operation. First, it is required to program them in the controller, using the iC Tool or the nE2 Link module (see the Generic Buttons Programming Guide).
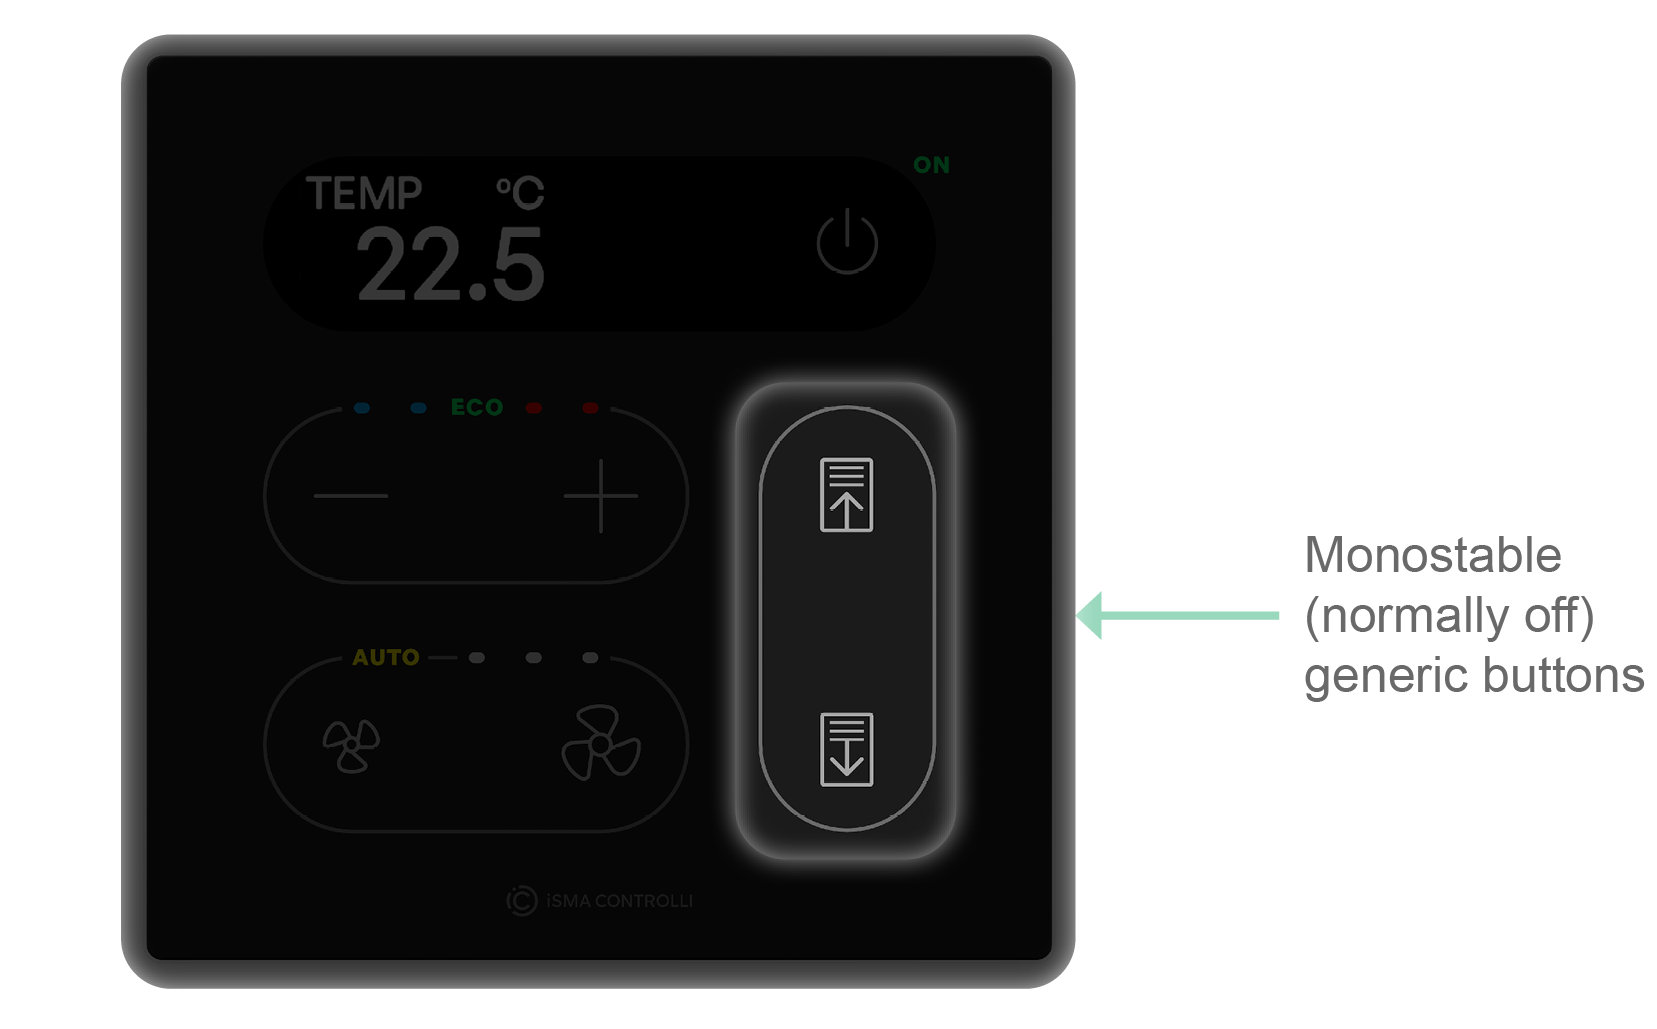
Generic buttons can be used either as bistable switches or monostable (normally off/on) switches.
Touch Point ONE 2.0
All generic buttons on the Touch Point ONE 2.0 panel are by default set to a monostable (normally off) mode. To change this setting or assign logic to the buttons, use a dedicated component designed strictly for programming the Touch Point ONE 2.0 panel, the TPOneControlLogic component in the nano EDGE ENGINE Comfort Control library.

To learn more about the programming and operation of the Touch Point ONE 2.0 panel, please see the Generic buttons programming guide.
Touch Point ONE 2L/1B 2.0, Touch Point Light&Blind 2.0
The Touch Point ONE 2L/1B 2.0, Touch Point Light&Blind 2.0 are equipped with the following generic buttons:
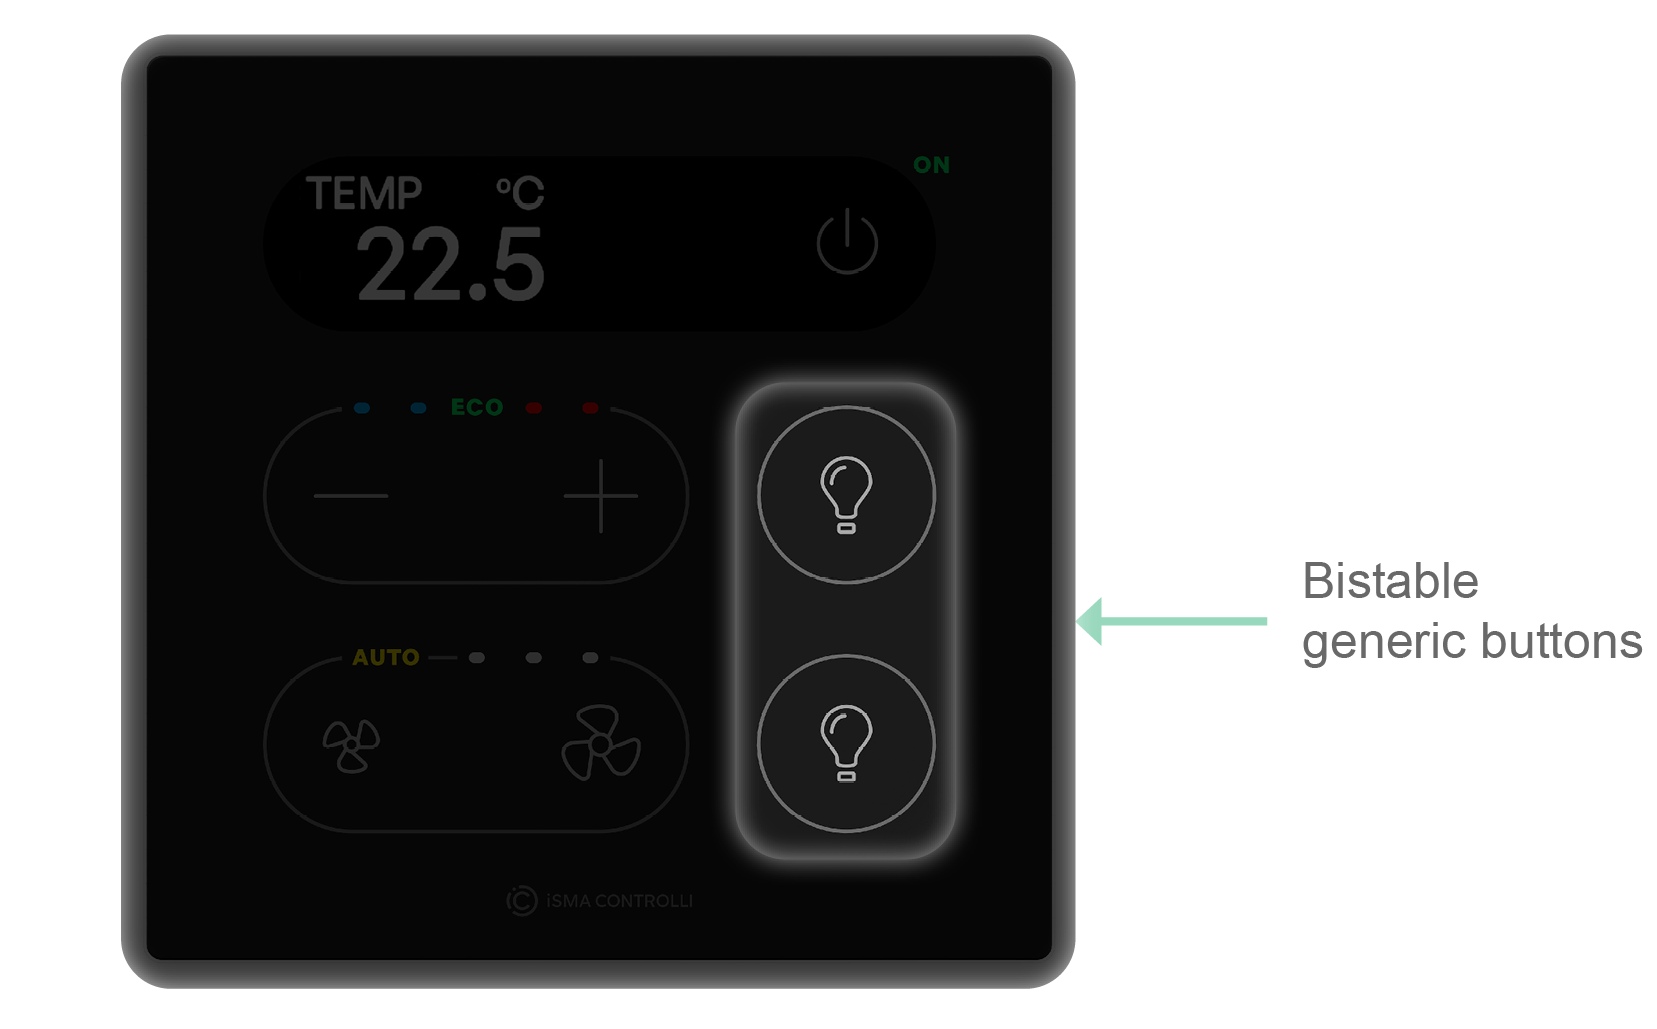
The generic buttons on the Touch Point ONE 2L 2.0 panel are by default set to a bistable mode.
The generic buttons on the Touch Point ONE 1B 2.0 panel are by default set to a monostable (normally off) mode.
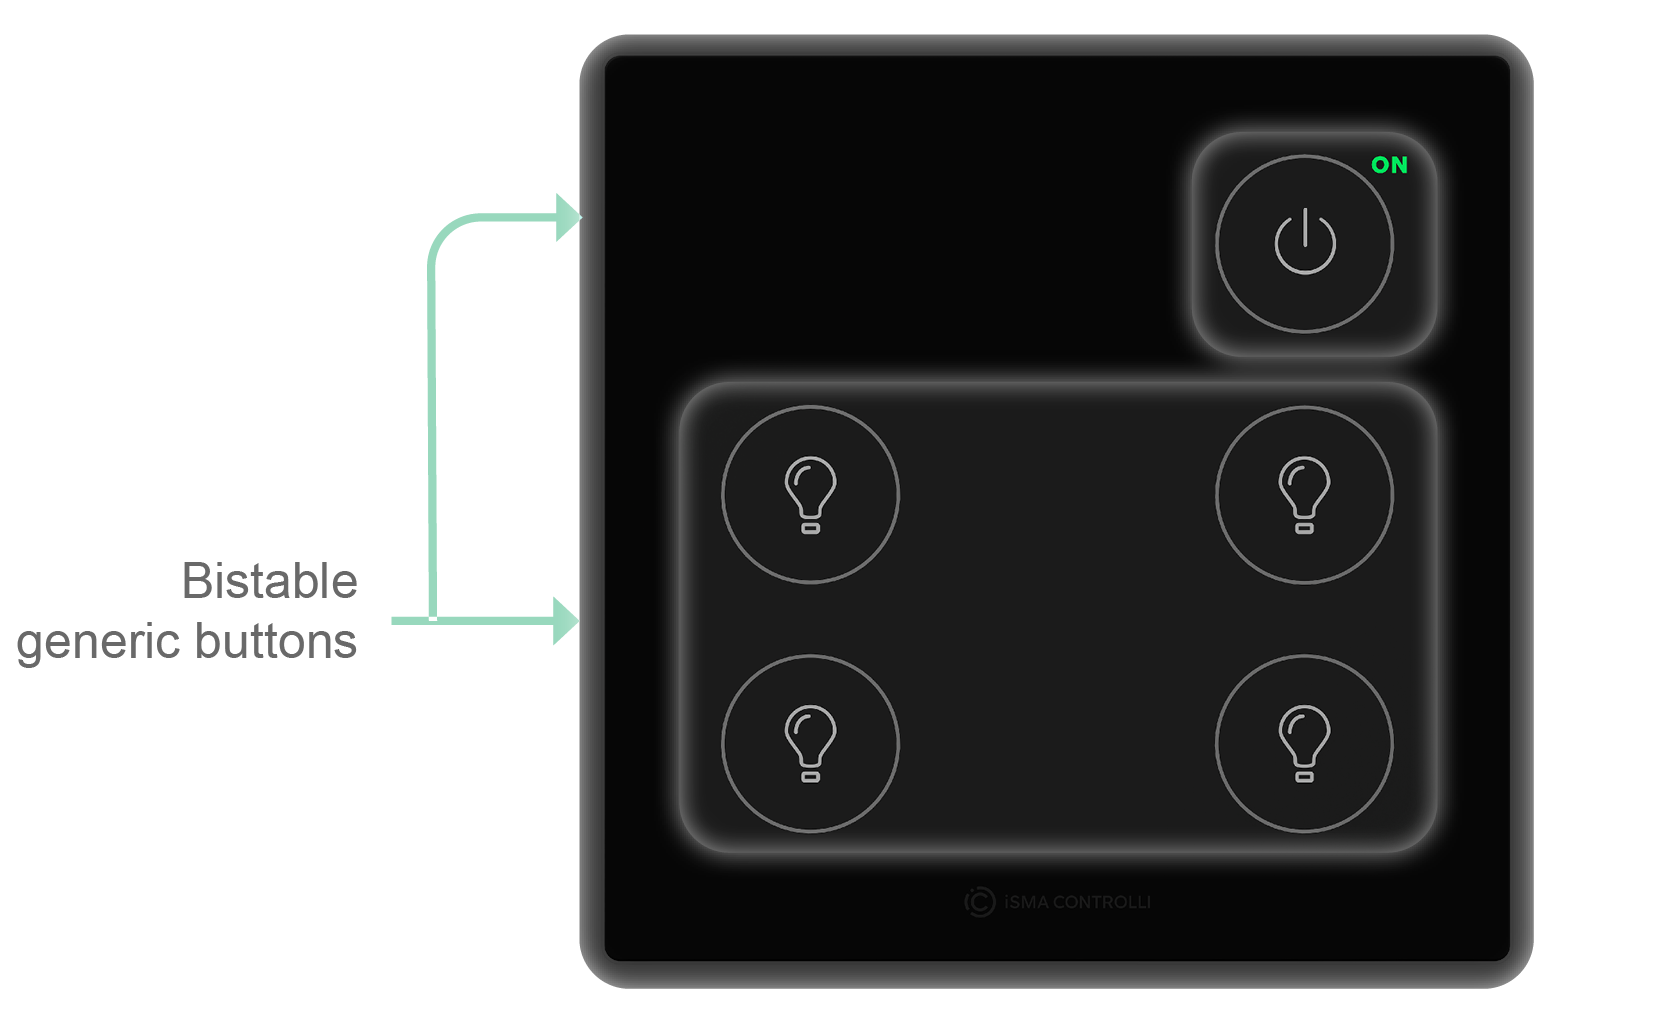
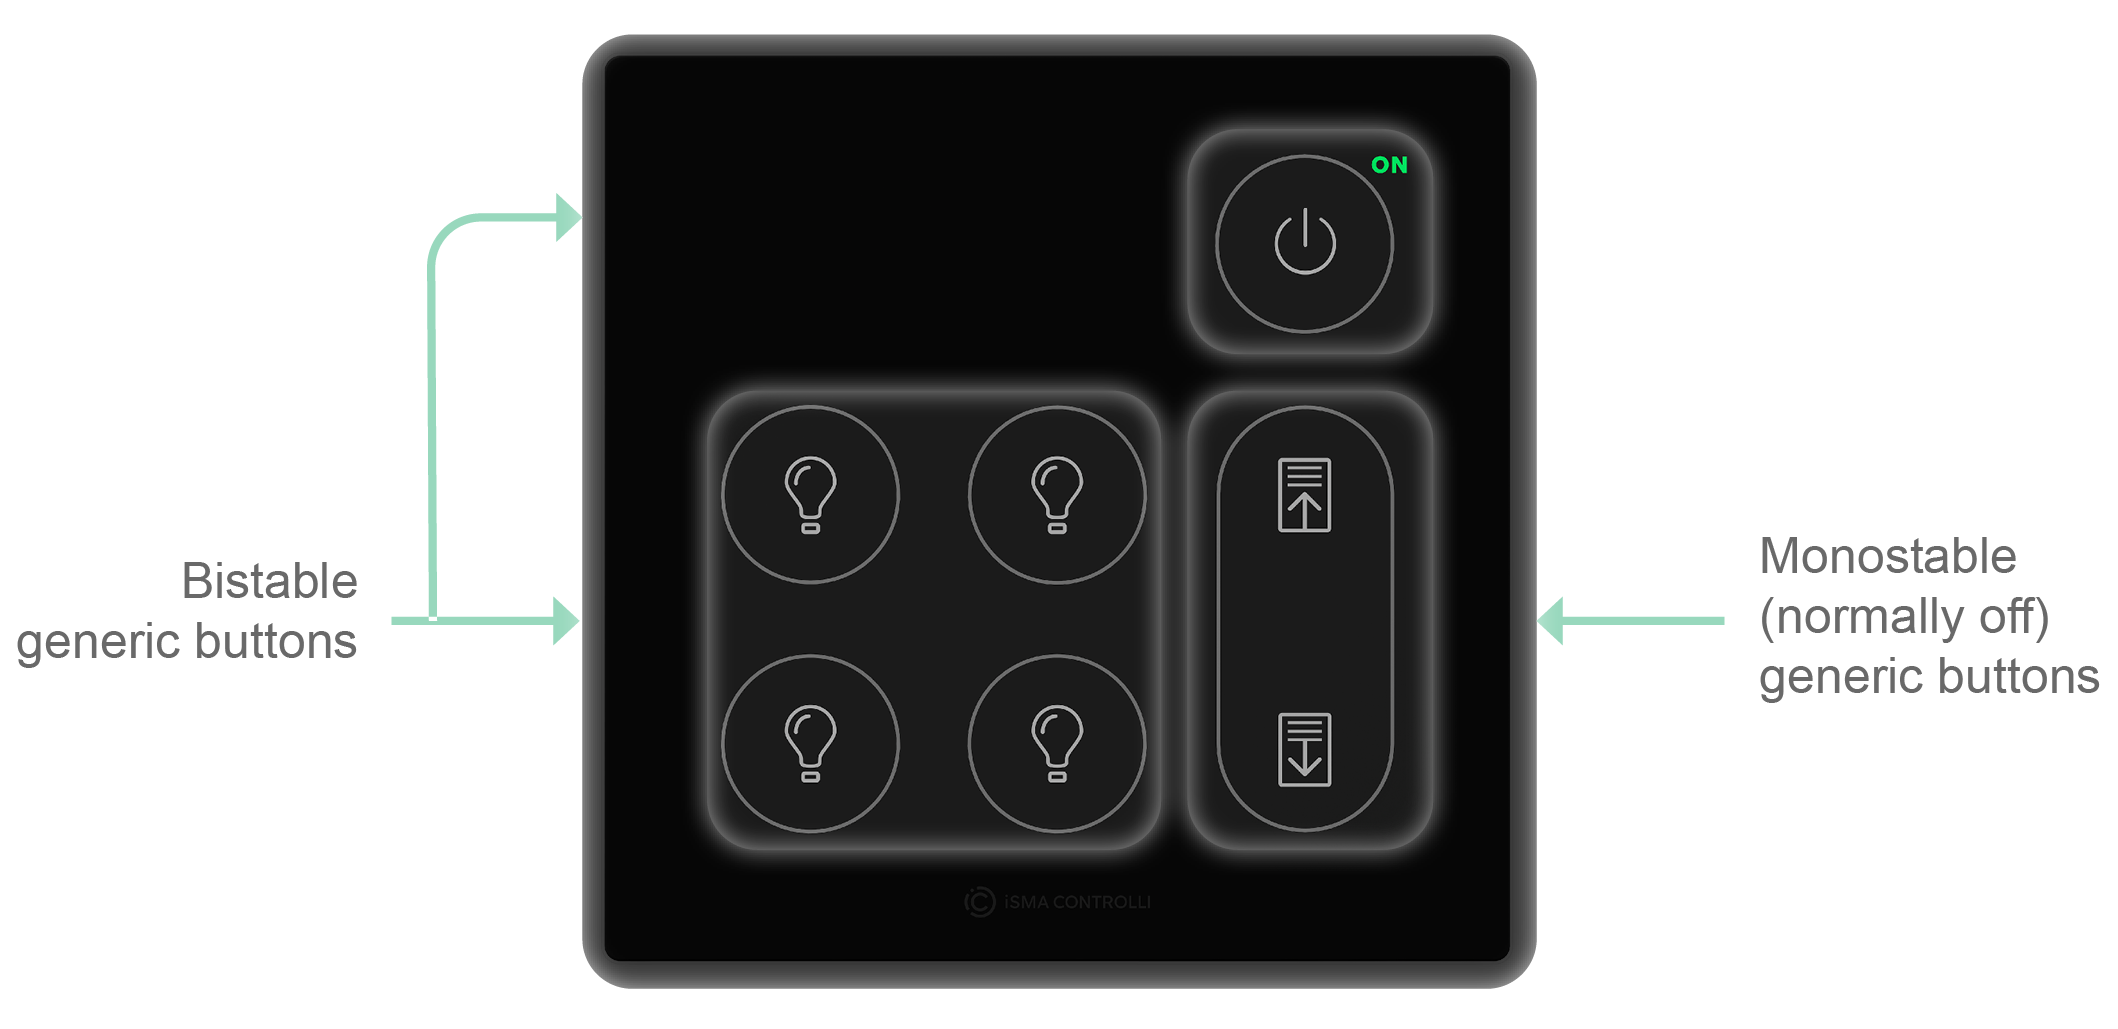
The generic buttons on the Touch Point 4L 2.0 panel are by default set to a bistable mode.
The generic buttons on the Touch Point 4L1B 2.0 panel are by default set to:
-
buttons with light bulbs and power button: bistable mode,
-
up/down blind buttons: monostable (normally off) mode.
To learn more about the programming of the generic buttons on the Touch Point ONE 2L/1B 2.0 and Touch Point Light&Blind 2.0, please see the Generic buttons programming guide.