Note
Please note that if the switch 1 on the S3 DIP switch is on, than configuration of reheater and perimeter type from any other source is blocked (iC Device Manager), as well as any changes made to the referring parameters (for example, Heater Priority) will not be written to the device.
The iC Device Manager service for Niagara Framework is dedicated for iSMA CONTROLLI VAV14-IP controllers. The service enables configuration of the app parameters in the VAV controller.
Using iC Device Manager
Adding the Module
The iC Device Manager service is a part of the iC Workbench and iC Niagara Expansion Pack (from version 4.14).
Note: For a correct operation of the iC Device Manager service, it is required also to have the latest iClib version.
To start using the iC Device Manager service, go to the Palette window (in iC Workbench or other Niagara tool) and select the Open Palette option.
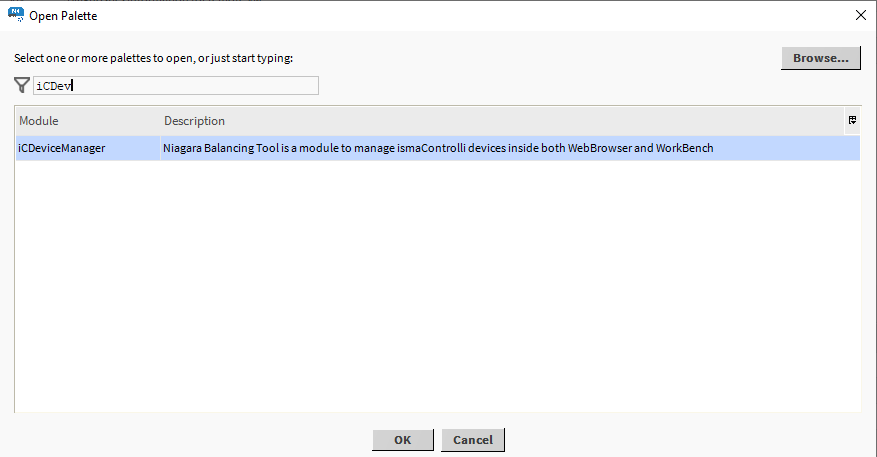
Confirm with OK, the palette is ready to use in the Palette window.
The only location where the service will operate properly is Config → Services.
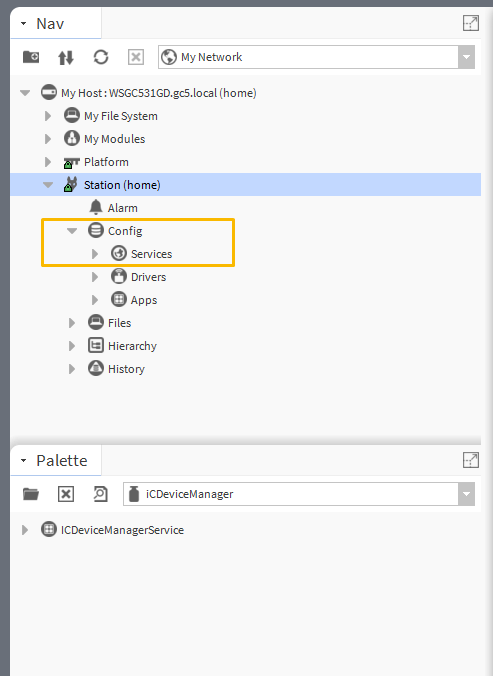
Drag and drop the iC Device Manager service to Services.
Warning!
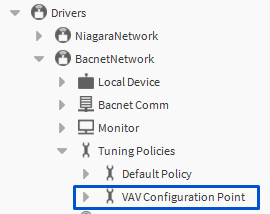
For the iC Device Manager service to fully operate, make sure that the VAV14-IP controller is added to the BACnet network in Drivers.
If BACnet has been configured using the default BACnetNetwork module, it is required to add the VAV Configuration Point (from the iSMA_CONTROLLI-Library) to Tuning Policies:
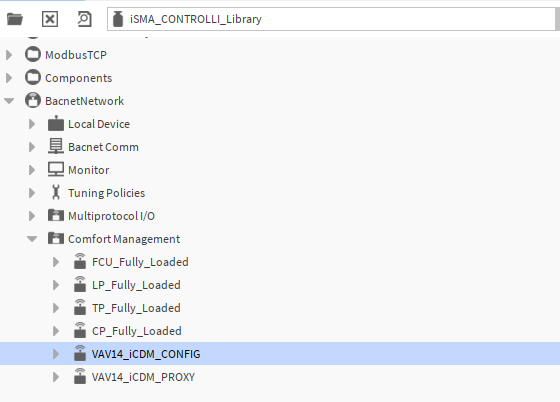
Adding the VAV Device
Offline
-
Add the VAV14-IP device from the iSMA_CONTROLLI_Library (BACnetNetwork → ComfortManagement), according to user requirements: VAV14_CONFIG_POINT or VAV14_PROXY_POINT.
-
Go to BACnetNetwork in the station and invoke the Discover action.
-
Mark the offline device and the device to be matched with it, and confirm with the Match button.
Online
-
Go to BACnetNetwork in the station and invoke the Discover action.
-
Add the discovered VAV14-IP device(s).
-
From the iSMA_CONTROLLI_Library select points for devices to be configured as proxy or config points.
Warning!
For a proper recognition of the device, the iC Device Manager verifies its hardware type, firmware version, and application version. From these values, only the application version is read from the AI 100 point. Make sure it is added to the device, otherwise, it may not be visible in the service.
Proxy and config points
Proxy points are BACnet points configured as proxy and placed under the Points folder. These consume Niagara license points.
Config points are BACnet points configured as config and placed under the Config folder. These points do not consume Niagara license points.
App Configuration
The first tab of the iC Device Manager service is the App Configuration tab. Here, it is possible to execute three basic actions and configure VAV application parameters.
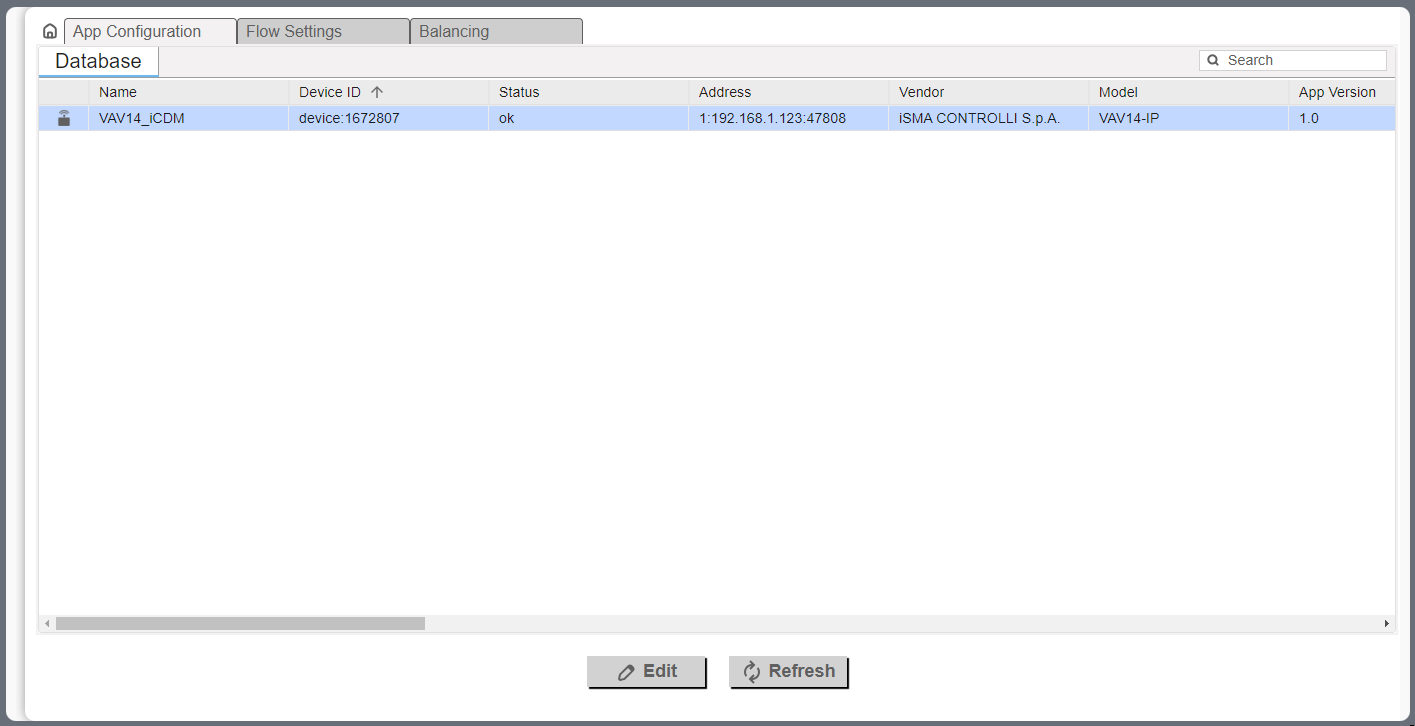
The main view of the tab shows data read from the device.
To make sure that the data are up to date, click the Refresh button.
To enter the application settings, click the Edit button. The configuration window pops up, where it is possible to set new values to the VAV application parameters, send them to the device (or download current settings).
Worth to notice
The configuration windows contains all parameters available to set and available actions. If any parameter from the list is meant to be left as is and not to be set to a new value, check the null option. If the null option is checked, then this parameter will be omitted when sending new values to the controller.
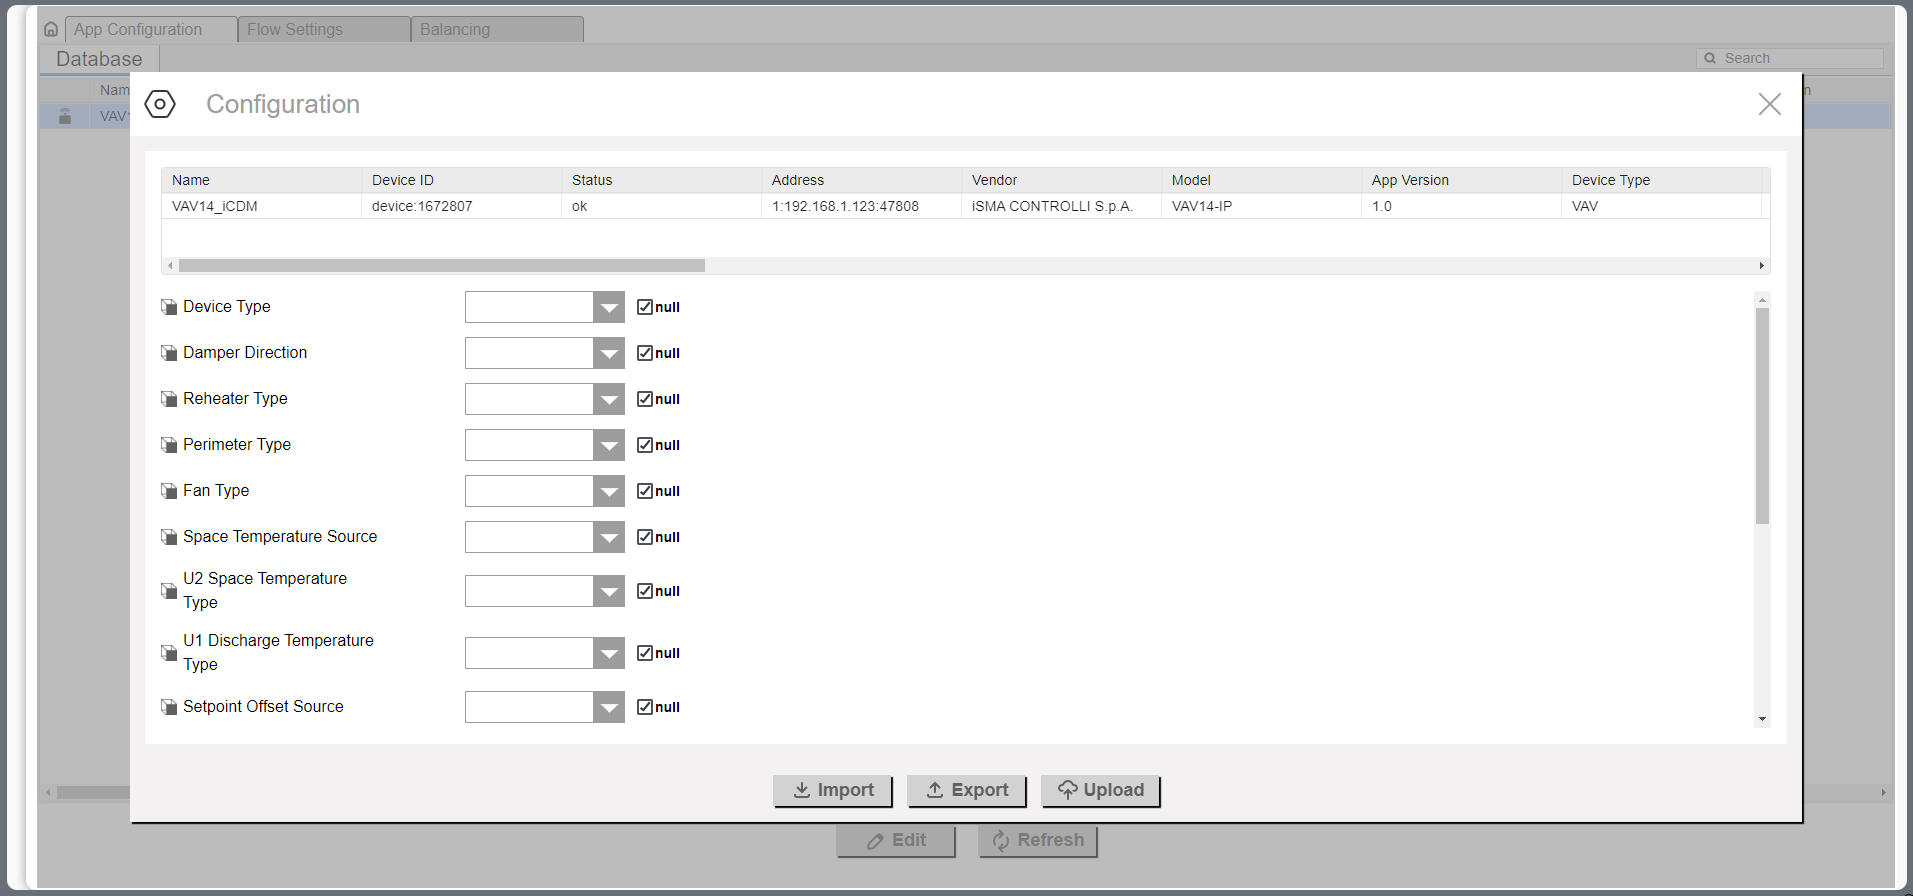
The three actions available in the configuration tab are:
-
Import: allows to upload application parameters from a previously saved file (*.json);
-
Export: allows to save current application settings to a .json file;
-
Upload: sends new settings the the device.
Warning!
Please note that if the switch 1 on the S3 DIP switch is on, the Upload action will take no effect.
The VAV application parameters available to configure are:
-
Device Type: unused;
-
Damper Direction: allows to set a damper direction to clockwise or counterclockwise;
-
Reheater Type: allows to set a reheater type;
-
Available settings: none, TimeProp (PWM), staged, float;
-
-
Perimeter Type: allows to set a perimeter type;
-
Available settings: none, TimeProp (PWM), digital, float – not allow;
-
-
Fan Type: unused;
-
Space Temperature Source: allows to set a source for temperature readings;
-
Available settings: panel, input, network;
-
-
U1 Discharge Temperature Type: allows to set a discharge temperature type on the universal input 1;
-
Available settings: voltage measurement, current, resistance input, specific temperature sensor;
-
-
U2 Space Temperature Type: allows to set a space temperature type on the universal input 2;
-
Available settings: voltage measurement, current, resistance input, specific temperature sensor;
-
-
Setpoint Offset Source: allows to set a source for setpoint offset settings;
-
Available settings: panel, input, network;
-
-
Setpoint Offset Range: allows to set a range for setpoint offset settings;
-
CO2 Source (Pressure Source): allows to set a source for pressure readings;
-
Available settings: panel - unused, input, network;
-
-
CO2 Range (Pressure Range): allows to set a relative range for pressure sensor readings;
-
Heater Priority: allows to select a priority order for the heat source;
-
Available settings: reheater, perimeter, simultaneous;
-
-
Dual Heat: allows to enable a possibility to use one or two heat sources;
-
Available settings: no, yes;
-
-
Occupancy Contact Type: allows to select an occupancy contact type;
-
Available settings: normal, invert;
-
-
Window Contact Type: allows to select a window contact type;
-
Available settings: normal, invert;
-
-
Units: allows to select a units system;
-
Available settings: imperial, metric.
-
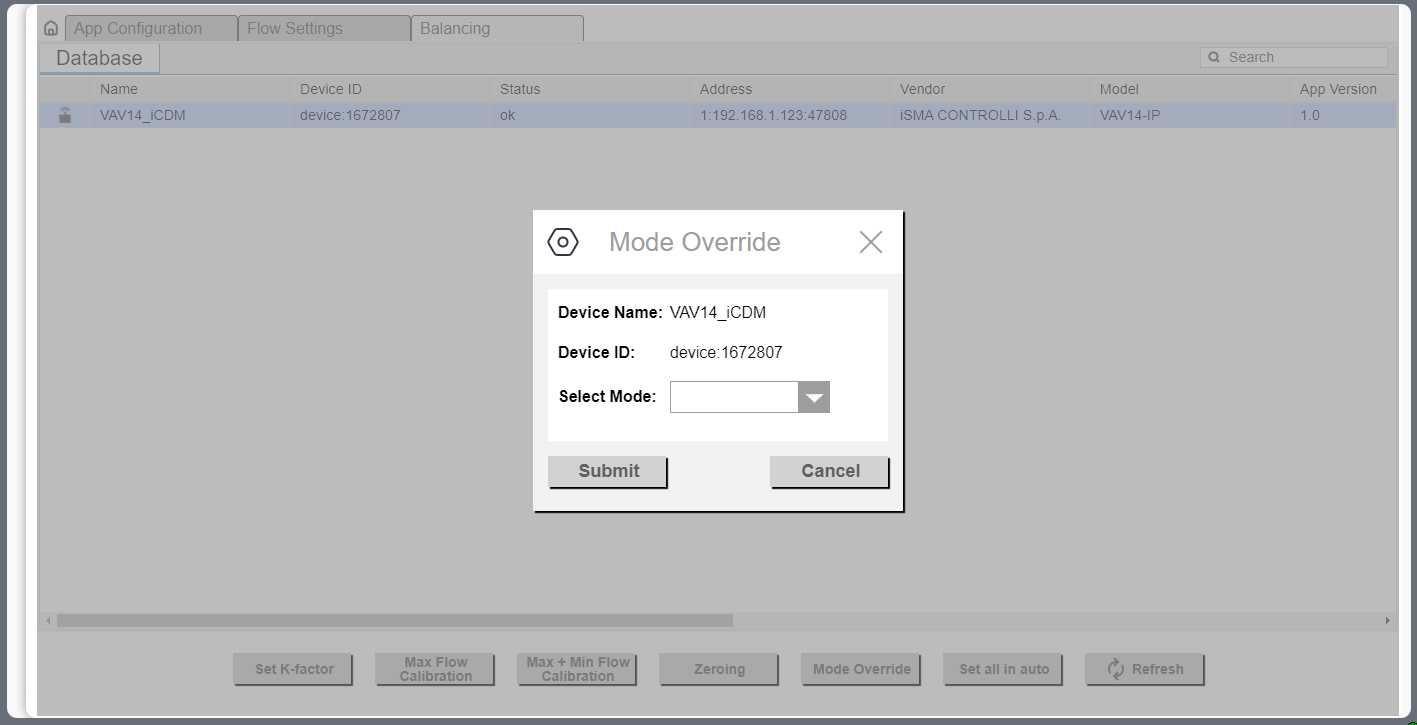
Mode Override from Balancing tab
The Mode Override action allows to force an operating mode to a damper. Available modes are:
-
Auto: sets auto mode (Pressure Control example application logic takes control),
-
Max flow: no action,
-
Min flow: no action,
-
User flow: no action,
-
User position: goes to a user-set position (% of damper opening),
-
Full open: damper fully open,
-
Full close: damper fully closed,
-
Calibrate: performs a damper calibration (the damper goes to 100%, than to 0%, and goes back to the control loop output).
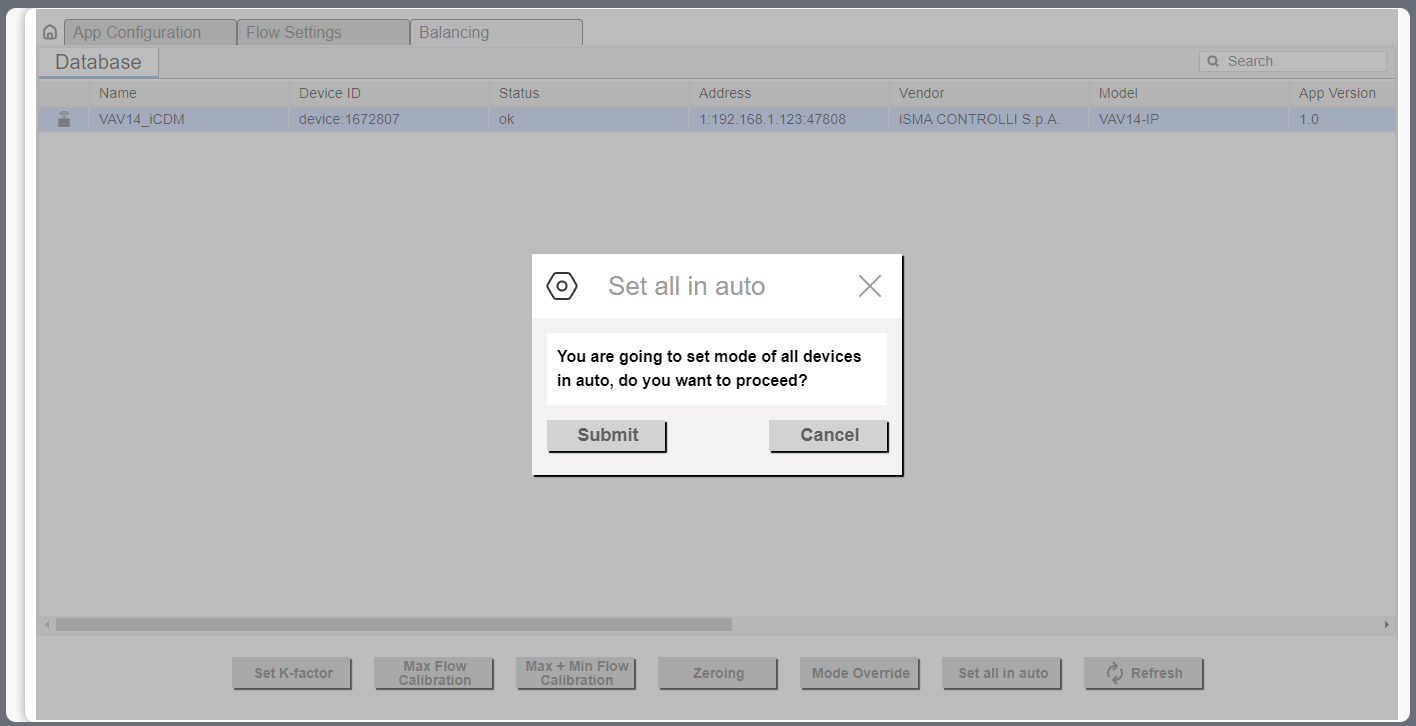
Set All in Auto
The Set All in Auto action forces all dampers to the Auto operating mode.