Mounting Without a Back Box
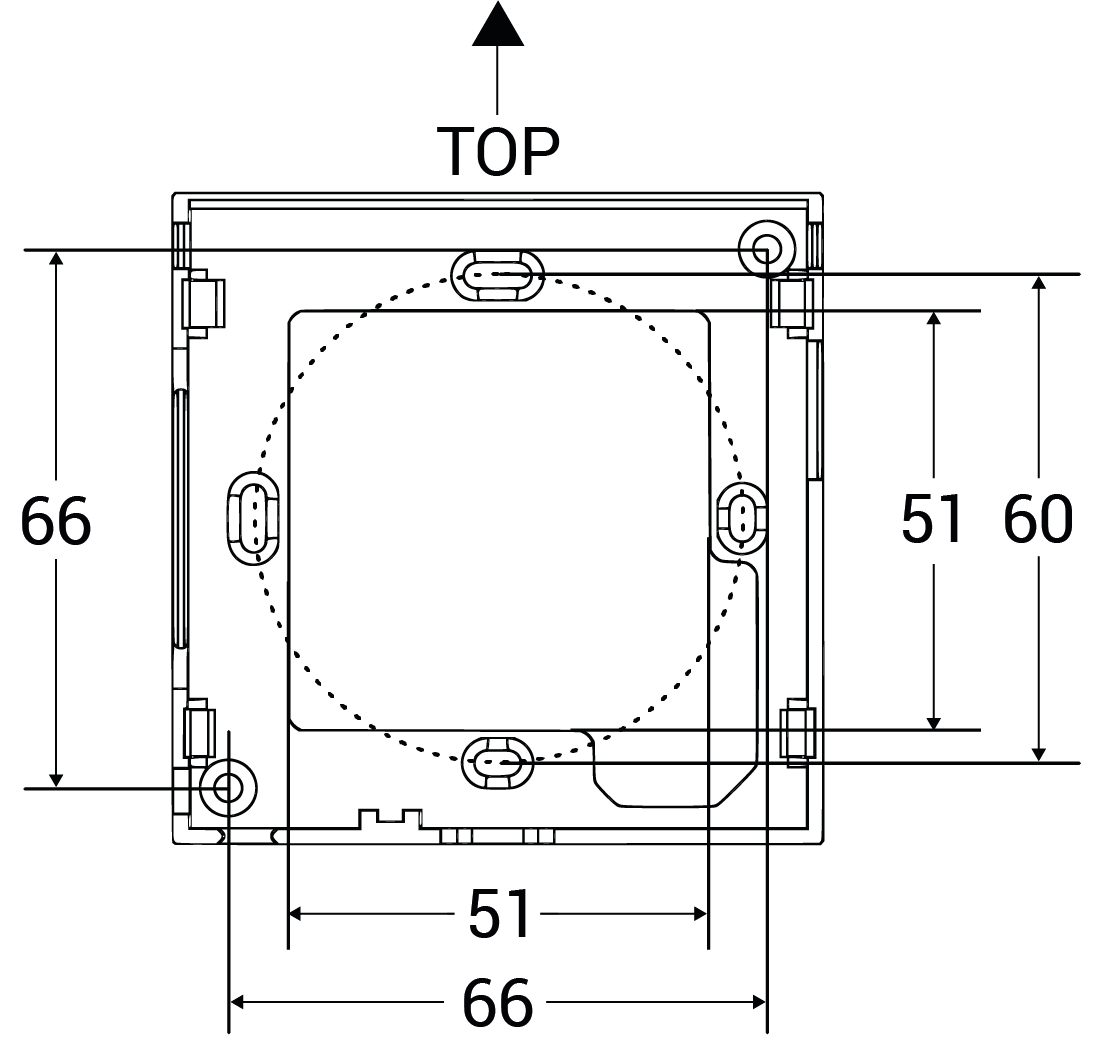
It is possible to mount the Touch Point panel without a back box in walls where a square hole of at least 51 x 51 mm can be cut directly in the wall. Then, it is required to securely install the installation screws in the wall in the position of the installation holes on the frame.
Mounting With a Back Box
For other cases, it is recommended to follow the below steps of installation with a wall back box.
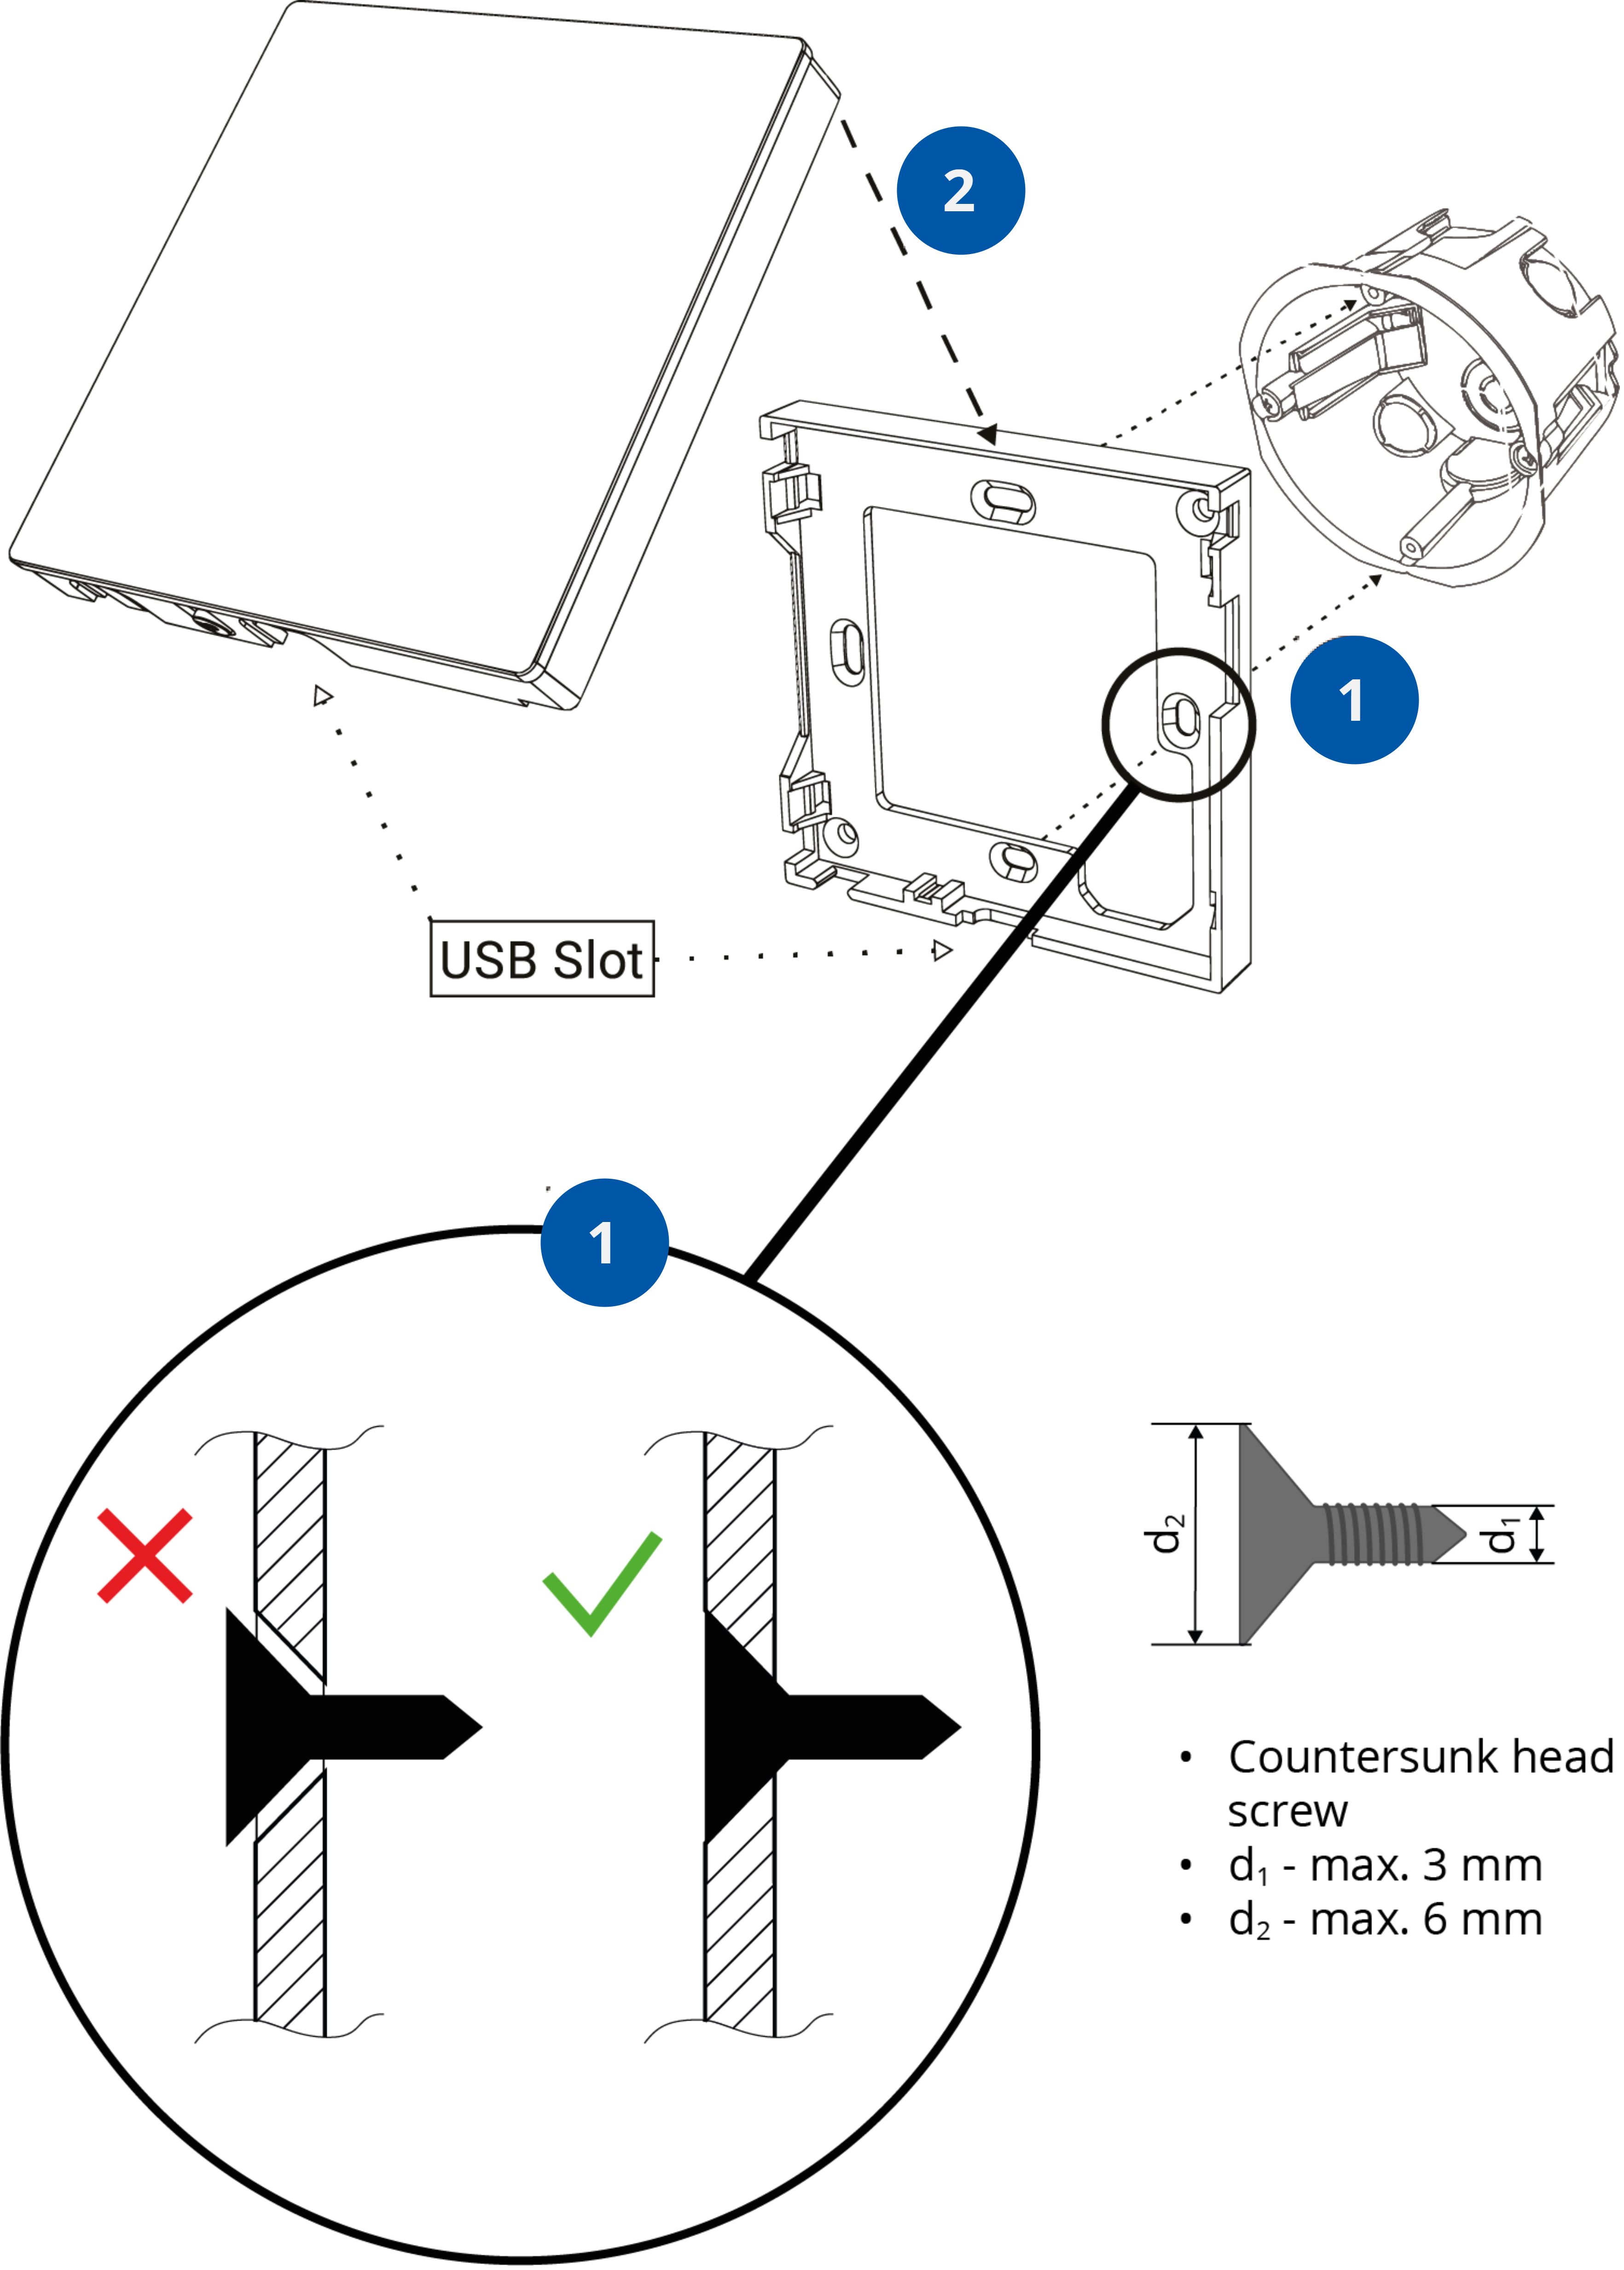
Step 1: Fit the back box to the junction box.
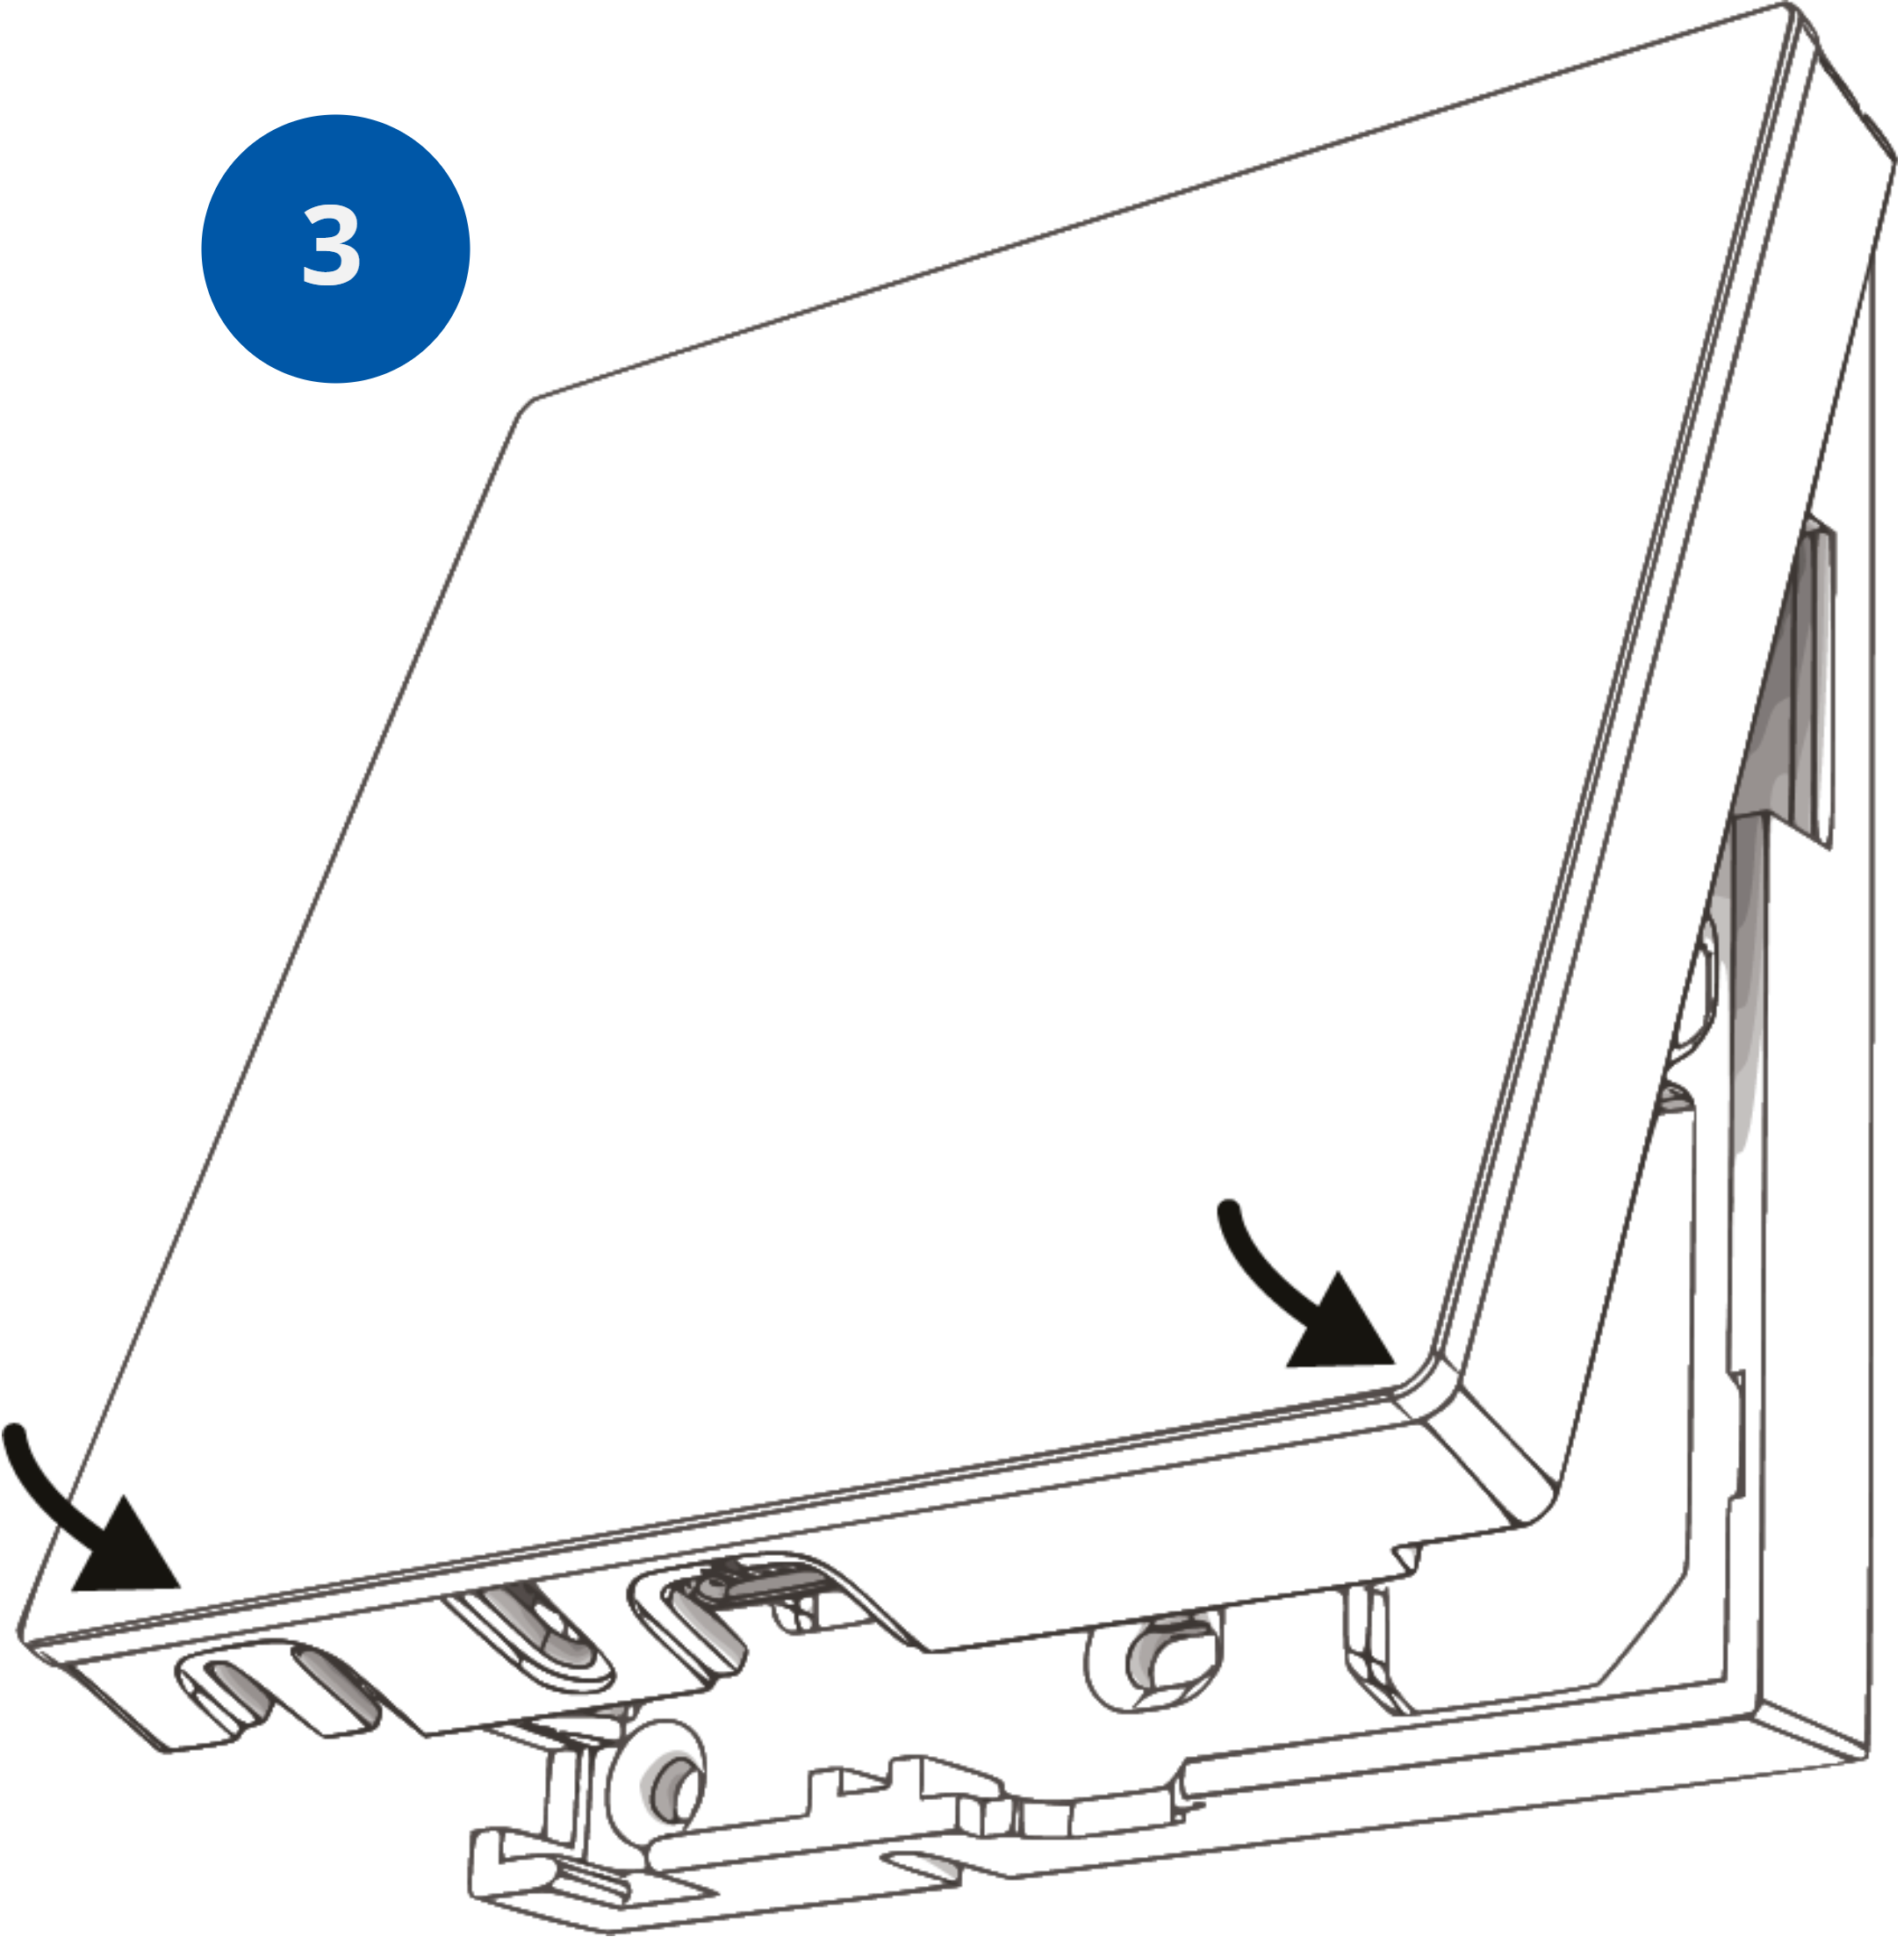
Step 2: Fit the panel to the back box, starting from up corners. Make sure the USB port is headed downwards. Make sure that the screw is flush with a mounting frame.
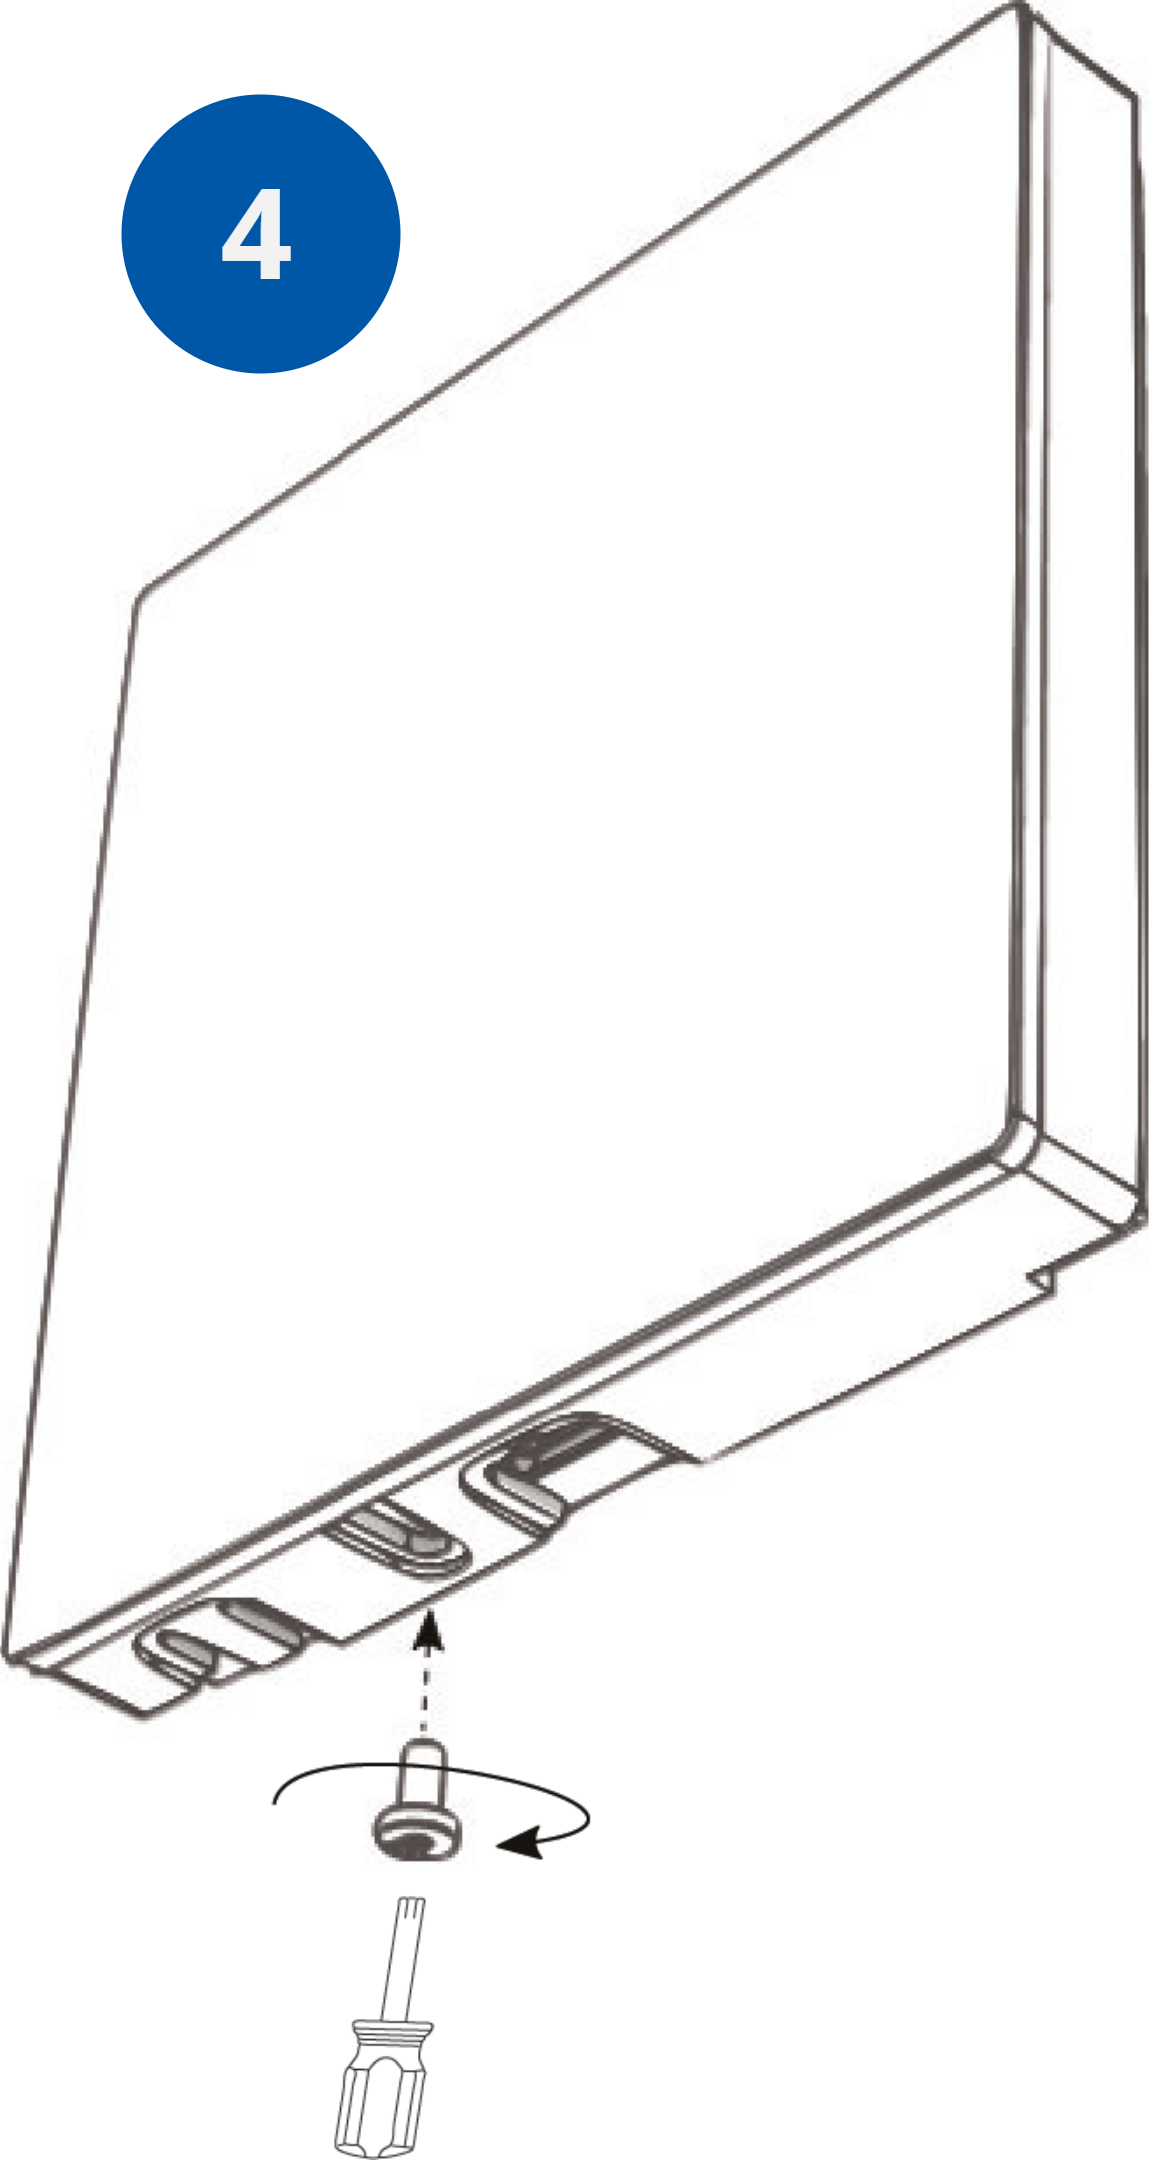
Step 3: Gently push in the bottom corners of the panel to the back box.
Step 4: Screw the panel to the back box. Turn the screw clockwise.
Warning!
-
Please ensure that any of the construction materials (for example, wall insulation, wall infill, wool, etc.) does not come into contact with the PCB board and cause any pressure on it.
-
Please ensure that no pressure is exerted on the RJ45 cable that could push the board out of place.
-
Please make sure that the mounting surface is flat and has no irregularities which could cause a housing distortion or glass sticking out.