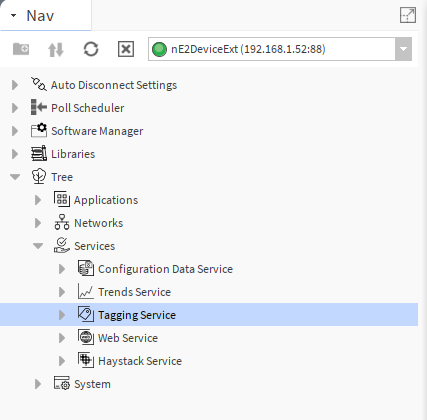
The Tagging service provides centralized management of semantic tags for Data Points and equipment, ensuring consistent and standardized metadata assignment across the local control system. It supports both automatic and manual tagging mechanisms, allowing automatic tag generation to be enabled or disabled, as well as manual tag assignment based on available tag dictionaries.
Tags in BMS
Tags are labels or key-value pairs that provide metadata to identify, categorize, and organize data from devices and systems like HVAC, lighting, or security. They enable interoperability by providing a standardized way to understand data from different sources, which improves data quality, facilitates automation, simplifies integration, and allows for more efficient data analysis.
Installation
The Tagging service requires a Tagging library and is automatically available in the Services container once the Tagging library is installed on the device. The Tagging library is a default part of the nano EDGE ENGINE from the OS V1.9 and is not compatible with earlier versions.
Default Views
Tag Manager
Tag Manager displays a list of available Applications and Equipment, along with the auto-tags status. It allows users to easily navigate between Data Points within Equipment and enables their editing and manual tag assignment using the Edit button.
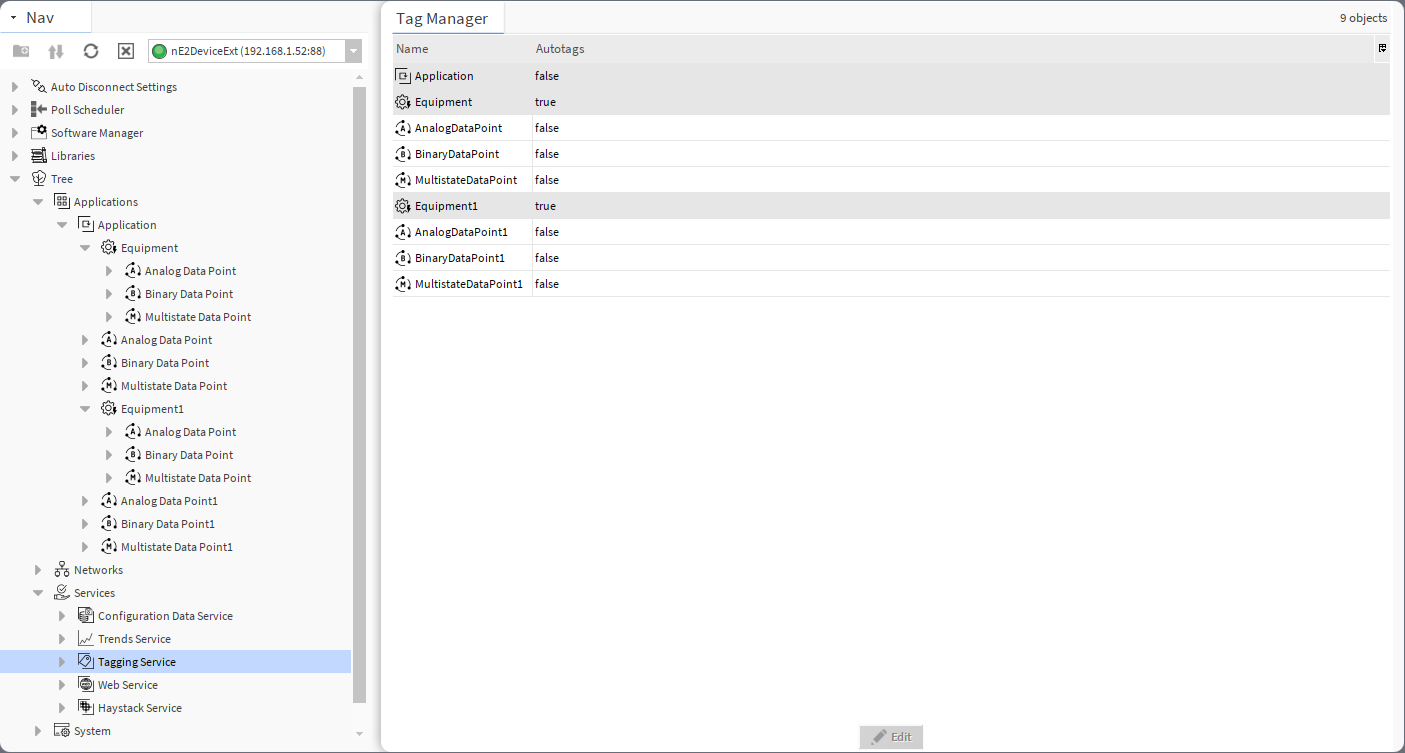
The Tag Manager has the following columns:
-
Name: shows the name of the Equipment component or Data Point added to the device; the Equipment/Data Point hierarchy is maintained in this view;
-
Autotags: informs if the auto-tag function is enabled or disabled for a given component.
The Tag Manager shows all Application and Equipment components along with Data Points.
Note
The Application components are displayed only for identification reasons, it is not possible to enable or disable auto-tagging or add tags manually to the Application component.
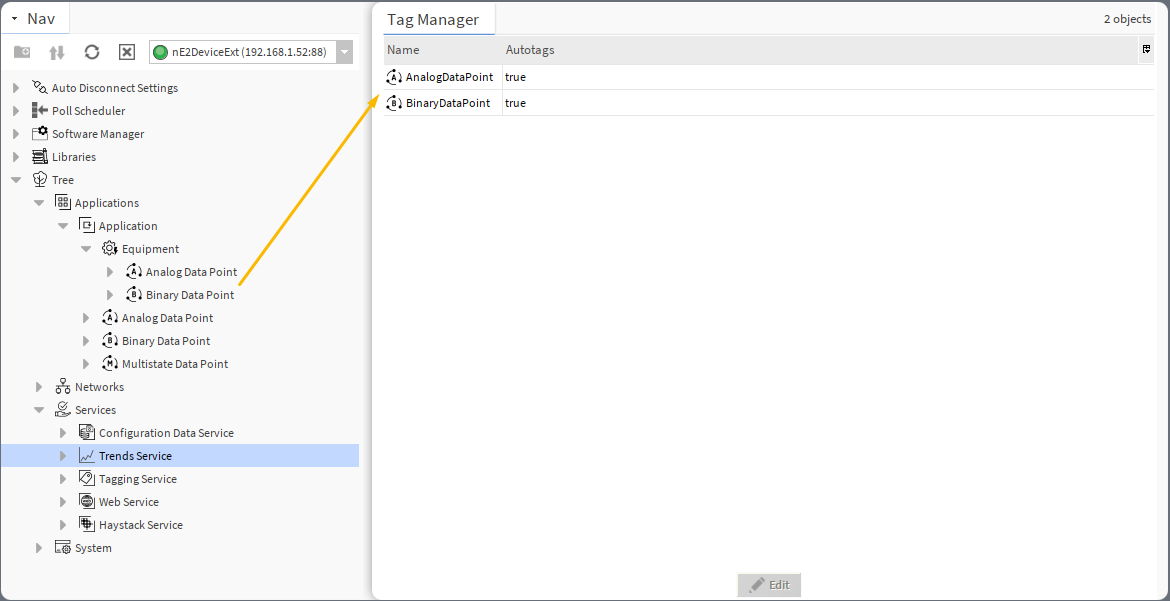
If Data Points are located under the Equipment component, it is required to double-click the relevant Equipment component to display its Data Points:
The Tag Manager allows to edit auto-tagging for Data Points using the Edit button:
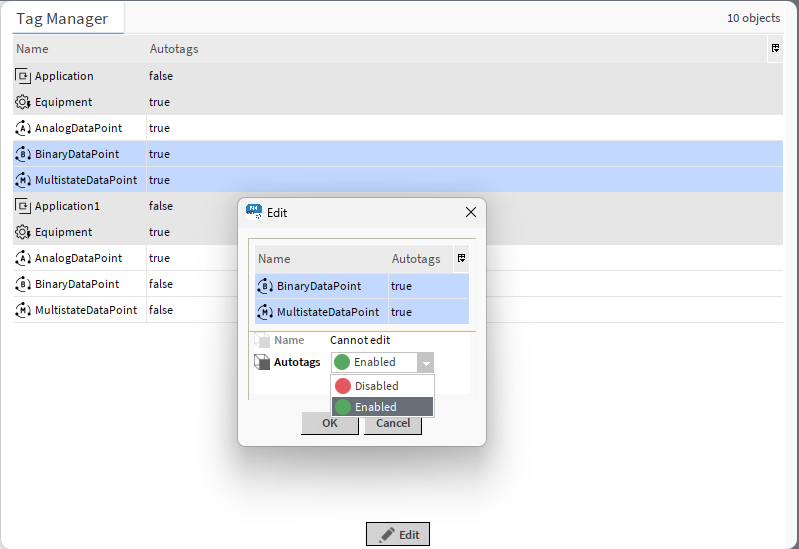
It is possible to edit auto-tagging function for individual Data Point or for many Data Points at once (sets the same selected value to all marked Data Points).
AX Property Sheet

The Tagging service has the following slots, available through the AX Property Sheet view:
-
Status: indicates the current status of the component. If the component works properly, its status is OK; however, it changes accordingly when values in other slots are adjusted.
-
Available information: disabled (the Enabled slot is set to false), OK;
-
-
Enabled: change of the slot's value enables or disables the component.
Tag Dictionaries
Tag dictionaries are libraries containing lists of tags, which can be applied to Data Points and the Equipment component. Tag dictionaries are searchable and contain labels, which allow for the clear and efficient structure management, data modelling, and faster data processing by local control systems.
There are two tag dictionaries available: Haystack and Webserver.
Haystack
The list of tags in the Haystack tag dictionary corresponds with the Haystack standard: Tags in Project Haystack; however, there are some differences. The Haystack tag dictionary does not include the following tags:
Haystack Tags Exceptions
list, dict, grid, scalar, xstr, choice, symbol, is, na, remove, of, quantities, quantityOf, tagOn, tags, containedBy, contains, def, defx, inputs, outputs, reciprocalOf, relationship, span, mlIdentificationPeriod as well as tags of types: feature, filetype, lib, op, list, dict, grid.
These tags are not relevant for the data modelling based on Data Points and the Equipment component (in the application structure).
Webserver
The tags of the Webserver tag dictionary allow for a seamless display of tagged elements in the nanoWebUI™. The list of Webserver dictionary includes:
|
Tag |
Auto-tag |
Description |
|---|---|---|
|
|
Yes (ADP, BDP, MDP) |
Shows which application the Data Point belongs to (for the nanoWebUI order) |
|
|
Yes (ADP, BDP, MDP) |
Defines the Data Point’s visibility on the nanoWebUI (editable) |
|
|
Yes (ADP, BDP, MDP) |
Defines the widget type to display on the nanoWebUI (editable) |
|
|
Yes (ADP, BDP, MDP) |
Defines the order of widgets displayed on the nanoWebUI |
|
|
Yes (ADP) |
Allows to configure the display of decimal point on the nanoWebUI (editable) |
|
|
Yes (ADP) |
Allows to configure the step value change for the nanoWebUI (editable) |
|
|
No (manually added) |
Sets the nanoWebUI as a web browser's homepage |
Note
To learn more about the display of the tagged elements in the nanoWebUI™, please see the nanoWebUI™ description.
Applying Tags
Applying tags in the nano EDGE ENGINE is based on a semantic approach that ensures consistent data structure which is easily usable by the nanoWebUI™ and by third-party systems. Tags are applied at the Equipment and Data Point levels, where Equipment serves as the logical container defining what is being controlled, and Data Points represent the measured or commanded values associated with that equipment. This structured model ensures that tagged data is immediately usable by platforms capable of communicating through standardized tag-based HTTP APIs, e.g., Haystack.
Note: Tags can be only applied to the Equipment components and Data Points. Other component types are not supported.
It is therefore recommended (however, not mandatory) to use the following structure when creating applications:
-
Applications container
-
Application component
-
Equipment component
-
Data Point(s)
-
other components
-
-
Equipment component
-
Data Point(s)
-
other components
-
-
-
A required condition for using tags is that the Tagging library is installed on the device and the Tagging service is available in the Services container. Both are a default part of the nano EDGE ENGINE V1.9 and are not compatible with previous versions.
Tags are available in two formats: auto-tagging and manually added.
Auto-tagging
The auto-tagging purpose is to automatically assign appropriate tags and markers based on various conditions. This mechanism ensures consistency and reduces manual work when creating or modifying applications.
If enabled, the auto-tagging mechanism is executed in the following situations:
-
after all components are loaded during a device’s start-up,
-
when a component is renamed,
-
when a component is redefined (e.g., extensions/tags are added/removed),
-
when a new component is added,
-
when a component is moved within the Workspace tree.
The list of auto-tags includes:
|
Tag |
Data Points applicability |
Description |
|---|---|---|
|
|
ADP, BDP, MDP |
Unique identifier of the Data Point (read-only) |
|
|
ADP, BDP, MDP |
Marker indicating a current value support (read-only) |
|
|
ADP, BDP, MDP |
Status of the Data Point's current value (read-only) |
|
|
ADP, BDP, MDP |
Display name of the component (read-only) |
|
|
ADP, BDP, MDP |
Marker (read-only) |
|
|
ADP, BDP, MDP |
Current output value (read-only) |
|
|
ADP, BDP, MDP |
Value kind (read-only) |
|
|
ADP, BDP, MDP |
Reference to the parent Equipment component (only if located under it) (read-only) |
|
|
ADP, BDP, MDP |
Reference to the application (for the nanoWebUI order) |
|
|
ADP, BDP, MDP |
User-editable flag to show on the nanoWebUI (editable) |
|
|
ADP, BDP, MDP |
Widget type for the nanoWebUI (editable) |
|
|
ADP, BDP, MDP |
Added if the Data Point’s mode is set Output or Value; removed when changed to Input (read-only) |
|
|
ADP, BDP, MDP |
Order for widgets on the nanoWebUI |
|
|
BDP, MDP |
BDP: Derived from |
|
|
ADP |
Inclusive minimum and maximum allowable value for a numeric input in the nanoWebUI-displayed component (editable) |
|
|
ADP |
nanoWebUI presentation configuration (editable) |
|
|
ADP |
Added when the user selects a unit (read-only) |
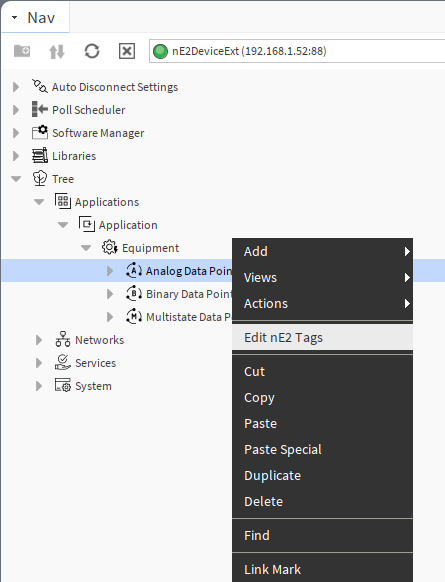
To enable or disable auto-tagging for the Data Point, either open the Edit nE2 Tags option from the Data Point’s context menu or go to the Tag Manager and use the Edit button:
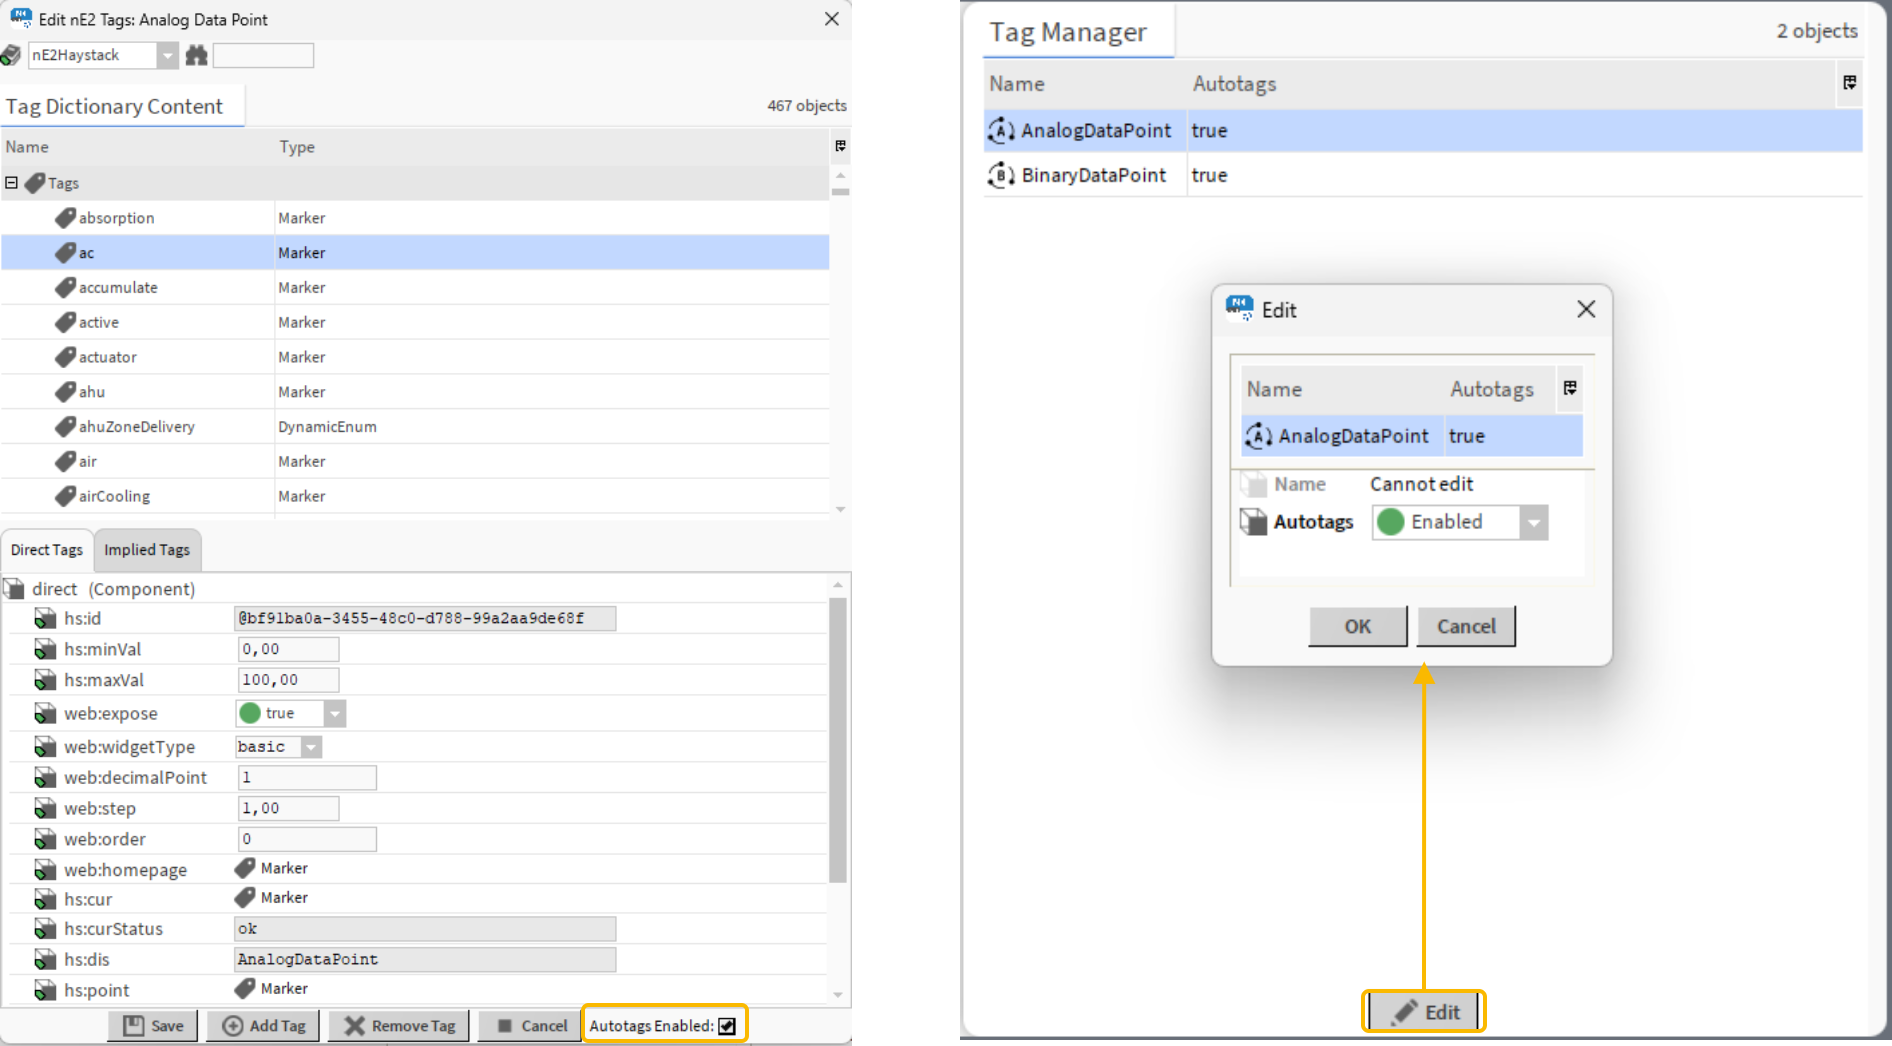
In the Edit nE2 Tags dialog window, check (enable) or uncheck (disable) the Autotags Enabled option. Make sure to save changes.
In the Tag Manager Edit dialog window, select Enabled or Disabled option from a drop-down list.
Auto-tagging in the Equipment Component
Due to implemented data modelling, auto-tags in the Equipment component are enabled by default and cannot by disabled.
Manual Adding of Tags
Outside of the auto-tagging mechanism, it is also possible to manually add tags.
Adding and editing tags are possible in the Edit nE2 Tags dialog window opened from the context menu of the Equipment component or Data Point.
In the Edit nE2 Tags dialog window, there are the following options:
-
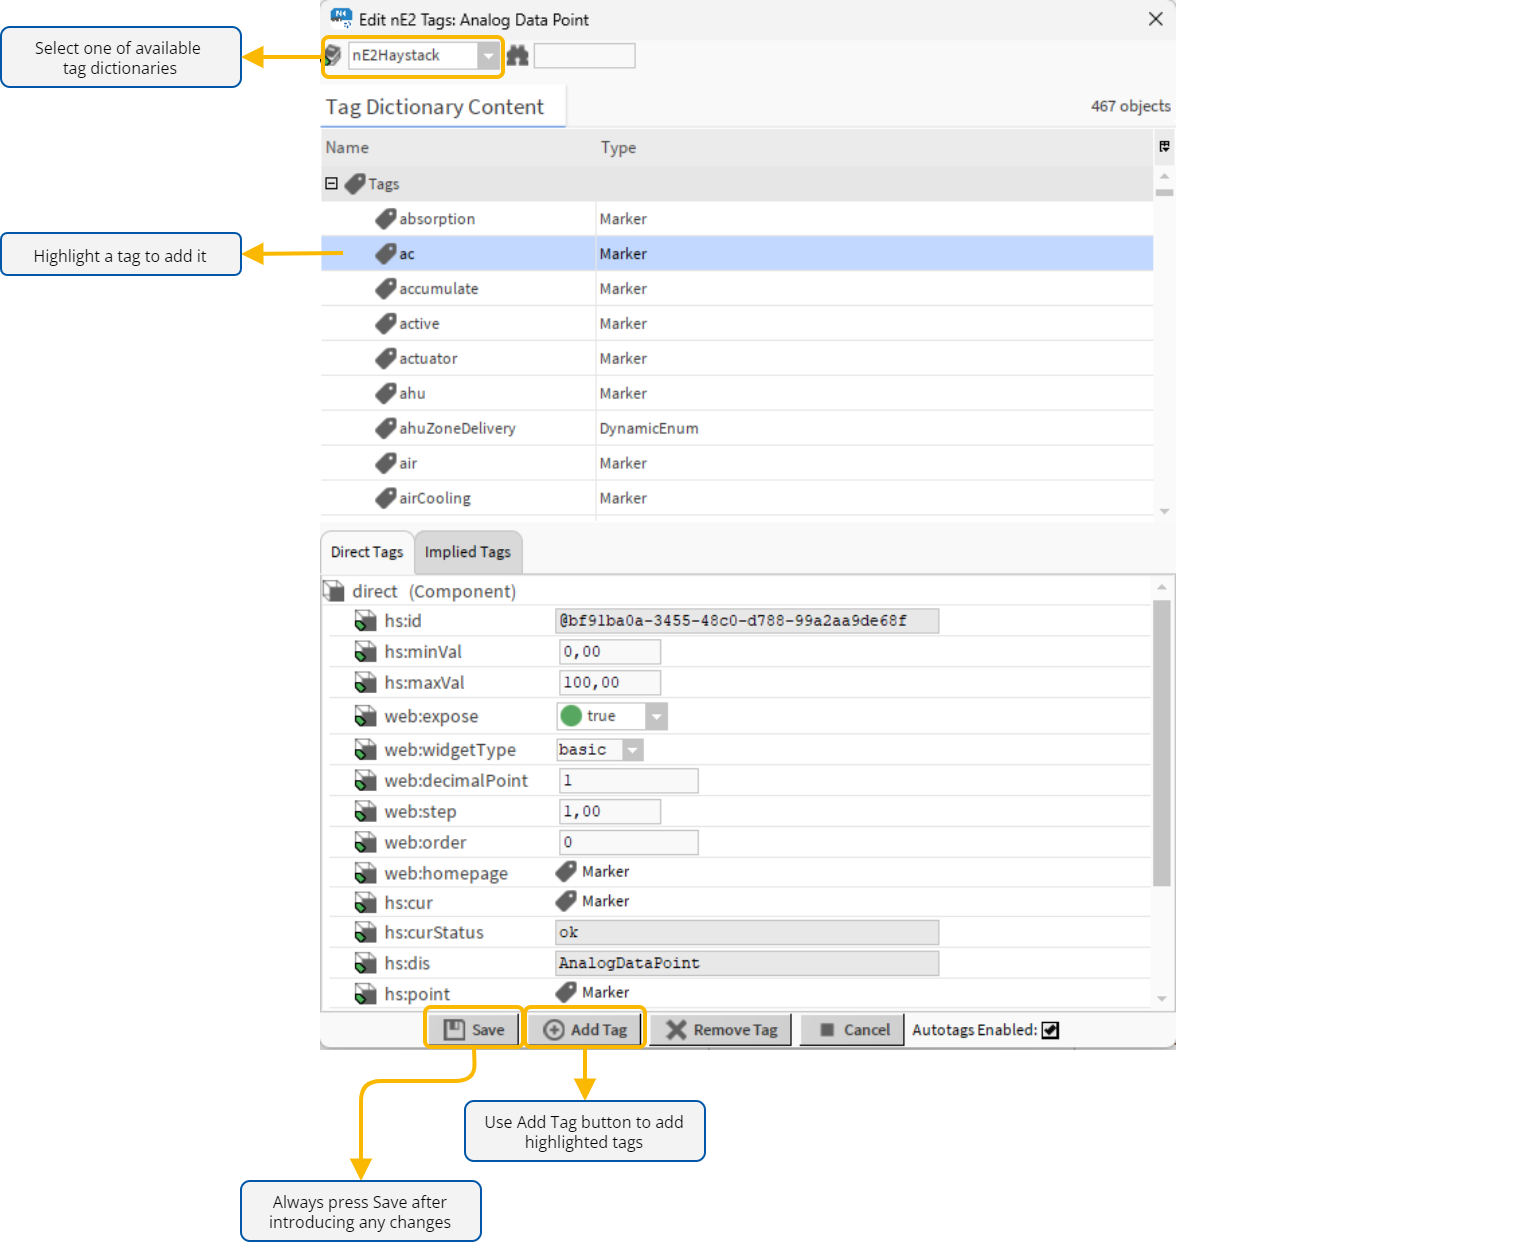
selecting tag dictionary: choose from the list of available tag dictionaries to display it in the Tag Dictionary Content section; it is possible to search through the list of tags in a search field;
-
adding tags: to add a new tag, highlight it in the Tag Dictionary Content section and confirm with the Add Tag button; it is possible to mark multiple tags by using Shift/Ctrl buttons on the keyboard;
-
removing tags: to remove a tag, use the Remove Tag button, which opens another dialog window; check tags to remove (or Remove All option) and confirm with OK:

Save
Always remember to save changes made in the Edit nE2 Tags dialog window.
Direct and Implied Tags
In the bottom section of the Edit nE2 Tags dialog window, there are two tabs, Direct Tags and Implied Tags.
The Direct Tags tab includes a list of tags added from any of the tag dictionaries dedicated specifically for the nano EDGE ENGINE devices (delivered with the nE2 Link module). Depending on the tag parameters, tags in the Direct Tags tabs can be editable.
The Implied Tags tab includes a list of Niagara-derived tags, which are added automatically based on Niagara-defined rules for the given type of component. These tags cannot be edited, added, or removed, and are required for a proper integration with Niagara.