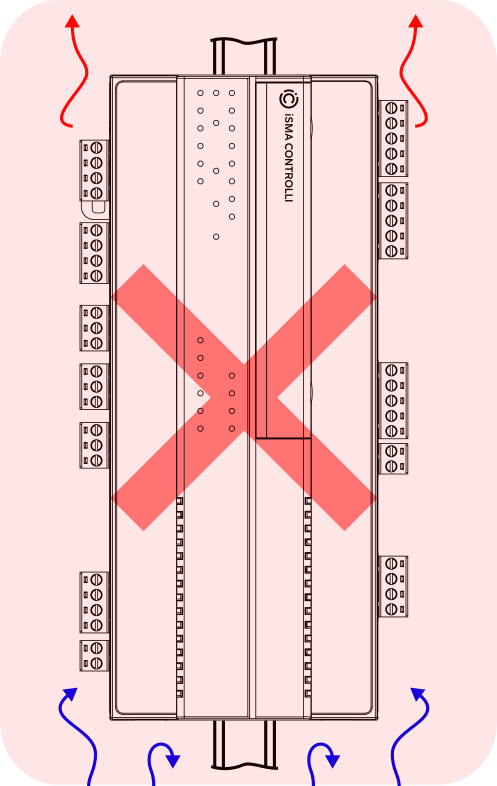
Mounting Orientation
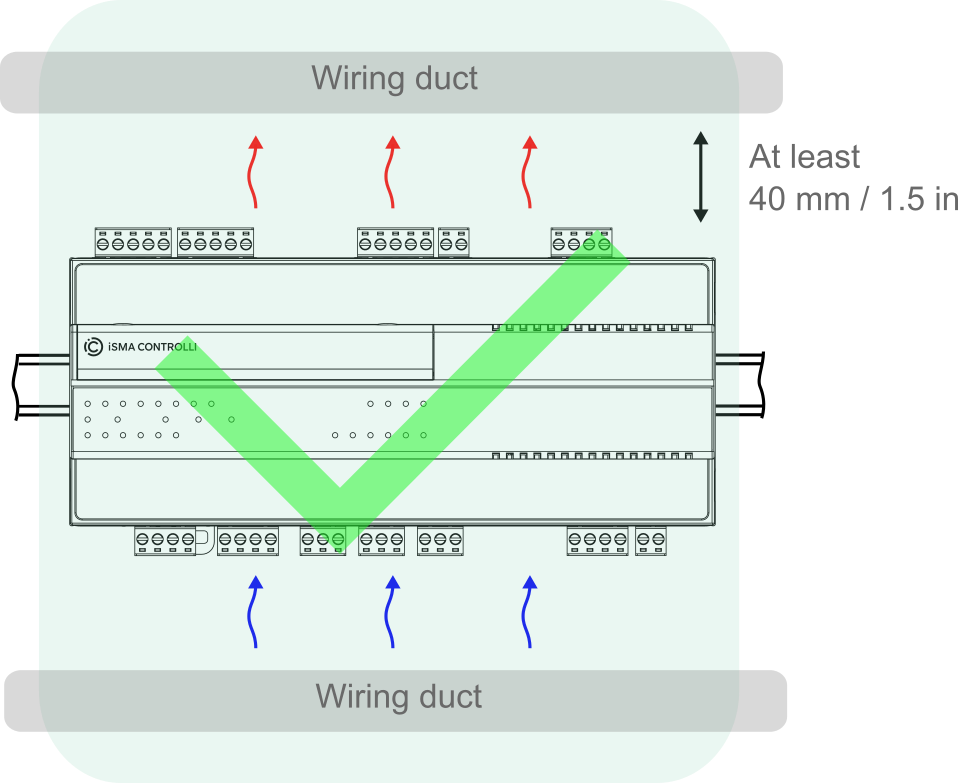
Proper Placement
The controller is properly placed when:
-
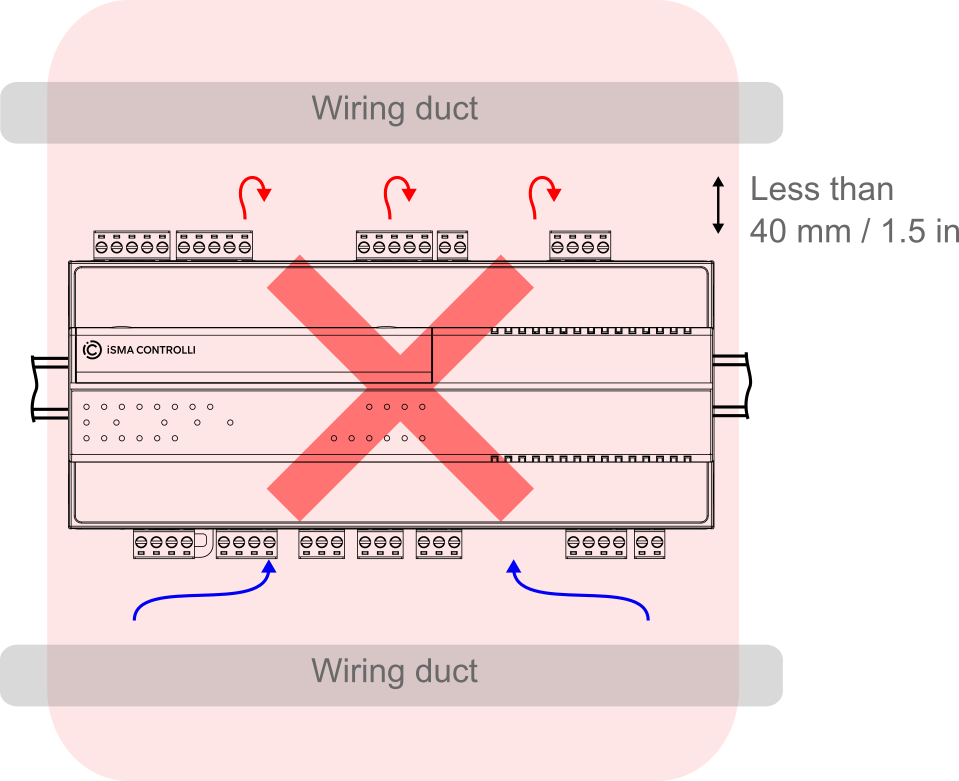
the space between the controller and the wiring ducts is at least 40 mm / 1.5 in,
-
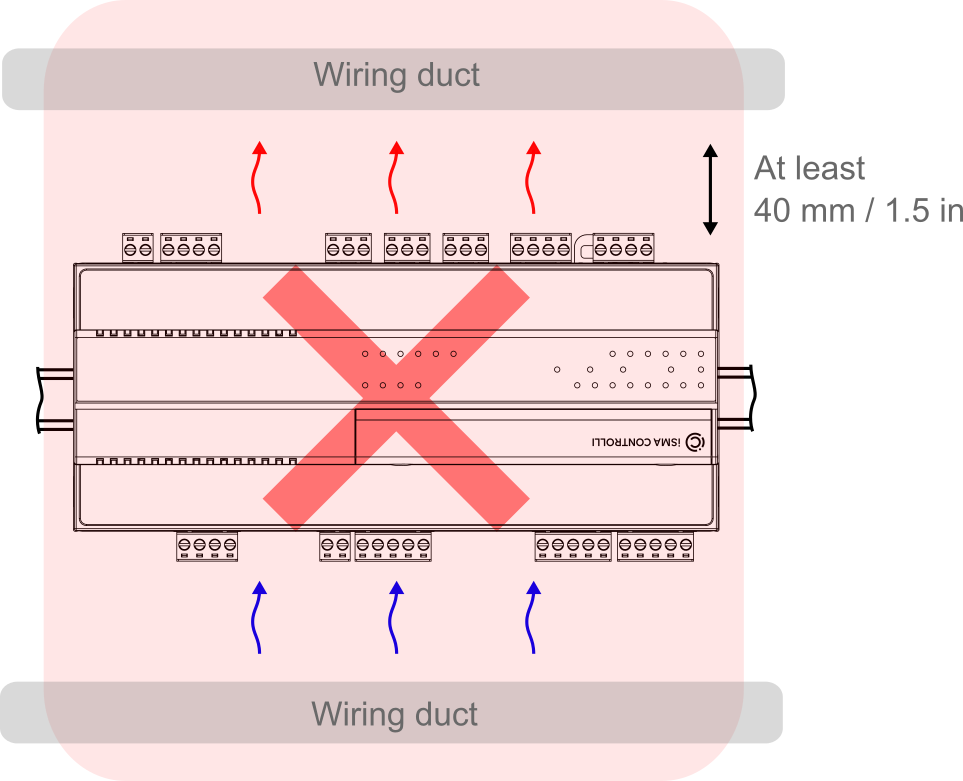
the controller is placed top side up (the blue panel is located over the LEDs panel).
Improper Placement
Mounting Instructions
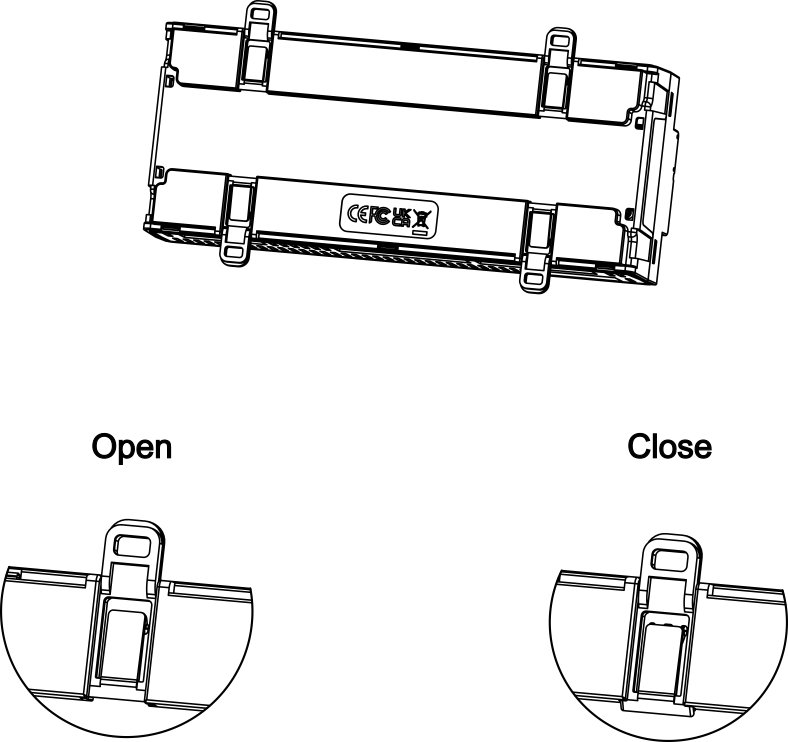
DIN Rail Mounting
-
Make sure the hooks are in open position, tip of the hooks do not stick out into rail cavity in enclosure.
-
Place the controller on the DIN rail and close the hooks.
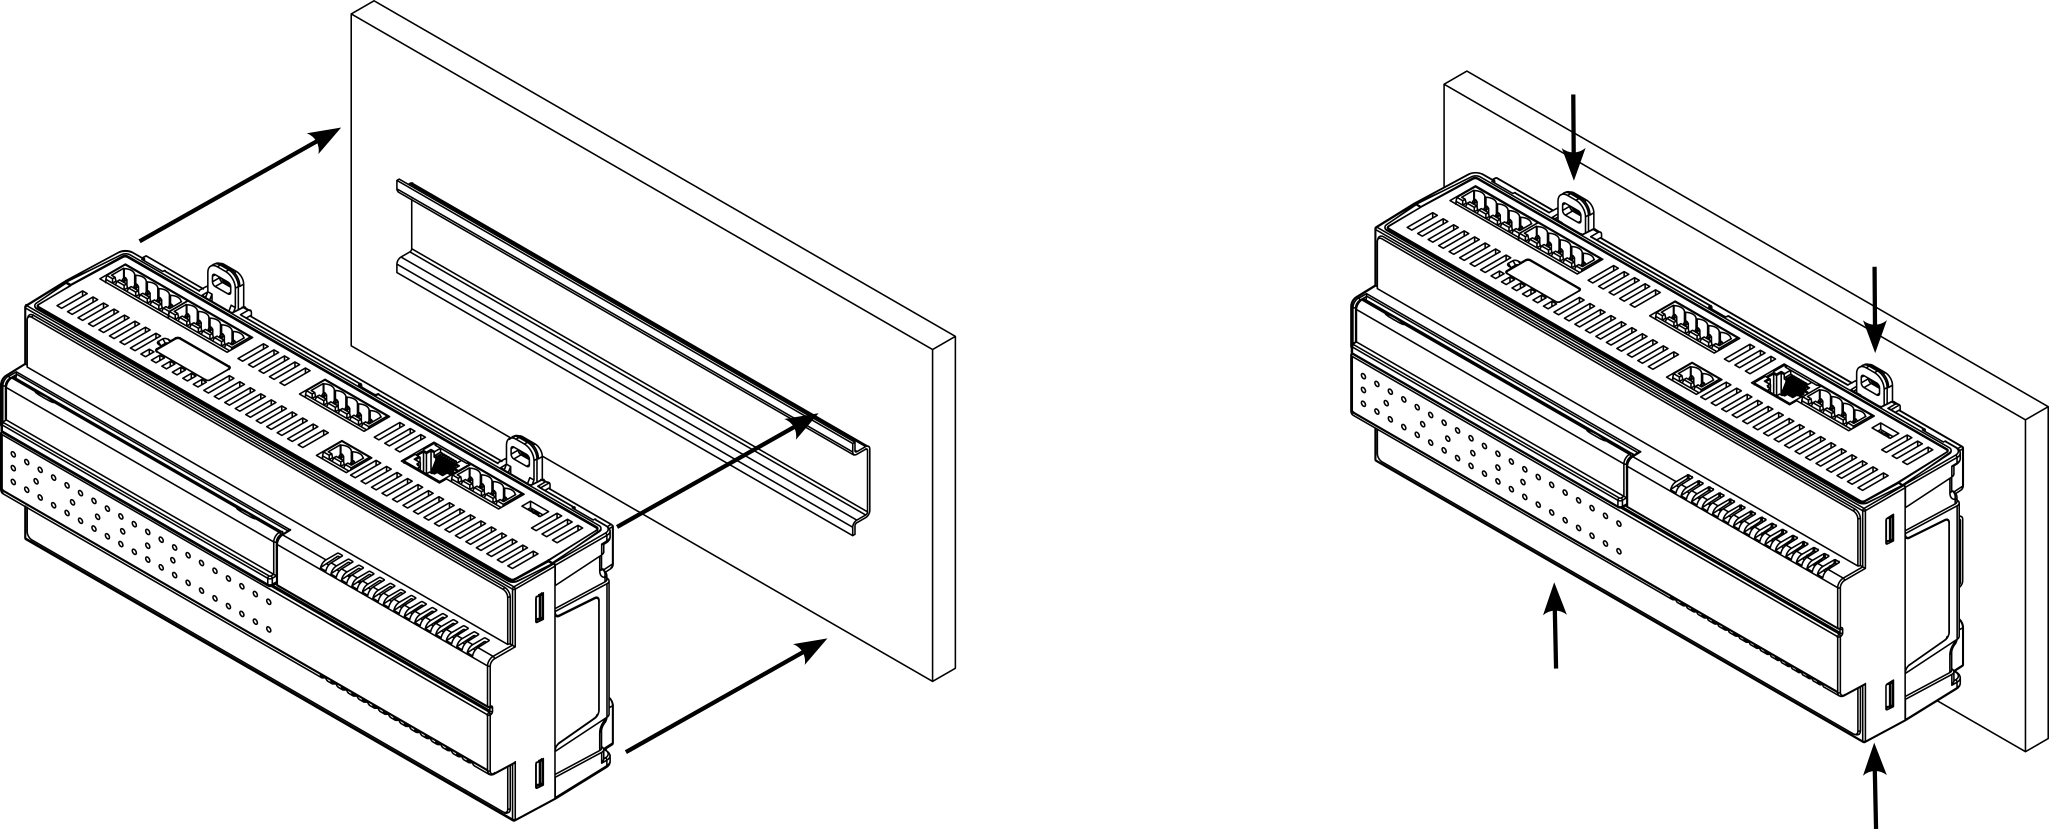
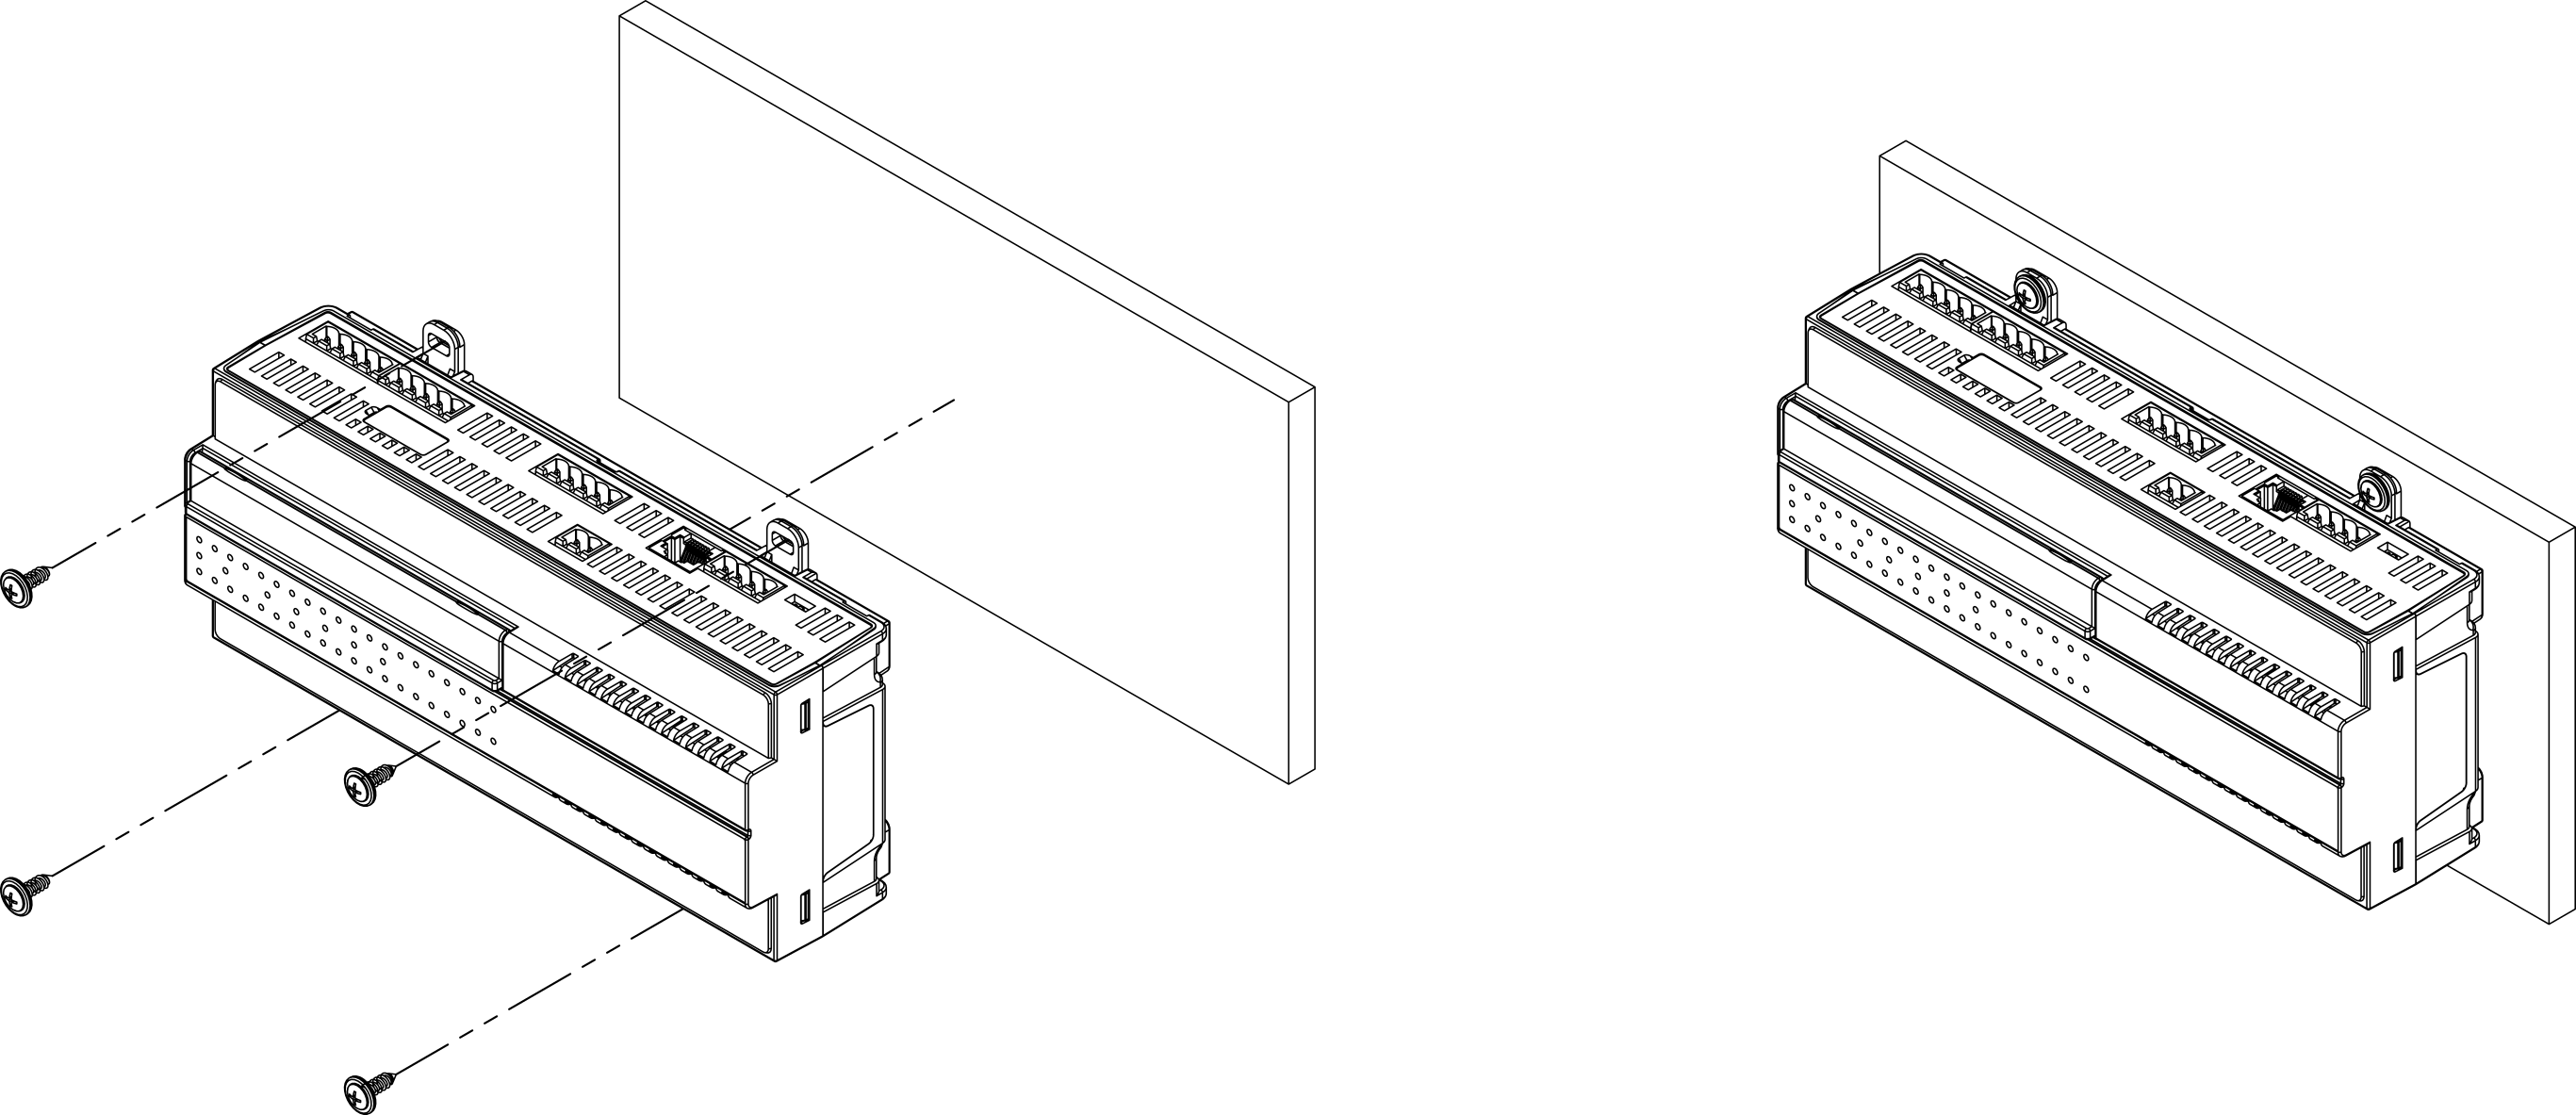
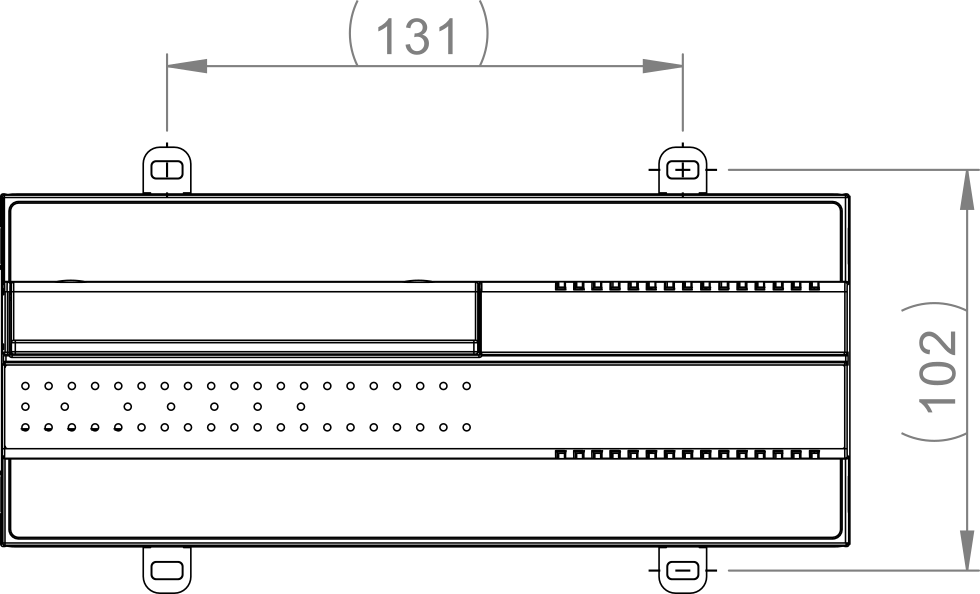
Screw Mounting
-
Set hooks into open position and put device next to the wall, use openings in hooks for marking pilot holes position.
-
Screw the controller to the wall, using screws of the following dimensions:
|
|
Thread diameter |
Screw head diameter |
|---|---|---|
|
Min. |
3 mm |
7 mm |
|
Max |
4.2 mm |
12 mm |