Adding Components
In order to add a new component in the Workspace Tree window, it is necessary to find a specific component in the Device Libraries/Kits window, and drag it to a proper place in the Workspace Tree. Adding components is performed by a drag and drop method. For nano EDGE ENGINE devices, it is possible to place inferior components only in the proper container or service component–the iC tool automatically blocks it, for example, to place an Application component in the Networks container, or the Device component in the iFnet service component.
For Sedona based devices there is no such limitation.
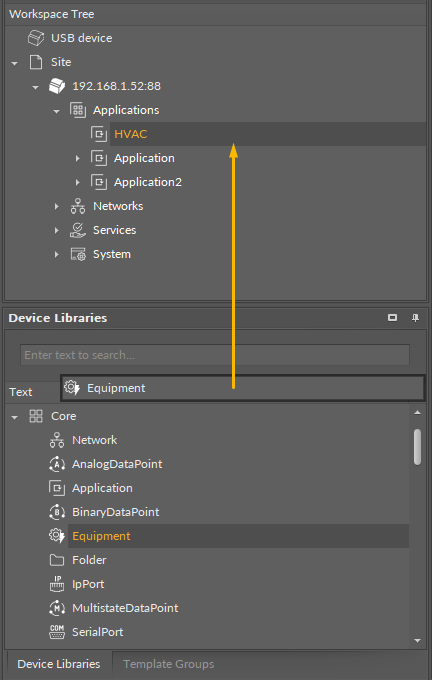
After dropping a single component in the specific place in the Workspace Tree, a dialog window appears, allowing to name a newly created component. After confirmation of the name, the component is added to the device, and the tree is refreshed.
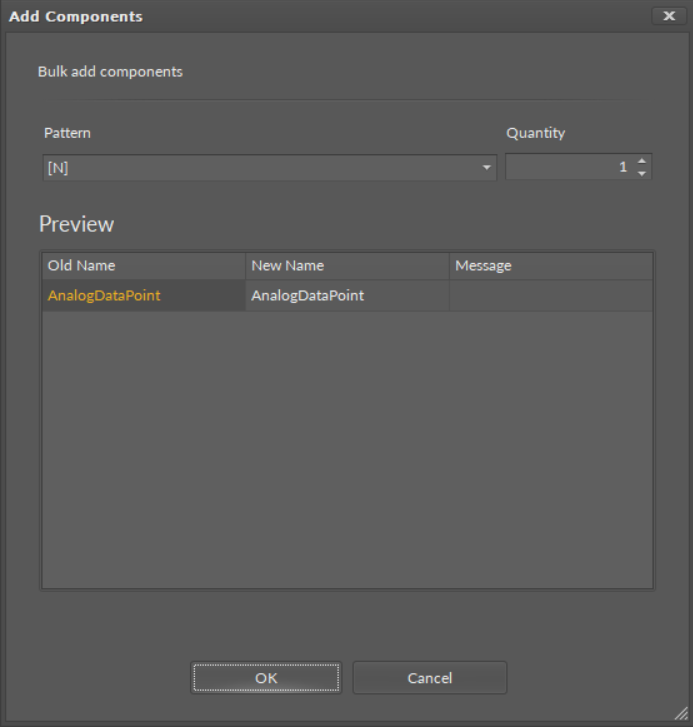
Many components can be dragged at once. After dropping them on the Workspace Tree, their names will be automatically defined as the component’s default name, without the user’s participation.
A second method of adding a component is copying and pasting or duplicating components already existing in the Workspace Tree. In order to do it, select a component in the Workspace Tree window, Property Sheet, or Wire Sheet view, and copy it using a keyboard shortcut Ctrl+C or the context menu using a Copy option. Afterwards, it is essential to choose the component in the Workspace Tree, under which the copied component is pasted with a Ctrl+V operation or the context using a Paste option.
The details of copying/pasting operation as well as duplication are described in the Single Device Functions section.
Adding Components from the Context Menu in nano EDGE ENGINE Devices
The Workspace Tree window, the Wire Sheet and Property Sheet views offer an option of adding components in the Applications and Network containers simply from the context menu.
The Add option is available in the context menu of elements contained in Applications and Networks. The Add option allows to select from available components and add them in the location, where the context menu has been opened.
The Add option incorporates a filtering mechanism, which adjusts the list of components available to add by the location (Applications/Networks container).
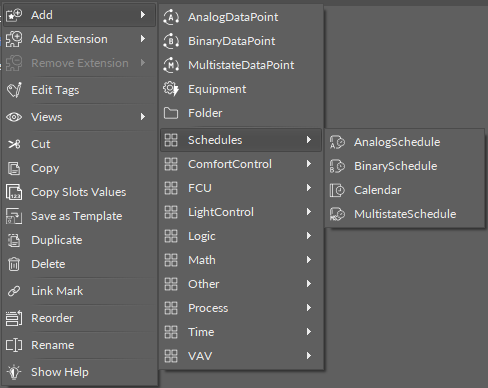
Add Option for Applications
In the Applications container, the Add option displays quick-access components and a list of libraries available for applications.
Quick-access components include:
-
AnalogDataPoint/BinaryDataPoint/MultistateDataPoint,
-
Equipment/Folder.
The components are followed by a list of libraries, from which each of available components can be added to the application.
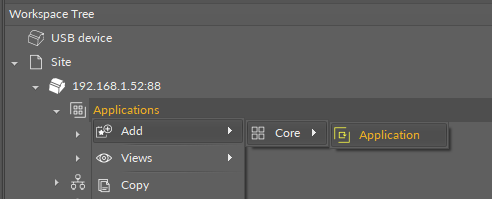
Due to the filtering mechanism, the list of libraries does not include, for example, the BACnet or Modbus library, which are exclusive to the Network container. If opened on the Applications container itself, the filtering mechanism will show the only possible option to add, the Application component:
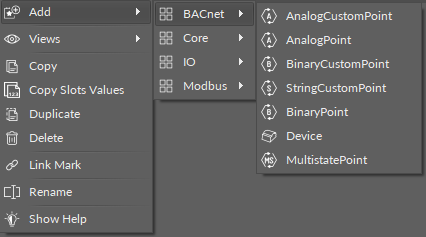
Add Option for Networks
In the Networks container, the Add option displays a list of libraries available for networks communication:
-
BACnet,
-
Core,
-
IO,
-
Modbus.
The Add option is not active for the Networks container component itself, because all network components for the device’s communication (LocalIO, BACnet, Modbus) are added by default.
Removing Components

A component may be removed from the Workspace Tree window level only by selecting it and choosing a Delete option from the context menu. Removal by pressing Delete key on the keyboard is blocked for this window.