The VAV14-IP controller is mounted directly on an air duct or in a panel with access to a damper shaft.
The VAV14-IP controller is delivered ready for mounting:
-
calibrated to 95°,
-
with sheet-metal tapping screw (fi 4.2 mm L 13 mm), slotted hexagon head,
-
with bearing bushes with flange fi 5 mm (inner) fi 6 mm (outer), L 35 mm,
-
and with pressure hose fi 7 mm (outer), L 1 m.
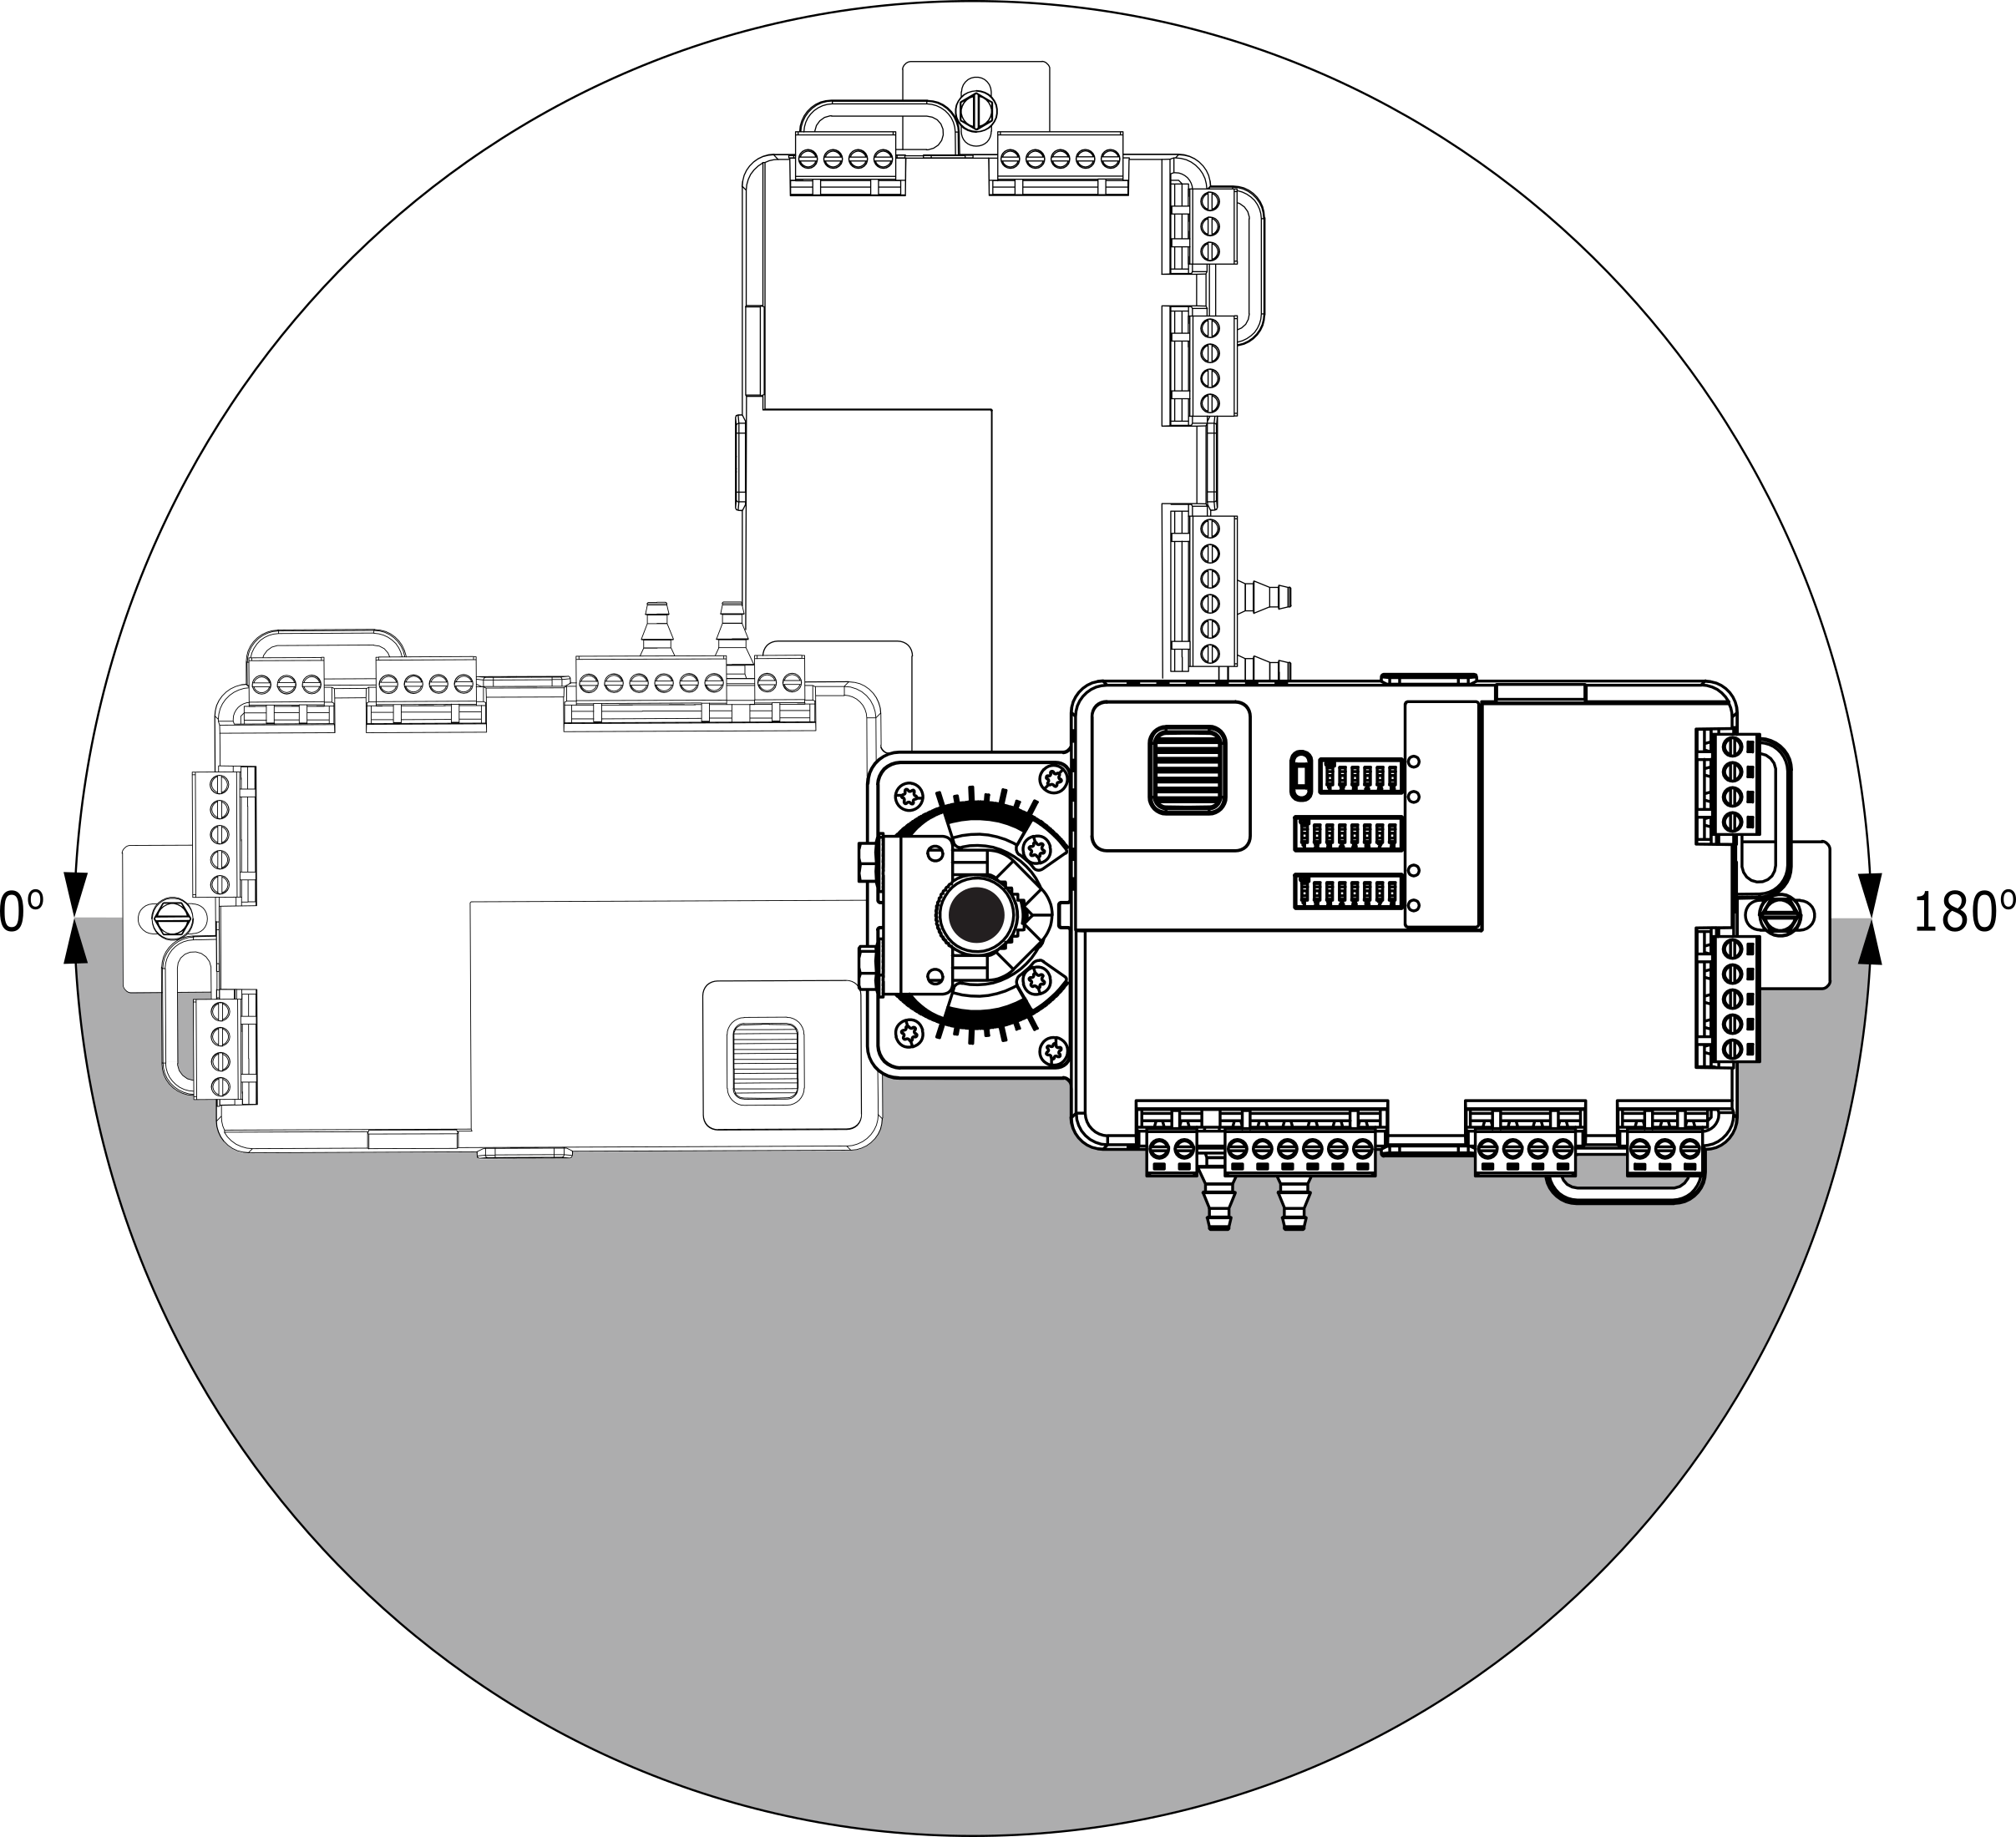
Mounting Orientation
To prevent condensation that might occur on damper shaft and get into the controller's housing, VAV14-IP should be installed in any position above the damper shaft level (from 0° to 180°).
Installation Steps
Tools for installation:
-
8 mm wrench,
-
screwdriver.
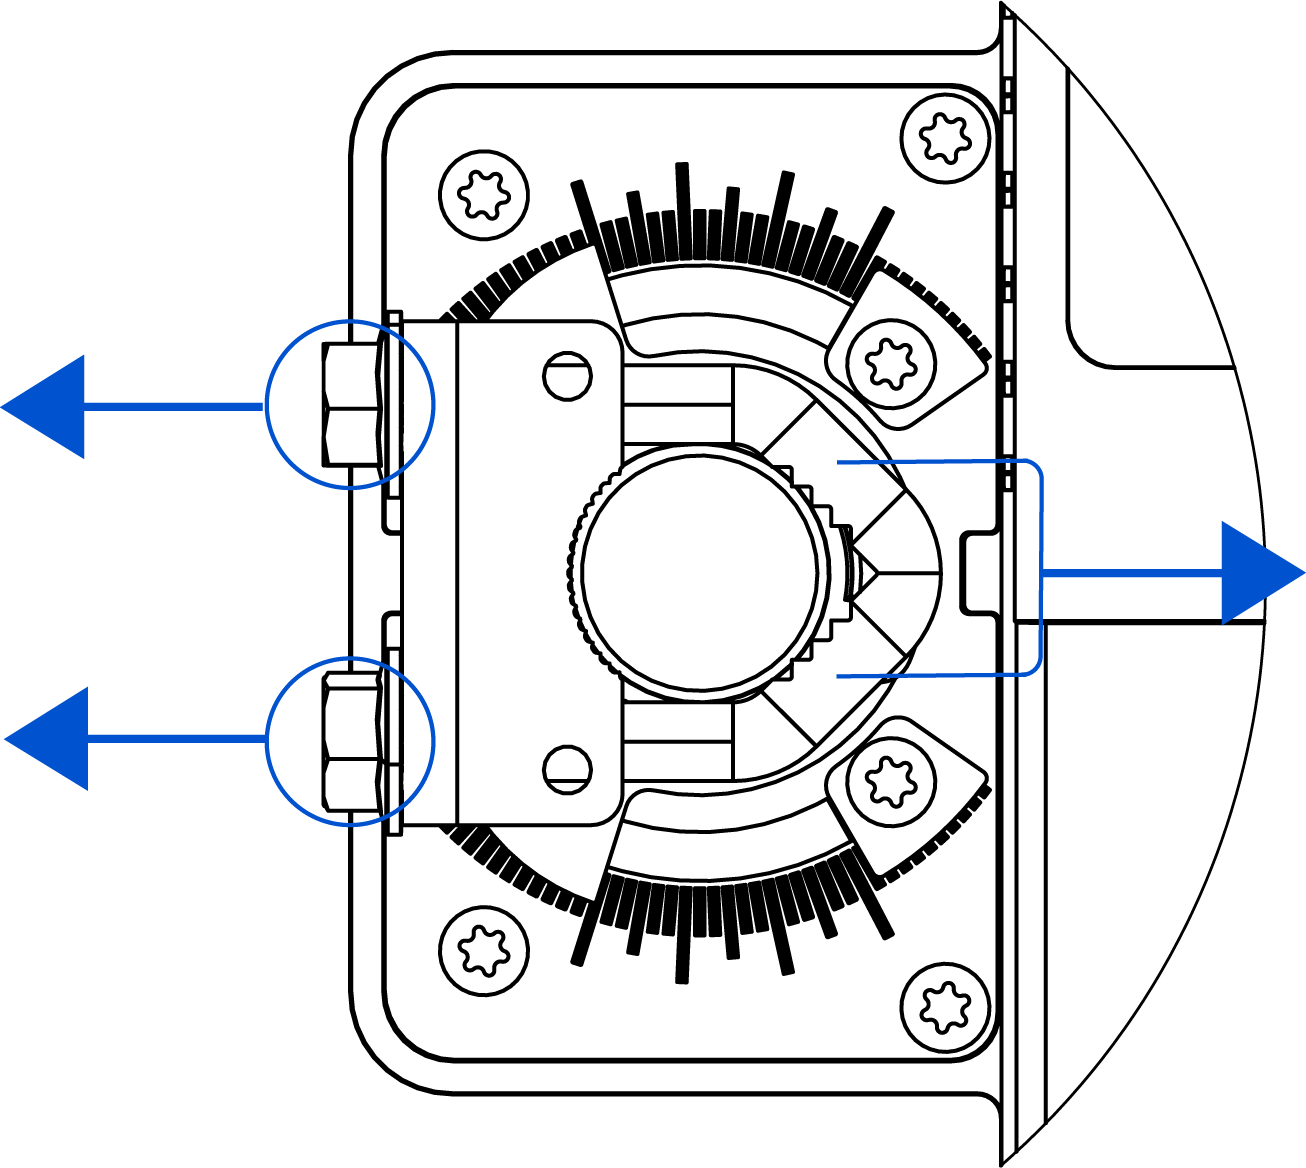
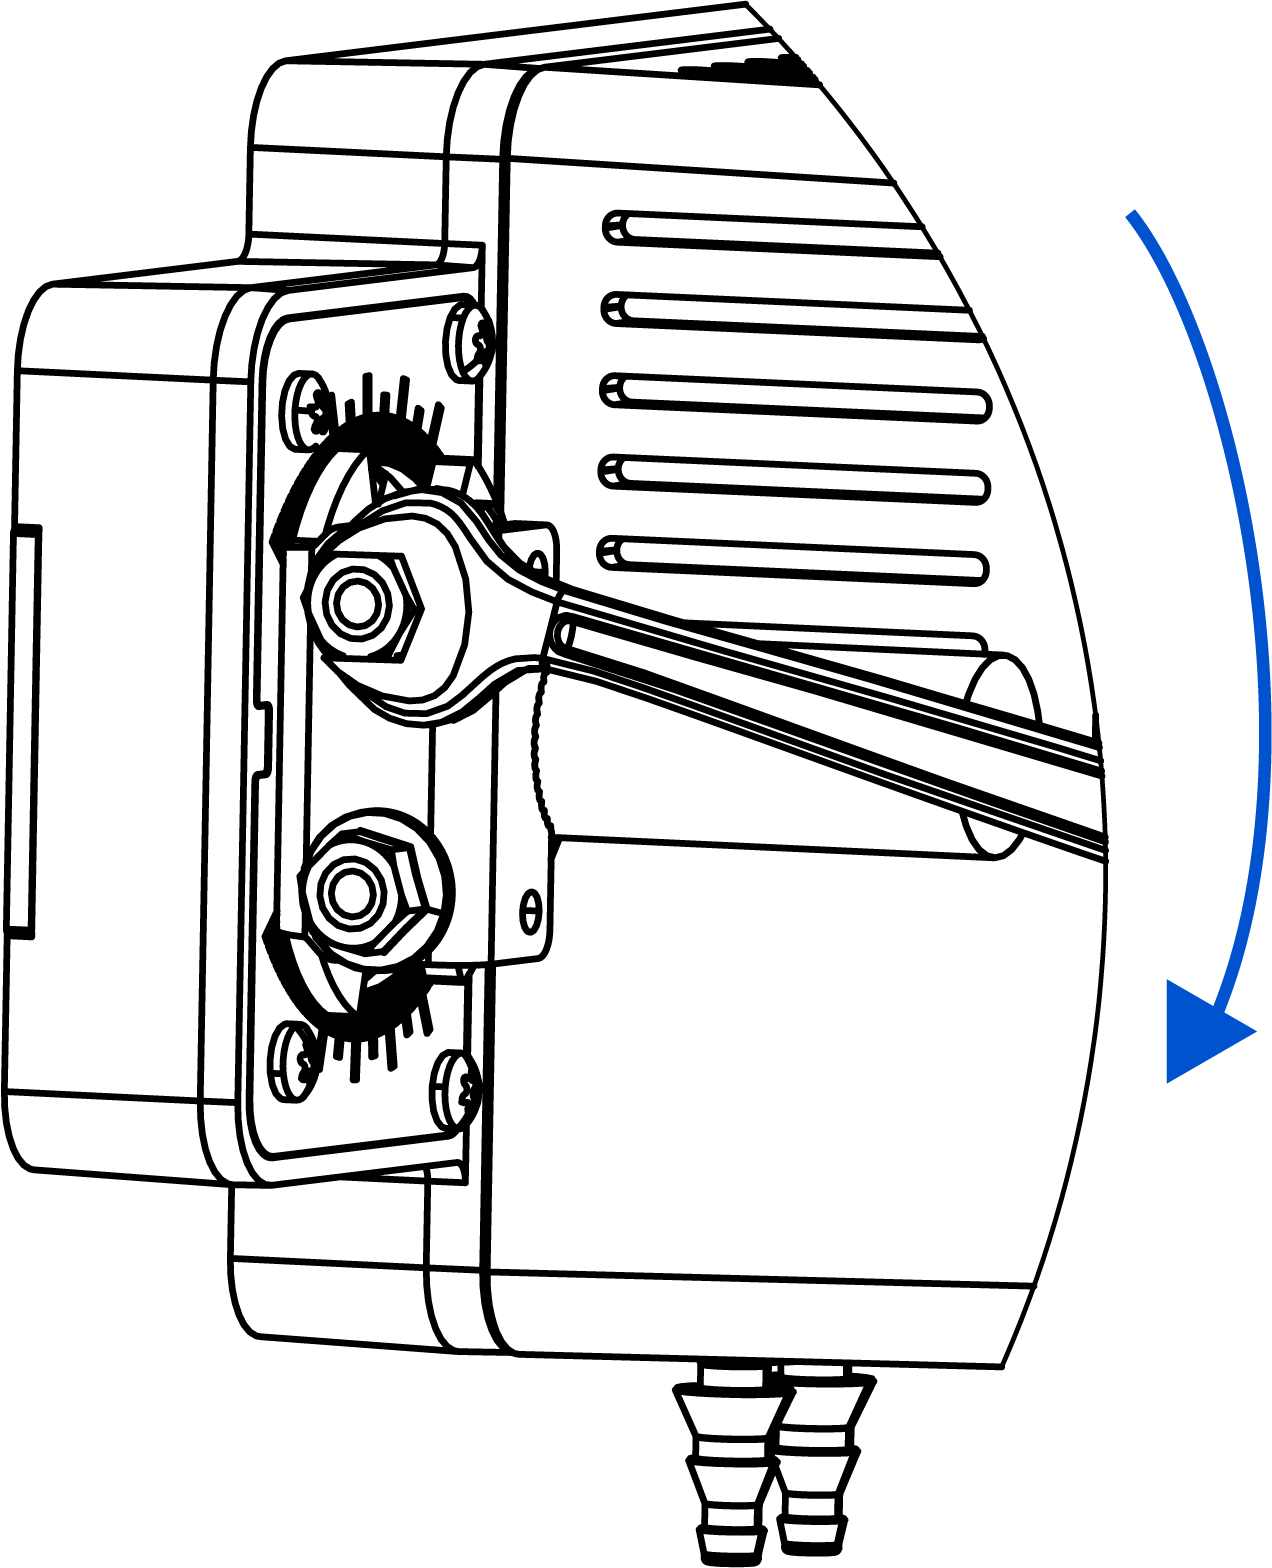
1. Loosen the U-bracket
First, loosen the U-bracket installed around a hole for a damper shaft. The U-bracket is tightened with 2 M5 hexagon flange nuts.
2. Mount the VAV14-IP controller
When the U-bracket is loosened, mount the VAV14-IP controller onto the damper shaft bearing in mind the recommended working orientation of the controller.
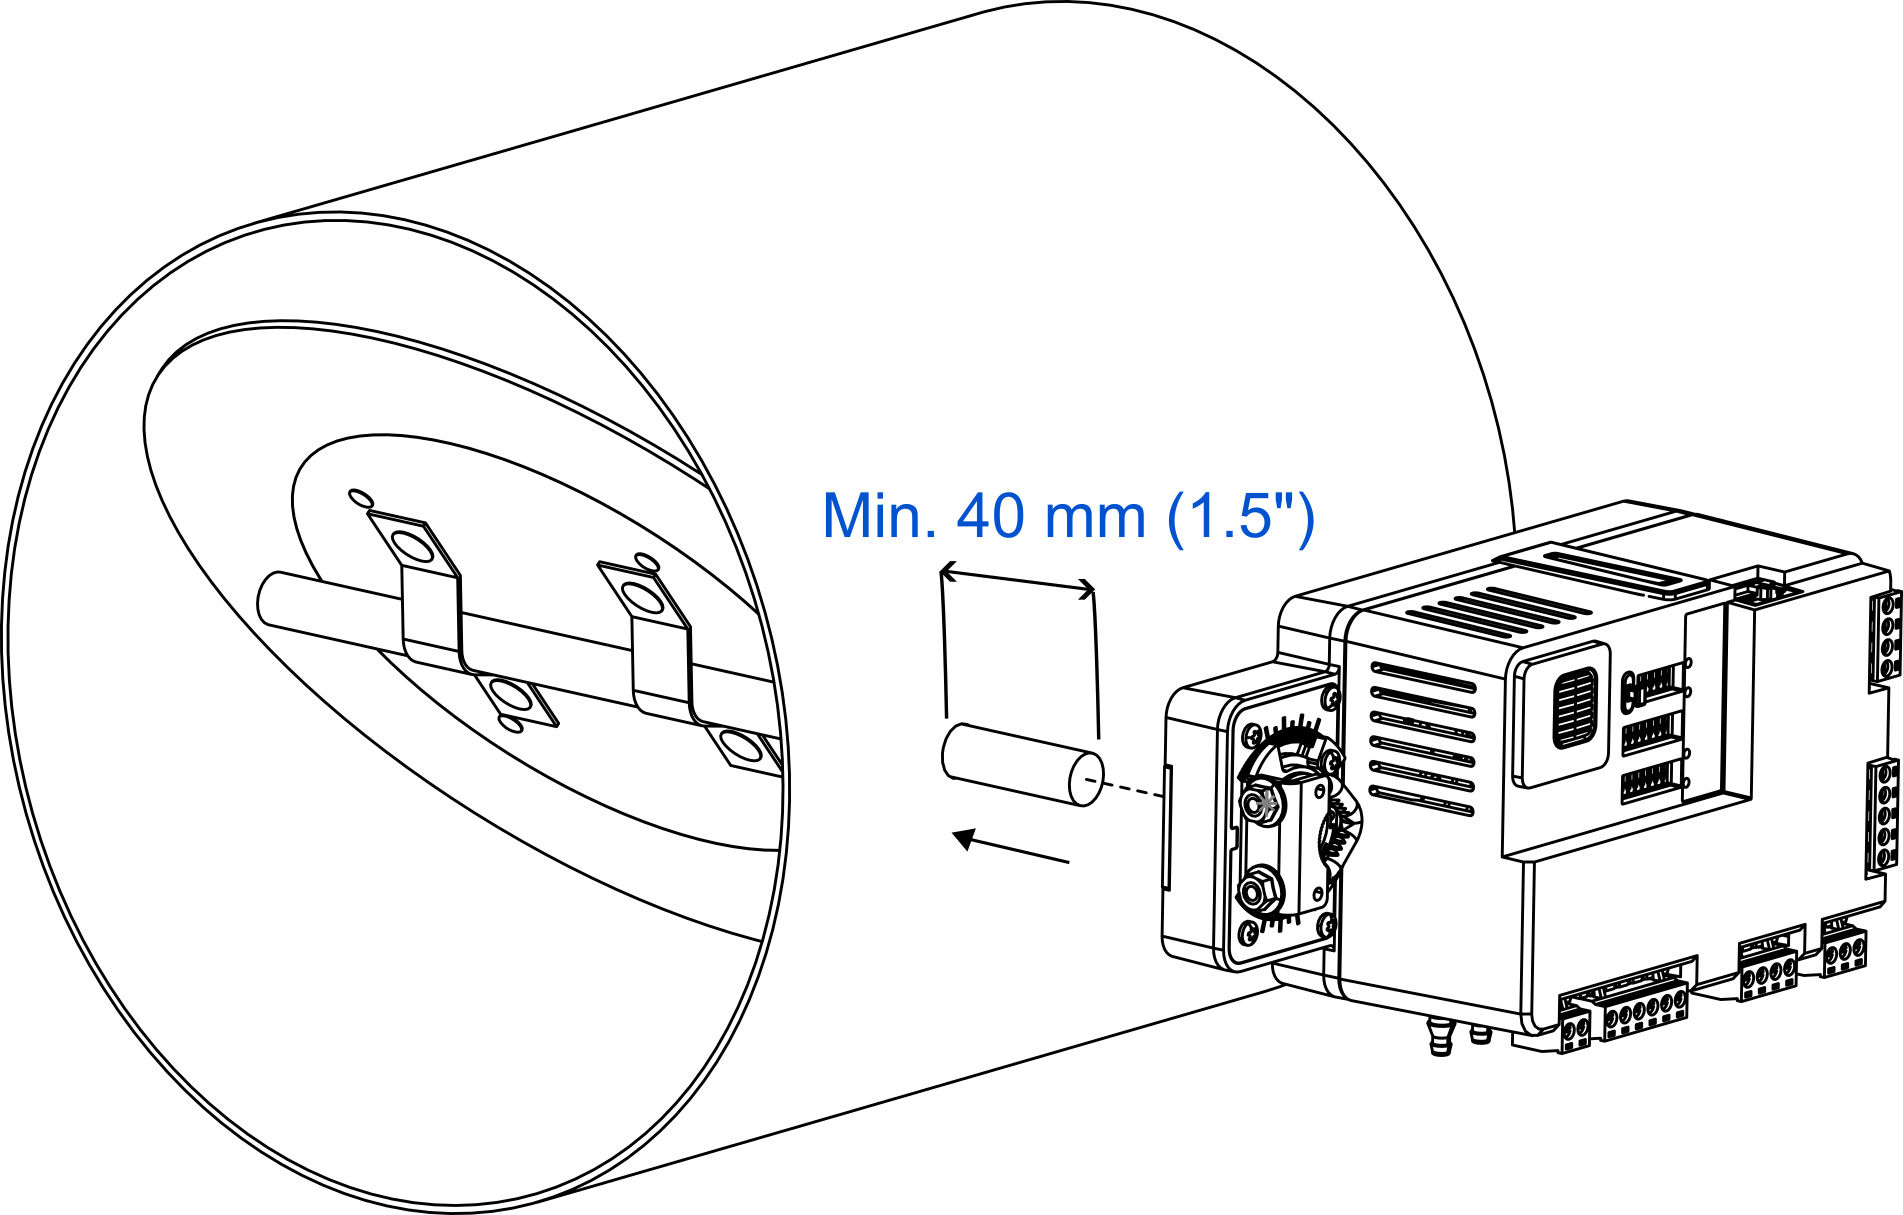
Please note that the minimum required length of the damper shaft for a proper mounting of the VAV14-IP controller is 40 mm/1.5 in.
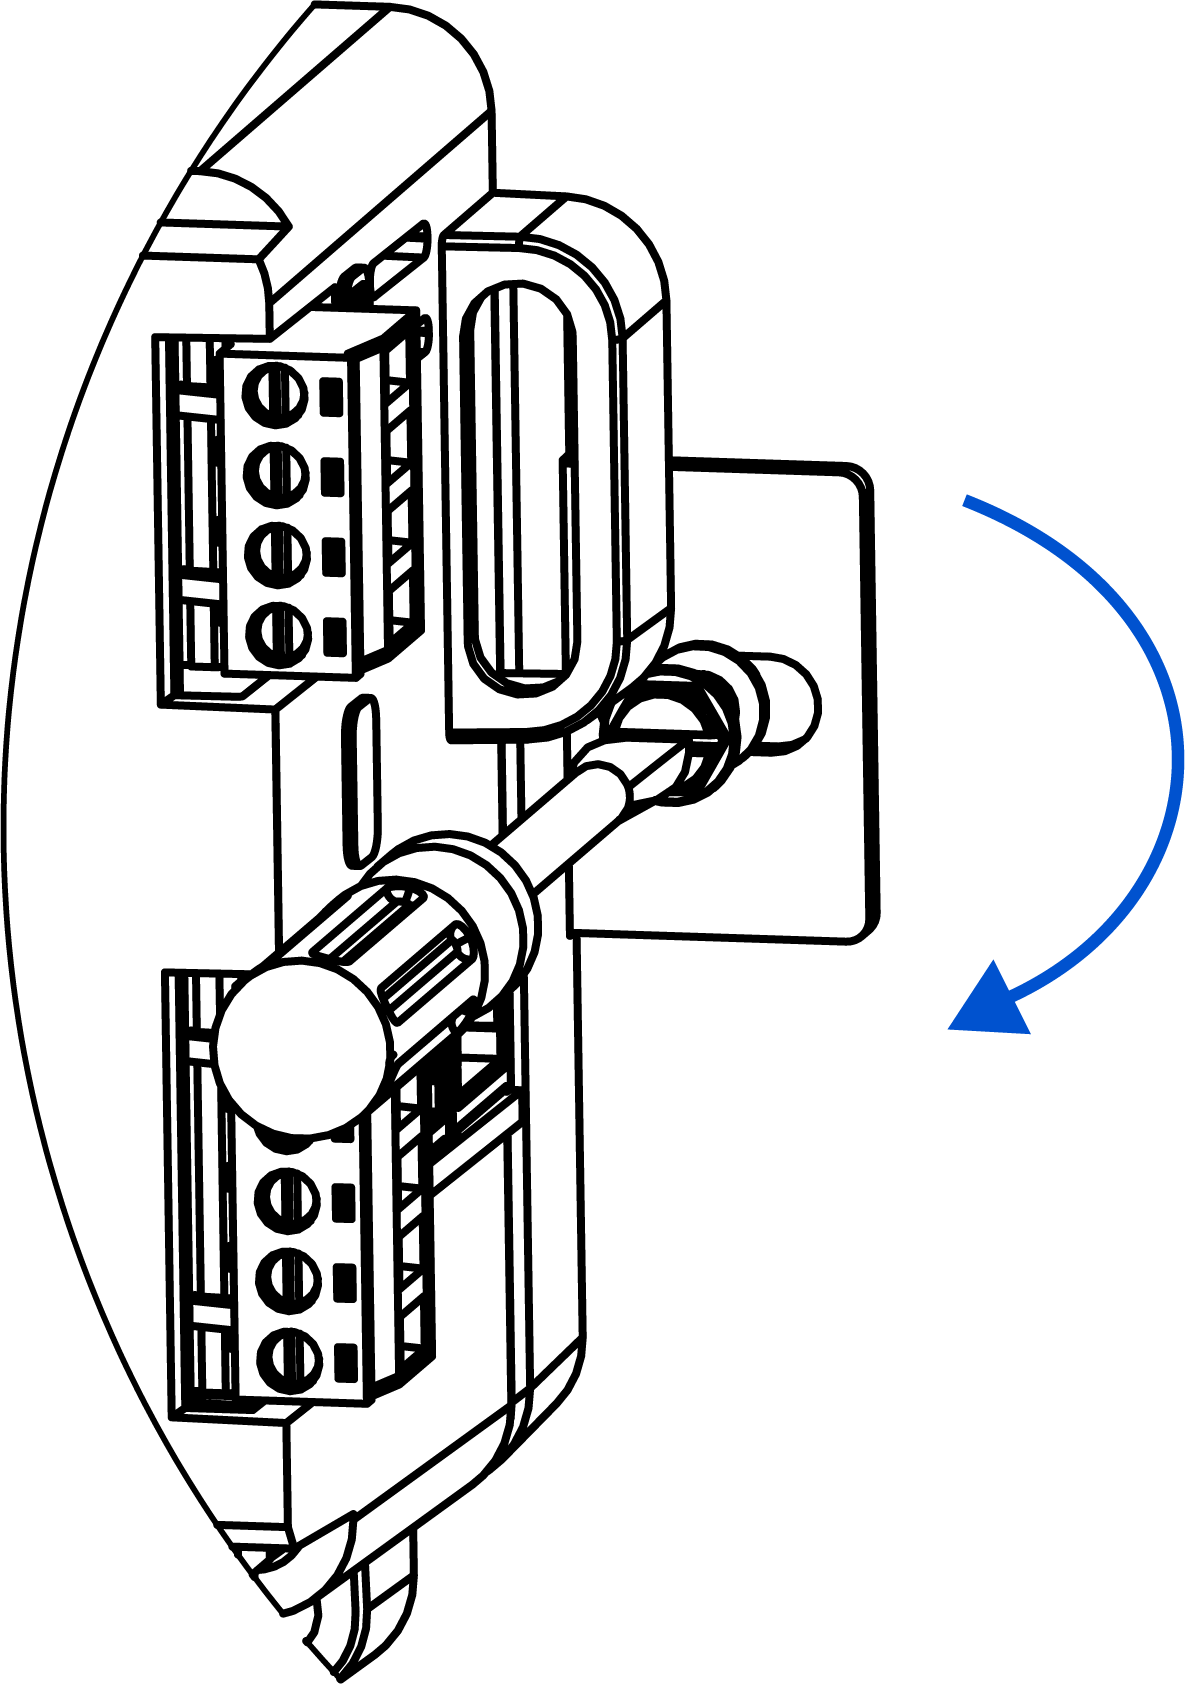
3. Tighten the U-bracket
Use the wrench to re-tighten the U-bracket around the damper shaft.
4. Tighten the mounting screw
Lastly, use the screwdriver to tighten the mounting screw on the side of the controller opposite to the damper shaft.