Logging Into the Visualization Web Server
There are two options to log in to the visualization web server: either manually or with autologin.
Manual Login
-
In order to log in to the graphic visualization in the iSMA-B-AAC20, insert the controller's IP address in the URL field of the an Internet browser (preferably, Google Chrome), click 'Enter', and wait until the login site loads.
-
When the login site is up, introduce the credentials, and click Login:
-
login: user
-
password: 1357
-
-
Having properly logged in, the Internet browser redirects to the index.html file. If no such file has been installed in the internal flash memory, the browser shows a standard diagnostic and configuration web page for the iSMA-B-AAC20 controller.
-
If the IP address with the name of the file (and location), separated with the '/' symbol, is inserted in the URL field of the Internet browser, then, after logging in, the browser redirects to the indicated location.
Warning!
If, after logging in to graphics the visualization web server, the web page in the Internet browser takes longer than few seconds to load (the web page is still, and the spinning wheel is active), then duplicate the tab, which makes the web page to fully load.
Setting Autologin to Graphics
To set automatic logging in to own graphics, in the application, go to the iSMA Tool, then to 'app/service/plat', and change the 'Web autologin' slot to true.
Warning!
Please remember that if the 'Web autologin' slot is set to true, then each attempt to log out of the graphics causes the web page to immediately log back in.
Warning!
Autologin always redirects to the path indicated in the URL field of the Internet browser.
Warning!
The option available from the 5.7 firmware.
Main View
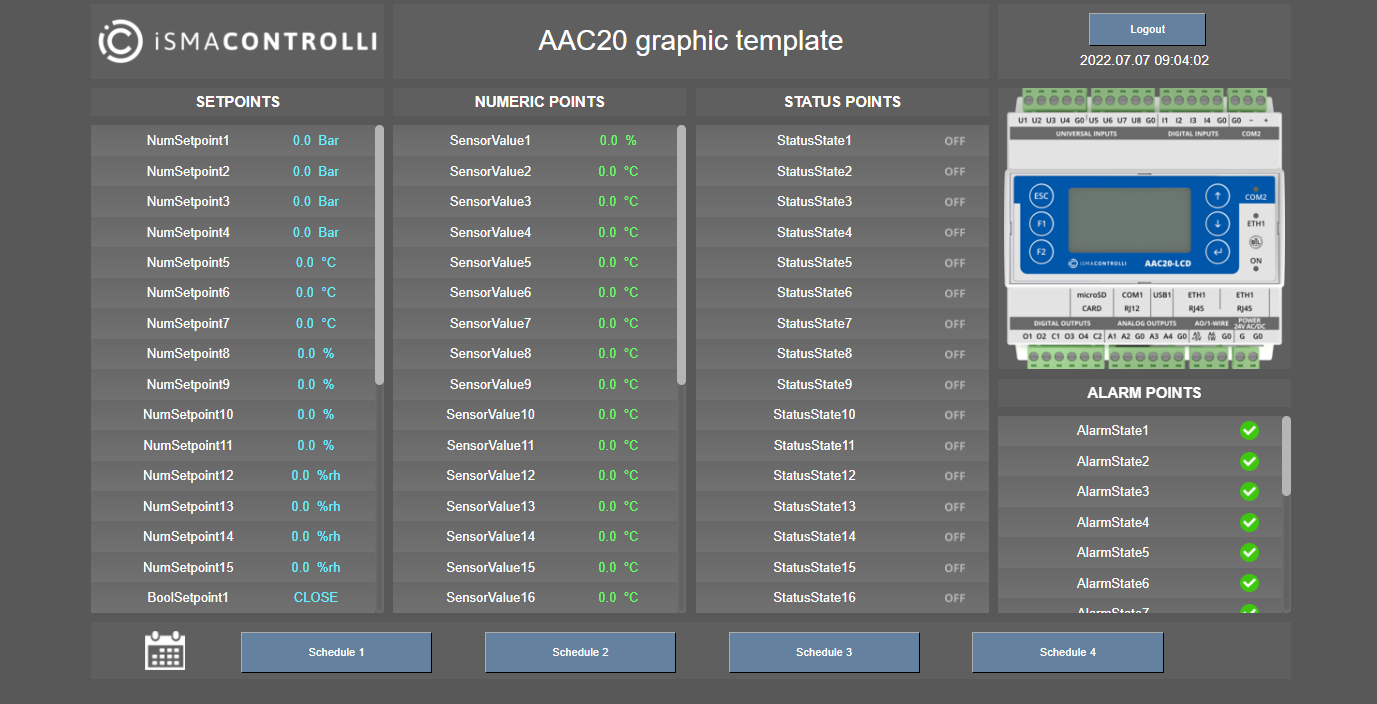
The visualization web server main view
The main view of the visualization web server displays the following items:
-
logo;
-
heading (top text);
-
logout button;
-
device image;
-
points current values;
-
schedules buttons.
All of these items can be configured in the Visualization_configurator.xlsm file.
In the main view of the visualization web server, it is possible to edit setpoints values by clicking a value itself.
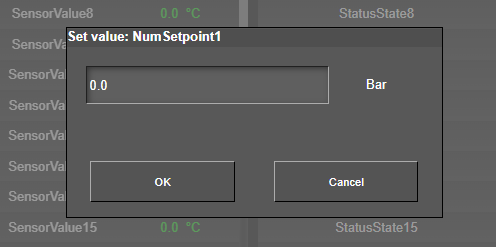
Setpoint edition dialog window
A pop-up window allows to enter a new setpoint value in units set in the configuration file for the selected setpoint. To confirm the new value, confirm with OK. The edited valued is automatically updated in the iSMA Tool.
Schedules View
Pressing a schedule button in the main view changes it to the schedule view. In order to exit the schedule view, click the arrow button left to days of week.
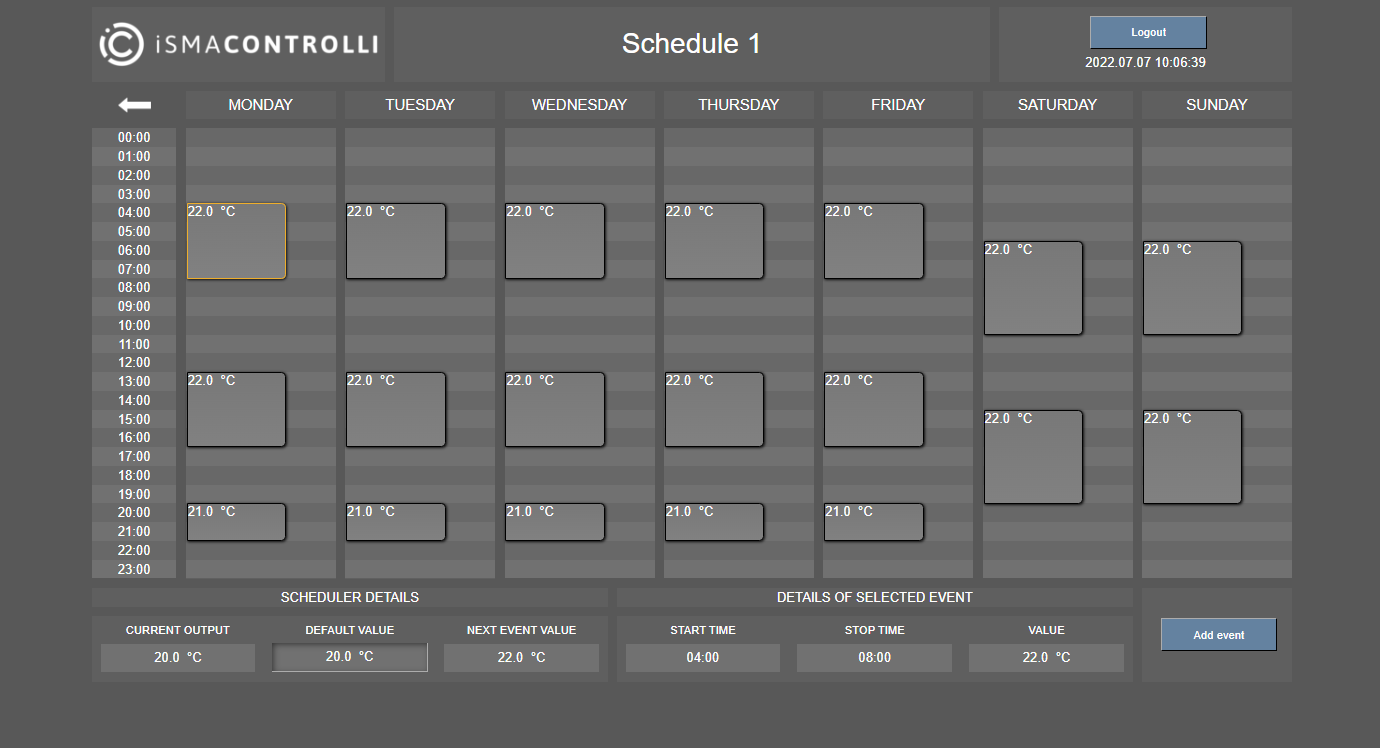
The Schedule 1 view
The schedule view displays a weekly view of events per 24 hours. The view is fully editable in terms of adding, editing, copying/pasting, and removing events.
Context Menu
All options available for events in a schedule are listed in a context menu (adding an events is also available using a button in bottom right corner of the view).
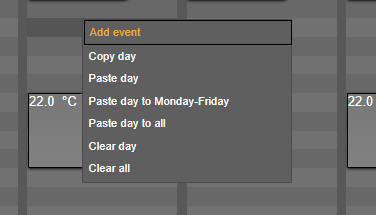
Schedules context menu
-
Add event
Selecting an Add event option, a dialog window pops up:
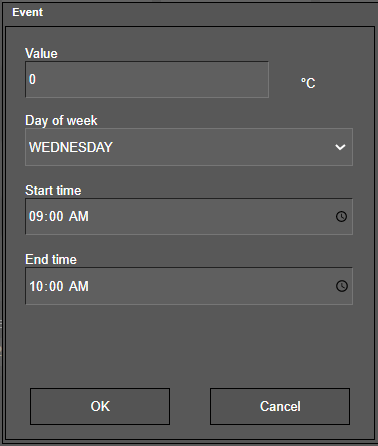
The dialog window allows to set the event's current value, day of week, and time. Confirm with OK to add the event.
-
Copy/paste
The context menu includes options for copying and pasting events for selected days:
|
Context Menu Option |
Function |
|---|---|
|
Copy day |
Copies all events from a selected day |
|
Paste day |
Pastes all copied events to a selected day (clears any other events set for the day) |
|
Paste day to Monday-Friday |
Pastes all events from a day, which the context menu is invoked for, to Monday, Tuesday, Wednesday, Thursday, Friday (clears any other events set for the days) |
|
Paste day to all |
Pastes all events from a day, which the context menu is invoked for, to a whole week (clears any other events set for the days) |
Copy/paste options
-
Clear day
Removes all events set for the day.
-
Clear all
Removes all events set in the schedule.
Context Menu for a Selected Event
The context menu for a specific event differs only in two options: the Add event option is replaced by the Edit event option and the Remove event option is added. All other options have the same functions.
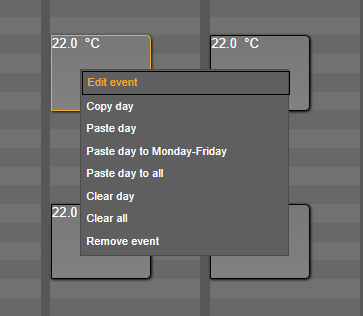
Context menu for a specific event
-
Edit event
Editing of an event is carries out in a pop-up window, which shows the same fields as for the Add event option but with the event's values. It is possible to edit a current value of the event, day of week, and time.
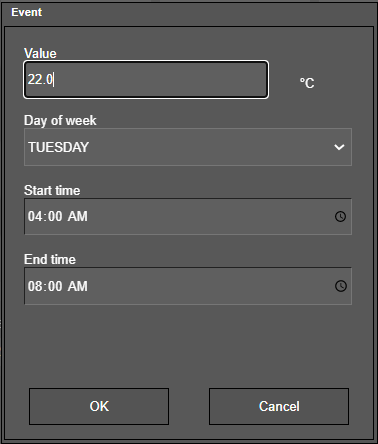
Editing of event dialog window
-
Remove event
Deletes a selected event.
Displaying the Visualization Web Server on Various Devices
The visualization web server is automatically fitted to PC's resolution (fixed resolution 1280x720). However, to correctly display the web server on other devices (e.g., panels), it may be required to change the resolution of display.
Industrial PC Panel 7" (iSMA-D-PA7C-B1)
To fit the visualization web server size to the Industrial PC panel 7", it is required to change the dpi settings to lower than the default value:
-
go to the panel's settings;
-
select OtherSettings;
-
select settingDpi;
-
set value lower than the default value, for example, 120 dpi.