The AnalogSchedule component allows for setting scheduled events in weekly intervals.
The AnalogSchedule component
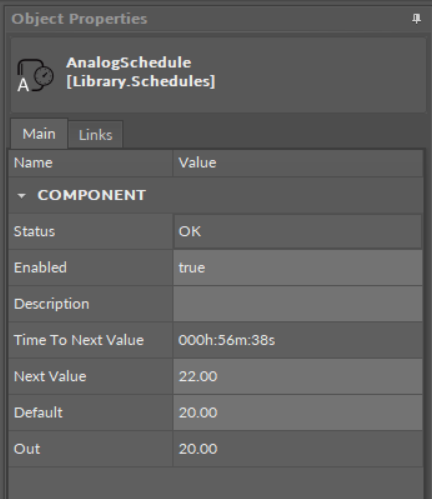
The AnalogSchedule component has the following slots:
-
Status: indicates the current status of the component;
-
Enabled: change of the slot's value enables or disables the component;
-
Available settings: true (enabled), false (disabled);
-
-
Description: an additional detailed information about a schedule that may be freely described by the user;
-
Time To Next Value: shows how much time is left until a next scheduled event;
-
Next Value: shows the value of a next scheduled event;
-
Default: allows to set a default value used in time when no event is specified;
-
Out: indicated the current value of the schedule (sourced from the event or default).
Setting AnalogSchedule
Events in the AnalogSchedule component are added in the Weekly Schedule view, which is automatically opened upon double-clicking of the component.
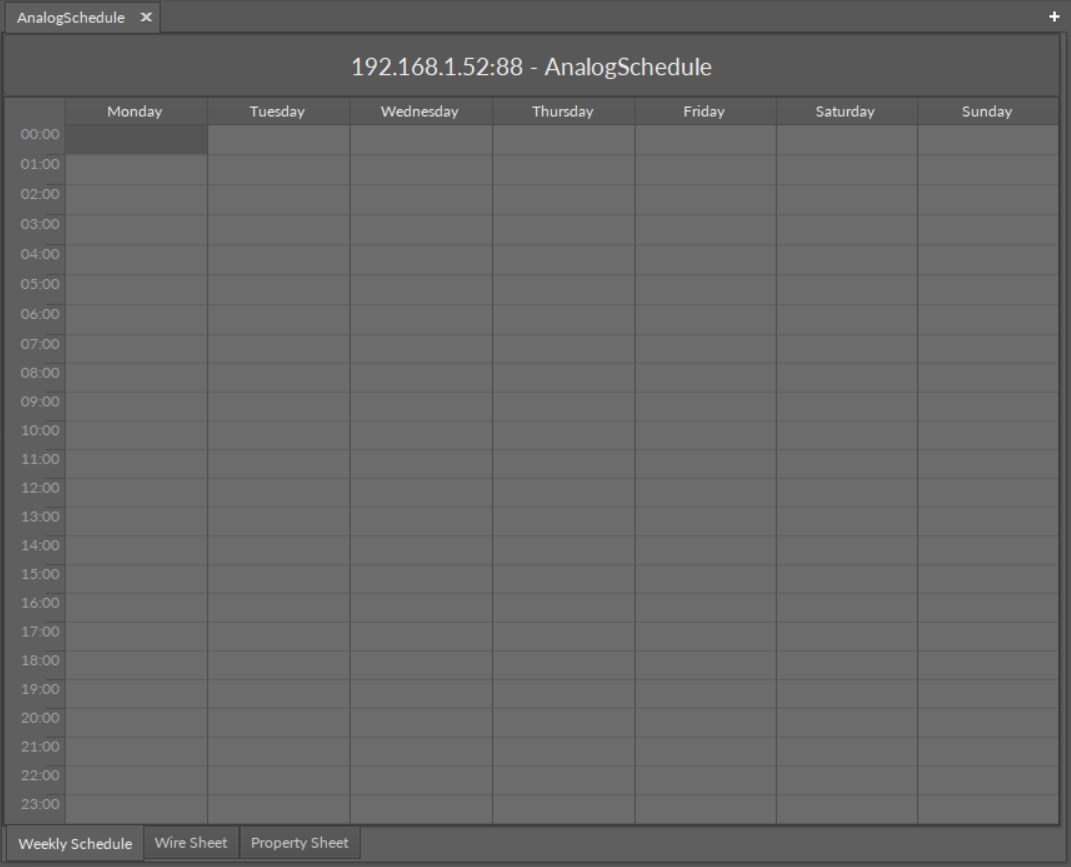
The Weekly Schedule view
To set a schedule, first, set the required time interval. If the required time interval lasts for an hour or less, double-click on the required day and time, open the context menu, choose Add Event option, and enter the required value and time limit in the displayed dialog window. If the required time is longer than an hour, click and hold the click on the beginning of the required time interval and drag until the end of it. Open the context menu, choose Add Event option, and set the required value in the displayed dialog window.
In case no specific value is set for a given time interval, the default value is applied.
An event can be added by double-clicking on a schedule or in a context menu.
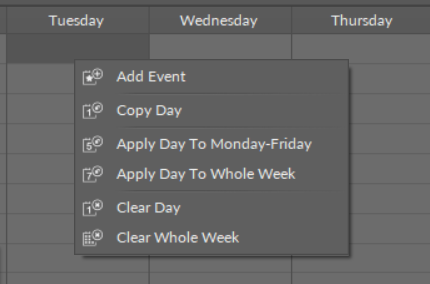
The context menu in the Weekly Schedule view
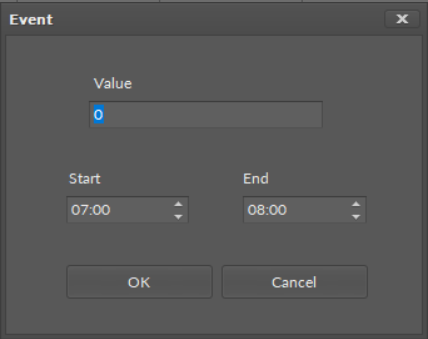
Adding event in the AnalogSchedule component
The Event dialog window allows to enter basic data of an event, value and starting and ending time. Confirm with OK to set the event.
Context Menu for the Weekly Schedule View
The context menu of the Weekly Schedule view has the following options:
-
Add Event: opens the Event dialog window and allows to add a single event;
-
Copy Day: copies all events in a day the context menu is invoked for;
-
Apply Day To Monday-Friday: copies all events in a day the context menu is invoked for, and pastes these events to Monday, Tuesday, Wednesday, Thursday, and Friday;
-
Apply Day To Whole Week: copies all events in a day the context menu is invoked for, and pastes these events to all days in a week;
Note: If the Apply Day To Monday-Friday or Apply Day To Whole Week option is invoked on a day with no events, all events on other days will be erased.
-
Clear Day: removes all events scheduled for a day the context menu is invoked for;
-
Clear Whole Week: removes all events in a whole week.
Context Menu for the Event
The context menu for a single event has the following options:
-
Edit Event: opens the Event dialog window and allows to edit the selected event;
-
Delete Event: remove the selected event from the schedule.
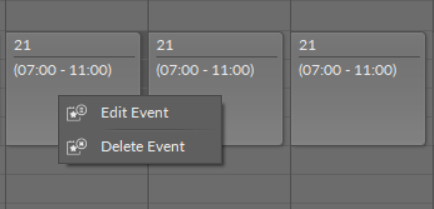
The context menu for a single event
Worth to Notice:
A single event can also be edited by a drag and drop method.