Installation
Before Installation
The following are needed to install the application:
- PC with Windows OS (the 32 or 64-bit latest version 7);
- USB A-USB A cable or USB C-USB A–depending on the version of iSMA-D-PA;
- Panel PC iSMA-D-PA7C-B1, iSMA-D-PA10C-B1, or iSMA-D-PA15C-B1.
Installation Steps
Note: Remember that this application is exclusively for iSMA Industrial PC Panels and Niagara stations.
Step 1: Add the folder with the application to your PC desktop.
Step 2: Turn the Panel PC on.
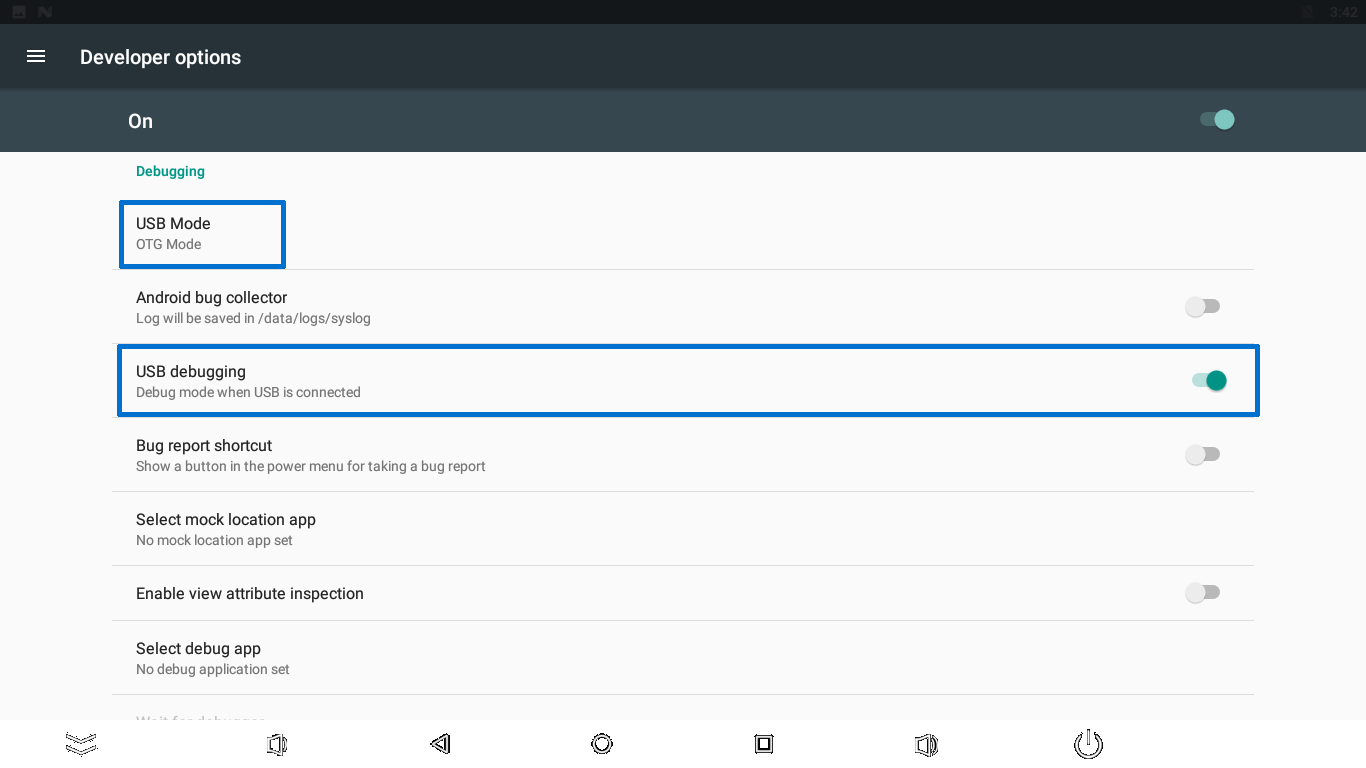
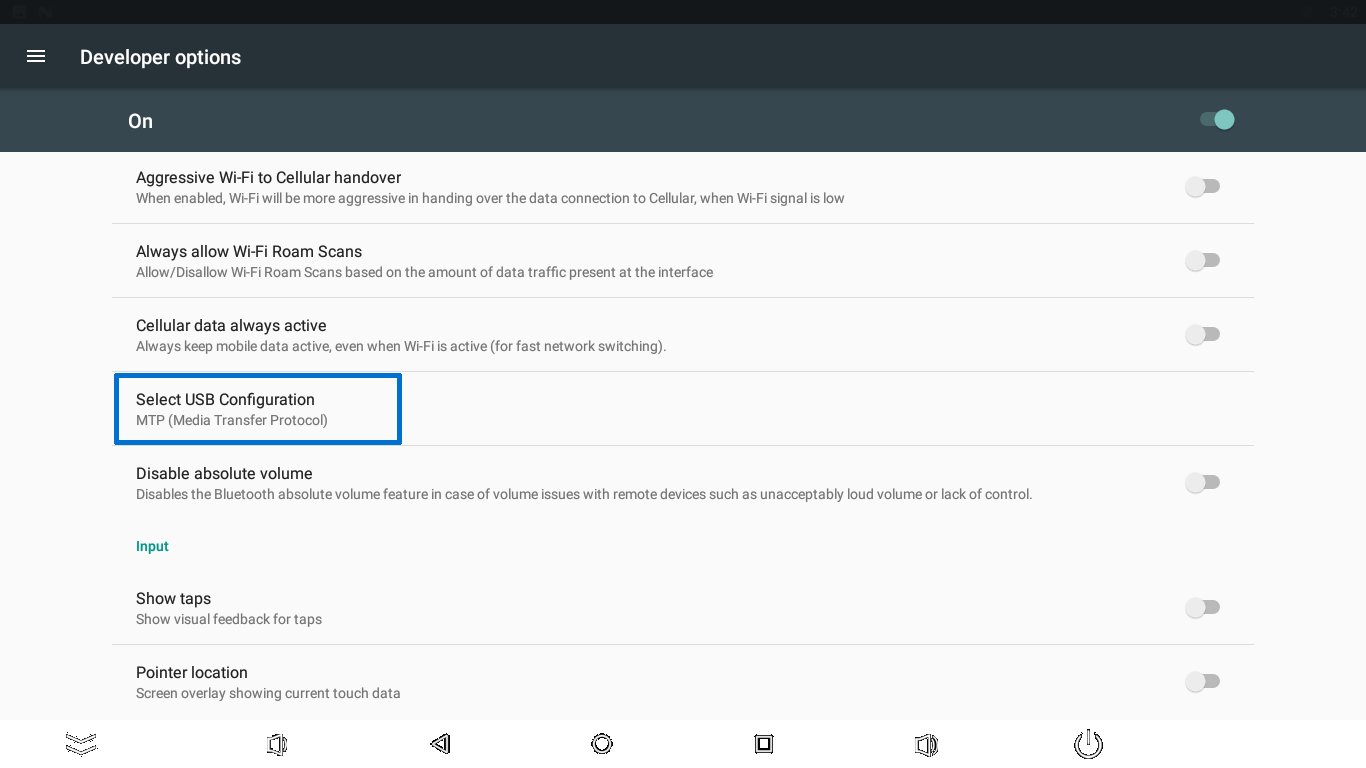
Step 3: The USB port should be set to OTG Mode, USB debugging to On, and USB Configuration to MTP (steps from 3.1 to 3.5 are necessary for iSMA-D-PA panels with a USB A interface).
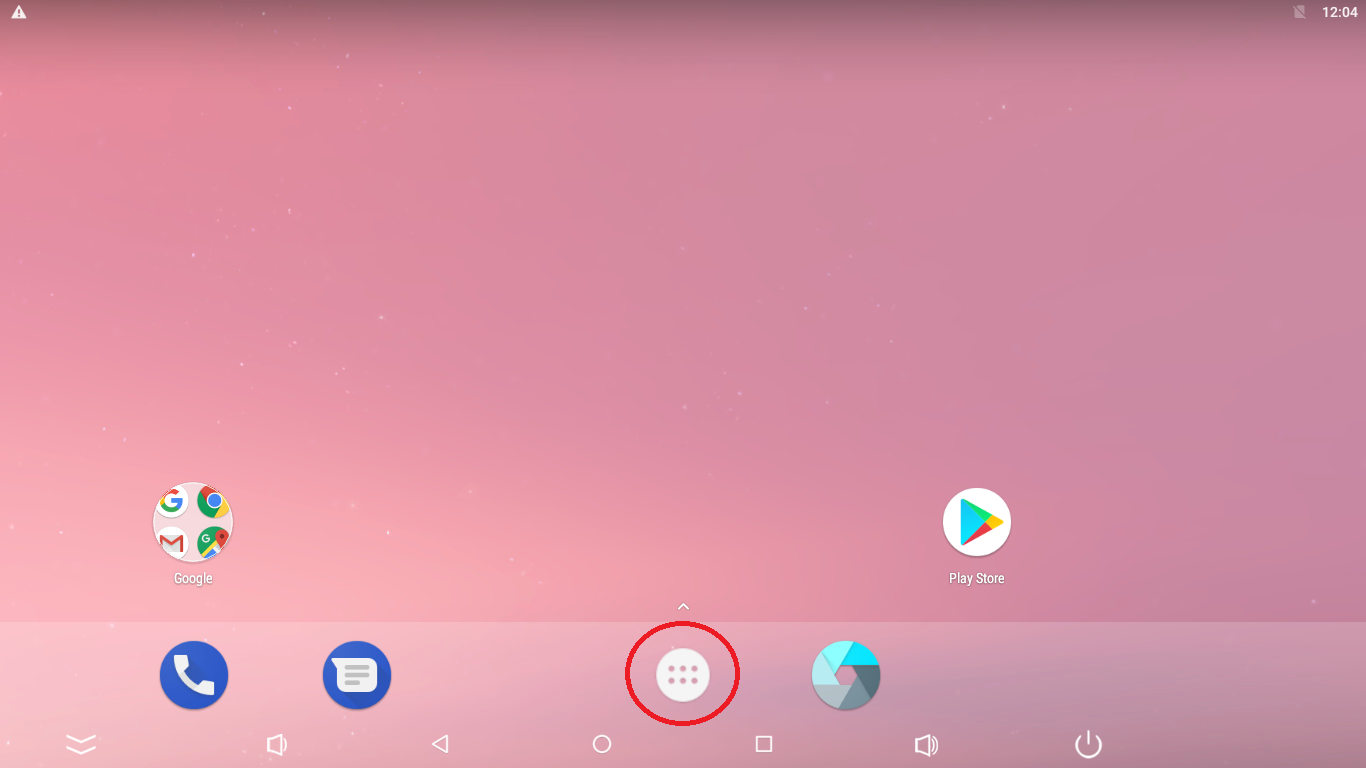
Step 3.1: Go to the main menu of the Android Panel PC–a round, white icon with dots at the bottom center of the screen:
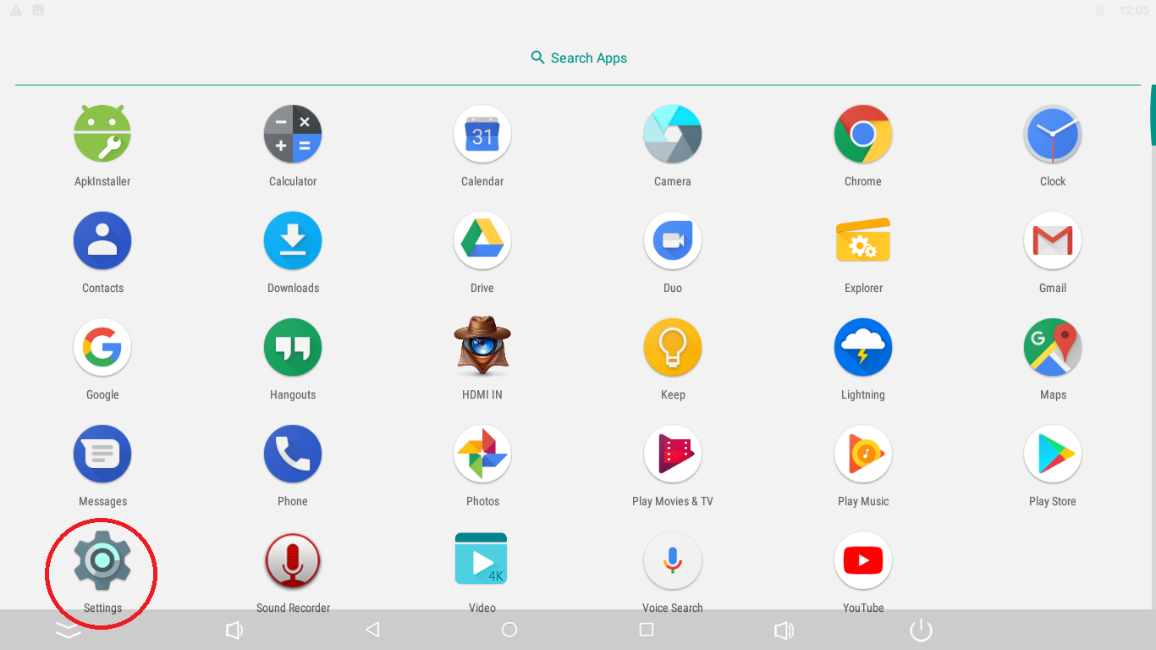
Step 3.2: Go to the Settings:
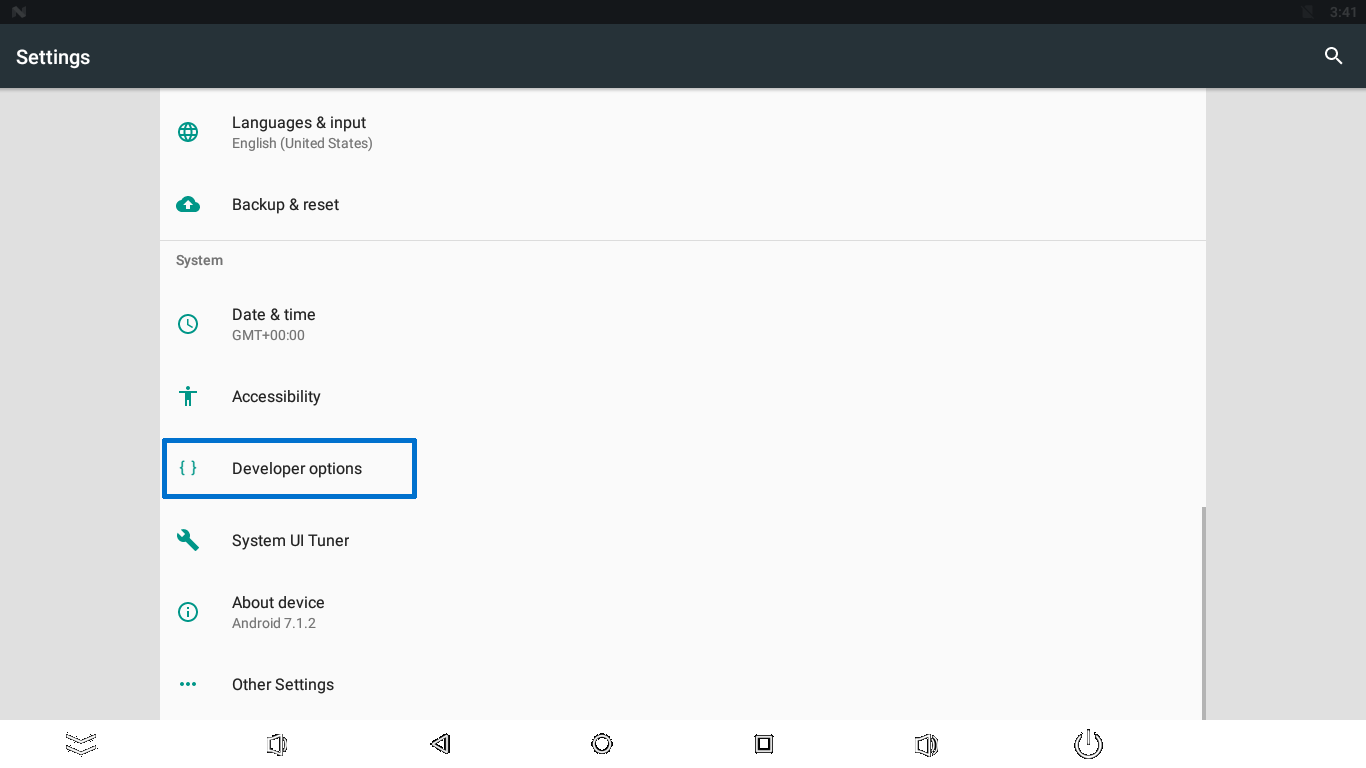
Step 3.3: Go to the Developer options:
Step 3.4: Set the USB Mode to OTG Mode and turn the USB debugging on:
Step 3.5: Set the USB Configuration to MTP:
Step 4: Connect a USB A cable to the PC and to the Panel (use the USB A socket next to RJ45 or the USB C–marked on the figures below):


Step 5: Wait for the PC to recognize the device and install drivers.
Step 6: Open the folder with the application.
Step 7: Double click on install.bat file–the application will be installed automatically on the connected Panel PC.
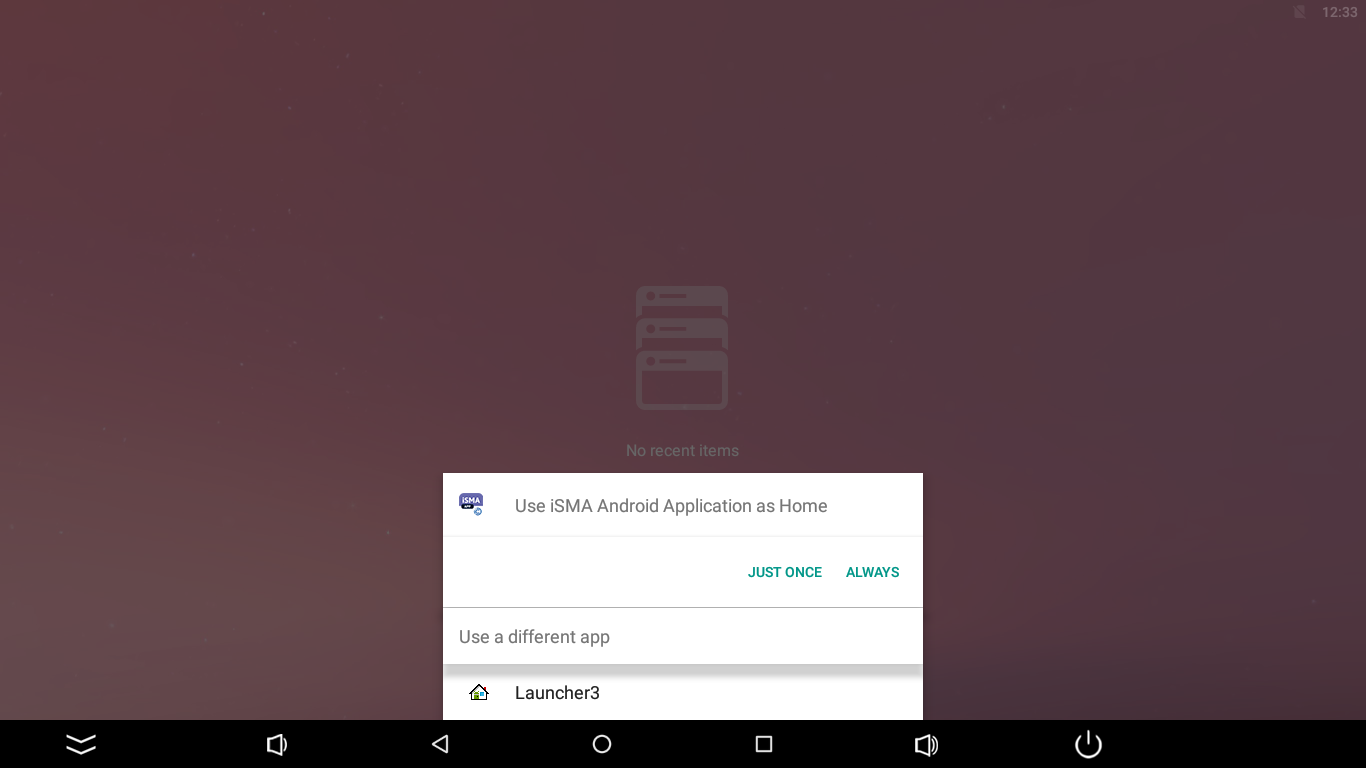
Step 8: The last step is to set the application as the Home app.
After touching the screen, a new window shows up. Choose the iSMA Android Application and select Always.
Note: Application is now ready to work. Follow the next steps to set up Niagara station and Kiosk Mode.
