Introduction
The AHU application allows for the use of a wide variety of ventilation systems containing water heaters, water coolers, humidifiers, heat exchangers, or mixing dampers.
Thanks to its versatility, the application allows to configure a number of types of popular ventilation systems, which will be discussed in the following sections. The application can be configured from the LCD level, the AAC20 web server, via the BACnet IP/Modbus TCP protocol or from the iC Tool level. The detailed parameters required to adjust the application to the specific requirements of the ventilation system onsite are available only from the iC Tool level.
Revision History
|
Rev. |
Date |
Description |
|---|---|---|
|
1.0 |
19 Jul 2024 |
First edition |
Revision history
Installation
Before the installation, make sure that the following prerequisites are fulfilled:
-
SD card to store the web server application is in place - minimum required SD card capacity is 4 GB, recommended maximum capacity is 32 GB;
-
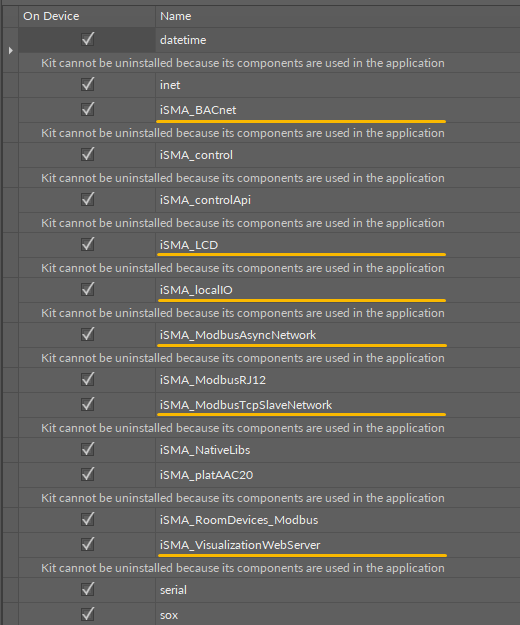
kits required to load the application are installed using the Kit Manager on the AAC20 controller:
-
iSMA_LCD (required even in AAC20 controllers without an LCD display);
-
iSMA_localIO;
-
iSMA_ModbusAsyncNetwork;
-
iSMA_ModbusTcpSlaveNetwork;
-
iSMA_BACnet;
-
iSMA_VisualizationWebServer.
-
Application
In order to install the application, first, download it from the website: support.ismacontrolli.com, extract it, and save it in the appropriate iC Tool folder (home/Applications).
Next, run the iC Tool and connect to the AAC20 device, logging in as an administrator.
Note: If the iC Tool has already been running, it needs to be restarted.
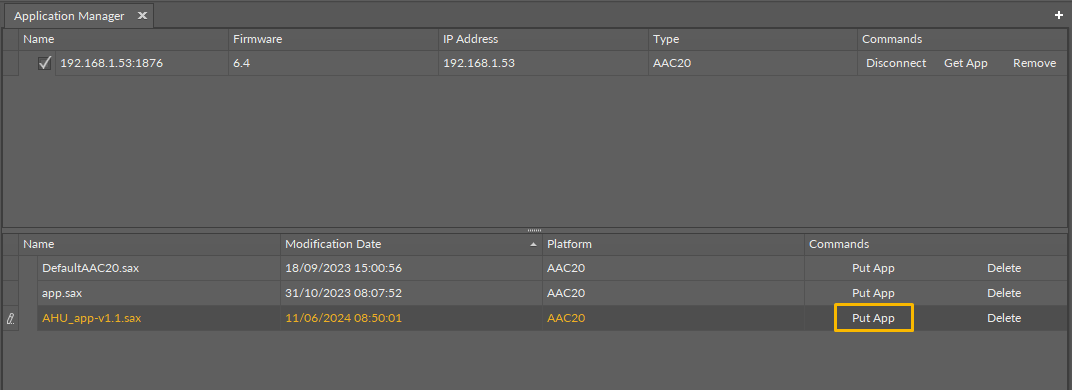
After logging in, go to the Application Manager, select the AHU application from the list of available applications, and load it to the selected device using the Put App command.
To complete the upload process, the device restarts and requires to log in again. Default authorization data:
-
User - admin
-
Password - (none - leave empty)
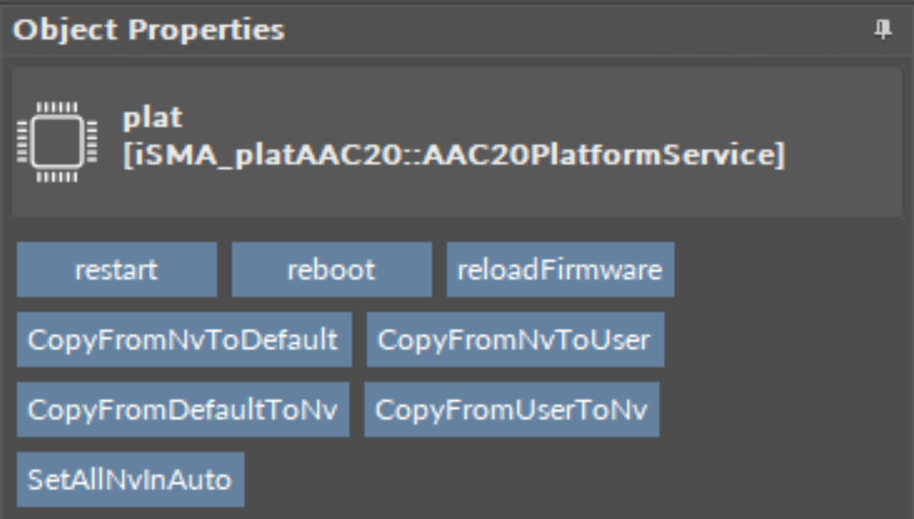
Then, it is also required to additionally load the default values to the NV variables (using the CopyFromDefaultToNv action available on the plat component under app\service\).
Note: Moreover, it is recommended to set all NV variables to work in an automatic mode using the SetAllNVInAuto action available in the plat component under app\service.